
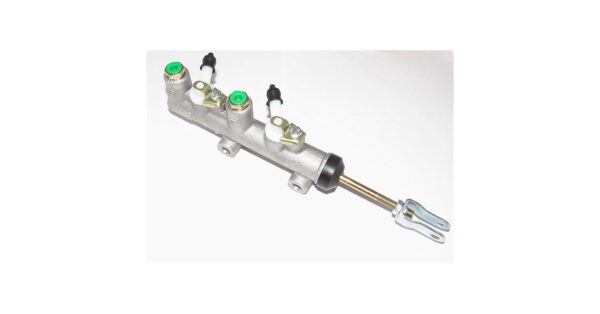
This article provides a comprehensive overview of golf cart brake master cylinder replacement, detailing the necessary steps for effective repair and maintenance. Readers will find insights on identifying issues, choosing the right parts, and performing the replacement process, ensuring optimal performance of their vehicle's braking system. With practical tips and expert advice, this guide is essential for anyone looking to tackle the golf cart brake fluid reservoir swap confidently.
- Understanding the Importance of the Golf Cart Brake Master Cylinder
- Signs Indicating a Need for Brake Master Cylinder Replacement
-
Step-by-Step Guide to Replacing Your Golf Cart Brake Master Cylinder
- Tools and Materials Needed
- Step 1: Safety First
- Step 2: Access the Brake Master Cylinder
- Step 3: Disconnect the Brake Lines
- Step 4: Remove the Old Master Cylinder
- Step 5: Install the New Brake Master Cylinder
- Step 6: Reconnect the Brake Lines
- Step 7: Fill with Brake Fluid
- Step 8: Bleed the Brakes
- Step 9: Test the Brake System
- Step 10: Dispose of Old Parts and Fluid
- Choosing the Right Replacement Parts for Your Golf Cart
- Common Mistakes to Avoid During Brake Master Cylinder Replacement
Understanding the Importance of the Golf Cart Brake Master Cylinder
The golf cart brake master cylinder is a critical component that plays a vital role in the overall safety and performance of your golf cart. Understanding its function and significance can help you maintain your cart more effectively and prevent costly repairs.
Functionality of the Brake Master Cylinder
The brake master cylinder is responsible for converting the force applied to the brake pedal into hydraulic pressure. This pressure is then transmitted to the brake system, enabling the cart to slow down or stop efficiently.
- Hydraulic Pressure Generation: When you press the brake pedal, the master cylinder pushes brake fluid through the system.
- Brake Fluid Management: It ensures that the right amount of brake fluid is available to maintain optimal braking performance.
- Safety Assurance: A properly functioning master cylinder is crucial for preventing brake failure, ensuring your safety while driving.
Signs of a Failing Brake Master Cylinder
Recognizing the signs of a failing brake master cylinder can save you from hazardous situations. Some common indicators include:
- Soft or Spongy Brake Pedal: If the pedal feels unusually soft or sinks to the floor, it may indicate a problem with the master cylinder.
- Brake Fluid Leaks: Visible fluid under the cart or around the brake components can signify a failing master cylinder.
- Unresponsive Brakes: If the brakes do not engage properly, it may be time to inspect the master cylinder.
Maintenance Tips for the Brake Master Cylinder
Regular maintenance of the brake master cylinder is essential for ensuring longevity and reliability. Here are some tips to keep it in top condition:
- Check Brake Fluid Levels: Regularly inspect the brake fluid reservoir and top it off as necessary.
- Inspect for Leaks: Periodically check for any signs of leaks around the master cylinder and brake lines.
- Replace Brake Fluid: Change the brake fluid every couple of years to prevent moisture contamination.
Importance of Timely Replacement
If you suspect that your golf cart brake master cylinder is malfunctioning, timely replacement is crucial. Delaying repairs can lead to more severe issues, including complete brake failure. The average cost for a new golf cart brake master cylinder can range from $50 to $150, depending on the model and brand.
Understanding the importance of the golf cart brake master cylinder is essential for every golf cart owner. By being proactive about maintenance and addressing any issues promptly, you can ensure a safer and more enjoyable golfing experience.
Signs Indicating a Need for Brake Master Cylinder Replacement
Recognizing when your golf cart's brake master cylinder needs replacement is crucial for maintaining safety and performance. Here are some key indicators to look for:
1. Spongy or Soft Brake Pedal
If you notice that the brake pedal feels unusually soft or spongy when pressed, it may indicate a failing brake master cylinder. This sensation often arises from air trapped in the brake lines or a fluid leak, both of which can compromise braking efficiency.
2. Brake Fluid Leaks
Visible leaks around the brake master cylinder can be a clear sign of trouble. If you find brake fluid pooling under your golf cart or notice wet spots around the master cylinder, it’s essential to address this issue immediately. Brake fluid is vital for effective braking, and any loss can lead to serious safety risks.
3. Warning Light Activation
Many modern golf carts are equipped with a brake warning light on the dashboard. If this light illuminates, it could indicate a malfunction within the braking system, including the brake master cylinder. Ignoring this warning can lead to further complications.
4. Unresponsive Brakes
If your brakes feel unresponsive or require excessive pressure to engage, it may signal a problem with the brake master cylinder. This condition can drastically affect your ability to stop the golf cart effectively, increasing the risk of accidents.
5. Uneven Braking
Experiencing uneven braking, where one wheel brakes more effectively than the other, can suggest an issue with the brake master cylinder. This imbalance can lead to loss of control while driving, making it essential to seek repairs promptly.
6. Frequent Brake Fluid Top-Ups
If you find yourself constantly needing to refill the brake fluid reservoir, this may point to a leak in the brake master cylinder. Regular top-ups should not be necessary if the system is functioning correctly.
Maintaining Brake Safety
To ensure the longevity of your golf cart’s braking system, it’s advisable to conduct routine checks on the brake master cylinder and other related components. Regular maintenance can help prevent unexpected failures and enhance your overall driving experience.
By being vigilant about these signs, you can ensure that your golf cart remains safe and reliable, minimizing the risk of brake failure. Always consult a professional mechanic for a thorough inspection and necessary replacements.
Step-by-Step Guide to Replacing Your Golf Cart Brake Master Cylinder
Replacing the brake master cylinder in your golf cart is crucial for maintaining safe and effective braking performance. This guide will walk you through the necessary steps to successfully replace this vital component, ensuring your golf cart operates smoothly.
Tools and Materials Needed
Before you begin, gather the following tools and materials to ensure a smooth replacement process:
- Socket set (including a ratchet and extension)
- Wrenches (various sizes)
- Brake fluid (ensure it’s compatible with your cart model)
- New brake master cylinder (check compatibility with your golf cart)
- Rags for cleaning up spills
- Safety goggles and gloves
Step 1: Safety First
Before starting any work, ensure that the golf cart is parked on a flat surface and the ignition is turned off. Engage the parking brake and wear safety goggles and gloves to protect yourself during the process.
Step 2: Access the Brake Master Cylinder
To replace the brake master cylinder, you will first need to locate it. Typically, it is found near the brake pedal assembly under the dashboard.
Remove Any Covers
If your golf cart has a dashboard cover, carefully remove it using your socket set or wrenches. This will provide you with direct access to the brake master cylinder.
Step 3: Disconnect the Brake Lines
Using the appropriate wrench, carefully disconnect the brake lines from the master cylinder. Be prepared for some brake fluid to leak out; use rags to catch any spills.
Step 4: Remove the Old Master Cylinder
With the brake lines disconnected, unbolt the old brake master cylinder from its mounting bracket. Gently pull it away from the assembly.
Step 5: Install the New Brake Master Cylinder
Position the new brake master cylinder in place and secure it using the bolts you removed earlier. Ensure it is firmly attached.
Step 6: Reconnect the Brake Lines
Reconnect the brake lines to the new master cylinder, making sure they are tightened properly to prevent leaks.
Step 7: Fill with Brake Fluid
Pour the appropriate brake fluid into the new master cylinder reservoir, filling it to the recommended level.
Step 8: Bleed the Brakes
To remove any air trapped in the brake lines, you’ll need to bleed the brakes. Start by having an assistant pump the brake pedal several times and hold it down. Then, open the bleeder valve on each brake, allowing fluid to escape until no air bubbles are present. Repeat for all brakes as necessary.
Step 9: Test the Brake System
Once you have bled the brakes, check for any leaks around the master cylinder and brake lines. Test the brake pedal for firmness. If everything feels secure, replace any dashboard covers you removed earlier.
Step 10: Dispose of Old Parts and Fluid
Ensure that you properly dispose of the old brake fluid and any used parts according to local regulations.
By following these detailed steps, you can effectively replace your golf cart's brake master cylinder, enhancing your vehicle's safety and performance.
Choosing the Right Replacement Parts for Your Golf Cart
Selecting the appropriate replacement parts for your golf cart is crucial for ensuring its optimal performance and longevity. With various components available on the market, it’s essential to know what to look for to make informed decisions.
Understand Your Golf Cart Model
Before purchasing any parts, familiarize yourself with your specific golf cart model. Each brand and model may require unique components, so refer to your owner’s manual for detailed specifications. Key brands include:
- E-Z-GO
- Yamaha
- Club Car
Identify the Parts You Need
Make a list of the parts you need to replace. Common components that may require replacement include:
- Brake Master Cylinder - Essential for safe stopping.
- Battery - Ensures reliable power.
- Tires - Provides traction and stability.
- Belts and Cables - Vital for operational efficiency.
Quality vs. Cost
While it may be tempting to opt for cheaper alternatives, investing in high-quality replacement parts can save you money in the long run. Look for parts that are:
- OEM (Original Equipment Manufacturer) - These are designed to meet the specifications of your golf cart.
- Aftermarket - Ensure they come from reputable manufacturers and have positive reviews.
Check Compatibility and Specifications
When you find potential replacement parts, verify their compatibility with your golf cart model. This includes checking:
- Part Numbers - Ensure they match the original parts.
- Specifications - Such as size, voltage, and capacity.
Seek Expert Advice
If you’re uncertain about which parts to choose, consult with a professional or a knowledgeable dealer. They can provide insights and recommendations tailored to your golf cart’s needs.
By following these guidelines, you can confidently choose the right replacement parts for your golf cart, ensuring safe and efficient operation for years to come.
Common Mistakes to Avoid During Brake Master Cylinder Replacement
Replacing the brake master cylinder in your golf cart is a critical task that requires attention to detail. To ensure a successful replacement and optimal performance, it’s essential to be aware of common pitfalls. Here are key mistakes to avoid during this process:
1. Ignoring the Owner’s Manual
Referencing the owner’s manual is crucial. It provides specific guidelines tailored to your golf cart model. Failing to consult it can lead to incorrect part selection and installation procedures.
Before replacing the master cylinder, inspect associated parts such as the brake lines and calipers. Neglecting to check these components can result in future issues and compromised braking performance.
3. Overlooking Brake Fluid Quality
Using contaminated or incorrect brake fluid can damage the new master cylinder. Always ensure you use the recommended fluid type, typically DOT 3 or DOT 4, and check for moisture or debris in the system.
4. Not Bleeding the Brake System Properly
After installation, it’s vital to bleed the brake system to remove air pockets. Skipping this step can lead to a spongy brake feel and reduced stopping power. Follow a systematic bleeding process to ensure all air is expelled.
5. Failing to Tighten Connections Securely
Loose connections can lead to leaks and brake failure. Double-check all fittings and bolts to ensure they are tightened to the manufacturer’s specifications.
6. Rushing the Installation Process
Taking your time during the replacement process is essential. Rushing can lead to mistakes such as cross-threading bolts or misaligning components, which can compromise safety.

7. Disregarding Safety Precautions
Always wear safety gear, including gloves and goggles, when working on your brake system. Additionally, ensure the golf cart is securely lifted and stable before beginning any work.
By being mindful of these common mistakes, you can enhance the effectiveness of your golf cart brake master cylinder replacement and maintain optimal safety on the road.
We value your insights and experiences, and we would love to hear your thoughts or any questions you might have regarding Golf Cart Brake Master Cylinder Replacement. Your perspective can enrich our discussion and help others in the community. Please feel free to share your opinions in the comments below; your voice matters, and together we can enhance our understanding of this important topic!
Leave a Reply