
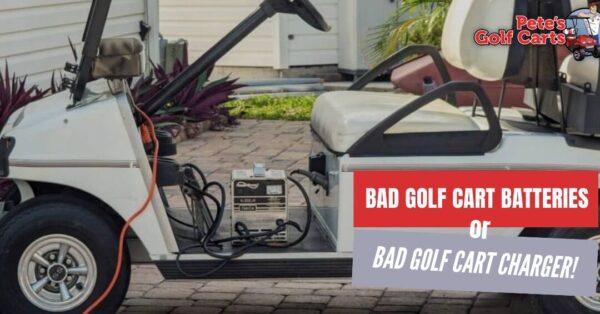
This article provides essential tips and solutions for effective golf cart battery charging system diagnostics. Readers will discover common issues related to the electric vehicle charging mechanism and learn practical steps for identifying and resolving problems. Whether you're facing slow charging or complete failure, this guide offers insights to ensure your golf cart power supply troubleshooting is efficient and effective.
Common Signs of a Faulty Golf Cart Charging System
When it comes to maintaining your golf cart, recognizing the common signs of a faulty charging system is crucial for ensuring its longevity and performance. A malfunctioning charging system can lead to unexpected breakdowns and costly repairs. Here are some indicators to watch for:
1. Inconsistent Battery Voltage
If you notice that the voltage readings from your golf cart's battery are inconsistent or below the recommended levels, this may signal an issue with the charging system. Use a multimeter to check the voltage; a healthy battery should read between 12.6 to 12.8 volts when fully charged.
2. Extended Charging Time
Another sign of a potential problem is if your golf cart takes significantly longer to charge than usual. A typical charge cycle should last around 6-8 hours. If you find it taking longer, this could indicate a malfunction in the charger or battery.
3. Overheating Charger
If the charger feels excessively hot during operation, it may be a sign of internal issues. A properly functioning charger should remain warm but not hot to the touch. Overheating can lead to damage or complete failure of the charger.
4. Visible Corrosion or Damage
Inspect the battery terminals and cables regularly for signs of corrosion, fraying, or physical damage. Corrosion can impede the charging process and may require cleaning or replacement of the affected components.
5. Frequent Battery Replacement
If you find yourself replacing the batteries more often than expected, this could indicate a deeper issue with the charging system. Ideally, golf cart batteries should last several years; frequent replacements may suggest that the charging system is not properly maintaining the battery health.
6. Warning Lights or Indicators
Many modern golf carts come equipped with dashboard indicators that alert you to charging system problems. Pay attention to any warning lights that illuminate during operation; these could be early warnings of a failing charging system.
7. Reduced Performance
If your golf cart struggles to reach full speed or has difficulty climbing hills, it may be an indication of inadequate power supply due to a faulty charging system. Reduced performance often correlates with insufficient battery charge, which can stem from charging system issues.
By staying vigilant and recognizing these signs, you can address potential problems early, ensuring your golf cart remains reliable and efficient. Regular maintenance and monitoring can help you avoid the pitfalls associated with a faulty charging system.
Step-by-Step Guide to Diagnose Golf Cart Charging Issues
Diagnosing charging issues in your golf cart can seem daunting, but with a systematic approach, you can identify the problem and restore your cart to optimal performance. This guide will help you troubleshoot common golf cart charging system issues effectively.
Step 1: Check the Battery Condition
Before delving into the charging system, assess the condition of your golf cart batteries. Follow these steps:
- Inspect for Corrosion: Look for corrosion on battery terminals, which can impede electrical flow.
- Measure Voltage: Use a multimeter to check the voltage of each battery. A healthy 12-volt battery should read around 12.6 volts or higher.
- Test for Weak Cells: If any battery reads below 12 volts, it may indicate a weak or failing cell.
Step 2: Examine the Charger
If the batteries are in good condition, the next step is to inspect the charger:
- Check Charger Connections: Ensure that all connections between the charger and the batteries are secure and free of corrosion.
- Verify Charger Functionality: Plug the charger into a working outlet and check for indicator lights. A malfunctioning charger may not show any signs of activity.
- Measure Output Voltage: With the charger plugged in, use a multimeter to measure the output voltage. It should be slightly higher than the battery voltage.
Step 3: Inspect Wiring and Connections
Wiring issues can often lead to charging problems. Follow these steps to check the wiring:
- Look for Damaged Wires: Inspect all wiring for frays, cuts, or other signs of damage.
- Check for Loose Connections: Ensure that all connections are tight and secure. Loose wires can disrupt the charging process.
- Examine Fuses: If your golf cart has a fuse, check it to ensure it is not blown. Replace any faulty fuses with the correct type.
Step 4: Test the Solenoid
The solenoid plays a critical role in the charging system. Testing it involves:
- Listening for Clicking Sounds: When you attempt to charge the cart, listen for a clicking sound, which indicates the solenoid is engaging.
- Measure Resistance: Use a multimeter to measure the resistance across the solenoid terminals. A reading of zero indicates a faulty solenoid.
Step 5: Evaluate the Controller
If all previous components check out, consider evaluating the controller:
- Inspect for Burn Marks: Look for any signs of damage or burning on the controller.
- Check Connections: Ensure that all wires leading to the controller are secure and free from damage.
- Test Functionality: If possible, test the controller with a multimeter or consult the manufacturer's guidelines for specific testing procedures.
By following these steps, you can effectively diagnose common golf cart charging issues. Each component plays a vital role in ensuring your golf cart runs smoothly, and identifying the problem early can save you time and money in repairs.
Essential Tools for Golf Cart Charging System Troubleshooting
When it comes to maintaining your golf cart, understanding the charging system is crucial for optimal performance. Whether you're experiencing slow charging or complete power loss, having the right tools can significantly simplify the troubleshooting process. Below are some essential tools that every golf cart owner should consider for effective charging system diagnostics.
1. Multimeter
A reliable multimeter is an indispensable tool for any golf cart charging system troubleshooting. It allows you to measure voltage, current, and resistance, helping you pinpoint issues within the charging system.
- Key Features:
- Voltage Measurement: Check battery voltage to ensure it’s within the recommended range (typically 36V or 48V for most golf carts).
- Continuity Testing: Identify broken wires or faulty connections.
- Amperage Measurement: Assess the current flowing through the charging system.
2. Battery Load Tester
Using a battery load tester can provide insight into the health of your golf cart batteries. This tool simulates a load on the battery to evaluate its performance under stress.
- Benefits:
- Determine Battery Condition: Helps identify weak or failing batteries that may not hold a charge.
- Quick Results: Most testers provide immediate feedback, allowing for swift decision-making.
3. Battery Charger
A quality battery charger is essential not just for charging but also for troubleshooting. Having a charger that matches your golf cart's specifications ensures compatibility and effectiveness.
- Features to Look For:
- Smart Charging Technology: Automatically adjusts the charging rate based on battery condition.
- Multi-Bank Charging: Ideal for carts with multiple batteries, ensuring each one is charged evenly.
4. Wire Strippers and Crimping Tool
Proper maintenance often involves inspecting and repairing wiring. A set of wire strippers and a crimping tool will help you manage and replace damaged wires efficiently.
- Why You Need Them:
- Easy Repairs: Quickly strip insulation and make secure connections.
- Versatility: Useful for various electrical repairs beyond just the charging system.
5. Torque Wrench
When working with battery terminals, a torque wrench ensures that connections are tightened to the manufacturer’s specifications. Over-tightening can damage components, while under-tightening can lead to poor connectivity.
- Advantages:
- Precision: Provides the correct torque settings for secure connections.
- Prevents Damage: Reduces the risk of damaging battery posts or connectors.
6. Cleaning Supplies
Maintaining clean connections is vital for the efficiency of your golf cart’s charging system. A set of cleaning supplies including baking soda, a wire brush, and a cloth can help keep terminals free from corrosion.
- Key Items:
- Baking Soda Solution: Neutralizes battery acid buildup.
- Wire Brush: Removes corrosion from terminals for better conductivity.
By utilizing these essential tools for troubleshooting your golf cart charging system, you can effectively diagnose and resolve issues, ensuring your cart runs smoothly and efficiently. Each tool plays a vital role in maintaining the health of your charging system and enhancing your overall golf cart experience.
Preventative Maintenance Tips for Your Golf Cart Charging System
Maintaining your golf cart charging system is crucial for ensuring optimal performance and longevity. By following these preventative maintenance tips, you can avoid common issues and enhance the reliability of your charging system.
Regular Inspection of Cables and Connectors
Inspecting the cables and connectors regularly is vital to prevent charging issues. Look for the following:
- Corrosion: Check for any signs of rust or corrosion on the battery terminals and connectors. Clean them with a mixture of baking soda and water to ensure a solid connection.
- Fraying: Examine the charging cables for any signs of wear or fraying. Replace any damaged cables immediately to avoid potential electrical failures.
- Tight Connections: Ensure that all connections are secure. Loose connections can lead to inefficient charging and battery drain.
Battery Maintenance
The health of your batteries directly affects your golf cart's charging system. Implement these battery maintenance tips:
- Water Levels: Regularly check the water levels in your batteries. Maintain them at the recommended level to prevent sulfation and extend battery life.
- Equalization Charging: Perform equalization charging periodically to balance the charge across all batteries. This helps prevent overcharging and extends battery life.
- Temperature Monitoring: Keep an eye on battery temperature during charging. If batteries overheat, it may indicate a malfunctioning charger or overcharging.
Charger Maintenance
Your charger plays a pivotal role in the efficiency of your golf cart charging system. Follow these maintenance tips:
- Clean the Charger: Dust and debris can accumulate on the charger. Wipe it down regularly with a damp cloth to ensure proper airflow and cooling.
- Inspect for Damage: Check the charger for any visible damage or wear. A damaged charger can lead to inconsistent charging and battery issues.
- Use the Correct Charger: Always use a charger that matches your golf cart's battery specifications. Using the wrong charger can cause severe damage to the batteries.
Charging Practices
Adopting proper charging practices can significantly enhance the efficiency of your golf cart charging system:
- Avoid Deep Discharges: Try not to let your batteries discharge below 50%. Deep discharges can shorten battery life and affect the overall performance of your golf cart.
- Charge After Use: Always charge your golf cart after each use. Regular charging helps maintain battery health and ensures your cart is ready for your next round.
- Monitor Charge Times: Be aware of the recommended charge times for your batteries. Overcharging can lead to battery damage, while undercharging can leave them depleted.
By implementing these preventative maintenance tips for your golf cart charging system, you can ensure a reliable and efficient performance. Regular inspections, proper battery care, charger maintenance, and mindful charging practices will contribute to the longevity and effectiveness of your golf cart.
When to Seek Professional Help for Golf Cart Charging Problems
Experiencing issues with your golf cart charging system can be frustrating, especially if you rely on your cart for recreational or transportation purposes. Understanding when to consult a professional can save you time and prevent further damage. Here are key indicators to consider:
Signs of Serious Charging Issues
If you notice any of the following symptoms, it may be time to seek professional assistance:
- Inconsistent Charging: If your golf cart's battery fails to charge fully or takes an unusually long time to charge, this could indicate a deeper issue with the charging system.
- Battery Swelling or Leakage: Any visible damage, such as swelling or leakage from the battery, should prompt immediate professional evaluation, as this can pose safety risks.
- Frequent Battery Replacement: If you find yourself replacing batteries more often than expected, it may suggest an underlying problem with the charging system.
- Unusual Sounds: Hearing strange noises, such as clicking or grinding, when charging your golf cart can be a sign of mechanical failure that requires expert attention.
Testing and Diagnostic Challenges
If you have attempted basic troubleshooting, such as checking connections or replacing fuses, but the problem persists, consider these factors:
- Voltage Testing: Properly diagnosing voltage issues often requires specialized tools. If you are unsure how to perform these tests, a professional technician can accurately assess the situation.
- Complex Wiring Issues: If you suspect that the wiring is compromised, seeking help is advisable. Professionals can safely diagnose and repair wiring problems that may be affecting your golf cart's performance.
Age and Condition of the Golf Cart
The age of your golf cart can influence its charging system's reliability. If your cart is older and has not been serviced regularly, consider professional evaluation to ensure all components are functioning optimally.

Benefits of Professional Assistance
Engaging a qualified technician can provide several advantages:
- Expert Knowledge: Professionals are equipped with the expertise and tools necessary to diagnose complex charging issues effectively.
- Time Efficiency: Avoid wasting time on trial-and-error repairs; a professional can quickly identify the root cause of the problem.
- Safety Assurance: Handling electrical components can be hazardous. Professionals can manage repairs safely, minimizing risk to you and your equipment.
Recognizing when to reach out for help is crucial in maintaining the functionality of your golf cart. By paying attention to warning signs and understanding the complexities of the charging system, you can ensure that your golf cart remains in optimal working condition.
We would love to hear your thoughts, questions, or experiences regarding Golf Cart Charging System Troubleshooting! Your insights can be incredibly valuable to others navigating similar challenges. Please feel free to share your opinions in the comments below—together, we can create a supportive community where we all learn and grow. Thank you for being a part of this conversation!
Leave a Reply