
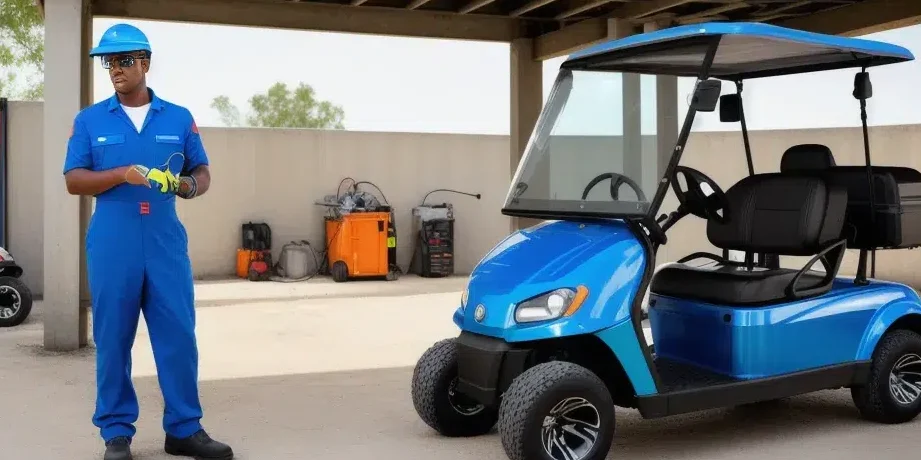
This article explores essential golf cart electrical evaluation methods for ensuring optimal performance and longevity of your vehicle. Readers will discover practical tips and strategies for conducting thorough electric cart assessment procedures, enabling them to identify potential issues and maintain peak functionality. By implementing these electrical inspection strategies, golf cart owners can enhance reliability and enjoy a smoother ride.
- Essential Tools for Golf Cart Electrical Inspections
- Step-by-Step Guide to Performing a Golf Cart Electrical Inspection
- Common Electrical Issues Found in Golf Carts and How to Diagnose Them
- Preventive Maintenance Tips for Golf Cart Electrical Systems
- Understanding the Importance of Regular Golf Cart Electrical Inspections
Essential Tools for Golf Cart Electrical Inspections
When it comes to ensuring the longevity and efficiency of your golf cart, having the right tools for electrical inspections is crucial. These essential tools will help you identify any potential issues, allowing for timely maintenance and optimal performance of your golf cart.
1. Multimeter
A multimeter is an indispensable tool for any electrical inspection. It measures voltage, current, and resistance, providing a comprehensive overview of the electrical system.
- Features: Look for a digital multimeter with auto-ranging capabilities and a minimum voltage rating of 600V.
- Price Range: Typically ranges from $20 to $100, depending on the brand and features.
2. Wire Strippers and Crimpers
Properly maintained connections are vital for electrical efficiency. Wire strippers and crimpers allow you to prepare and secure electrical connections effectively.
- Features: Opt for a tool that can handle various wire sizes and has built-in safety features.
- Price Range: Generally priced between $10 and $30.
3. Battery Load Tester
A battery load tester is essential for assessing the health of your golf cart's battery. This tool simulates the load on the battery to determine its performance under stress.
- Features: Choose a model compatible with 6V and 12V batteries and one that provides clear, easy-to-read results.
- Price Range: Prices typically range from $25 to $70.
4. Circuit Tester
This handy device allows you to check for voltage presence in various components of the golf cart’s electrical system.
- Features: A non-contact circuit tester is preferred for safety and ease of use.
- Price Range: Available for $10 to $40, depending on the complexity of the model.
5. Insulation Resistance Tester
To ensure that your golf cart's wiring is not compromised, an insulation resistance tester can be invaluable. This tool helps in detecting insulation breakdowns that can lead to short circuits.
- Features: Look for testers that offer multiple voltage settings for versatility.
- Price Range: Prices vary from $50 to $150.
6. Socket and Wrench Set
A complete socket and wrench set is necessary for removing and securing electrical components during inspections.
- Features: Ensure the set includes both metric and standard sizes for compatibility with various golf cart models.
- Price Range: Sets can range from $30 to $100.
By equipping yourself with these essential tools, you can conduct thorough golf cart electrical inspections. This proactive approach not only enhances the performance of your vehicle but also extends its lifespan, ensuring a more enjoyable golfing experience.
Step-by-Step Guide to Performing a Golf Cart Electrical Inspection
Performing a golf cart electrical inspection is crucial for ensuring your vehicle operates safely and efficiently. This guide will walk you through a detailed inspection process, highlighting essential techniques to maintain optimal performance.
1. Gather Necessary Tools and Equipment
Before beginning your inspection, assemble the following tools:
- Multimeter: For measuring voltage, current, and resistance.
- Wrench Set: To tighten or loosen electrical connections.
- Screwdriver Set: For accessing various components.
- Wire Brush: To clean corroded terminals.
- Safety Gear: Including gloves and goggles for protection.
2. Inspect the Battery System
The battery is the heart of your golf cart's electrical system. Follow these steps:
Check Battery Voltage
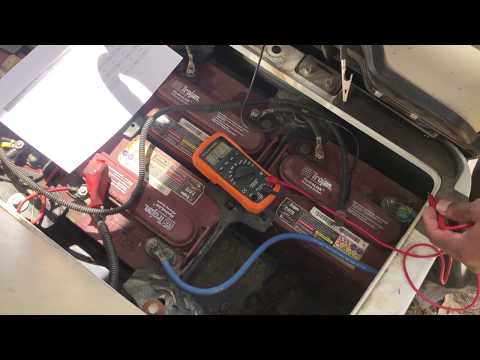
Using the multimeter, measure the voltage of each battery. A fully charged 6-volt battery should read around 6.3 volts, while a 12-volt battery should read approximately 12.6 volts.
Examine Battery Terminals
Look for any signs of corrosion or loose connections. Clean terminals with a wire brush if necessary, and ensure they are securely fastened.
3. Evaluate Wiring and Connections
Inspect all wiring for signs of wear or damage. Pay special attention to:
- Frayed Wires: Replace any damaged wiring immediately.
- Loose Connections: Tighten any loose connections to prevent electrical failures.
- Insulation Integrity: Ensure that wire insulation is intact to avoid short circuits.
4. Test the Charger
A properly functioning charger is essential for battery maintenance. Check the following:
Charger Output
Using your multimeter, measure the output voltage of the charger. It should match the specifications for your battery type. For example, a 48-volt charger should output between 55 to 60 volts during charging.
Charger Connections
Inspect the charger’s plug and cord for any signs of wear. Ensure that all connections are secure and free from corrosion.
5. Assess the Controller and Solenoid
The controller and solenoid play a vital role in the golf cart's performance.
Controller Functionality
Test the controller by checking for proper operation when the accelerator pedal is pressed. Look for any unusual noises or error codes.
Solenoid Testing
Use a multimeter to check the solenoid's functionality. You should hear a clicking sound when the accelerator is pressed, indicating it is engaging properly.
6. Check Lighting and Accessories
Ensure that all lights, indicators, and accessories are functioning correctly.
- Headlights and Taillights: Test each light to ensure they illuminate properly.
- Turn Signals: Verify that they are signaling correctly.
- Accessory Functionality: Check any added features like radios or GPS systems.
7. Document Findings and Recommendations
After completing the inspection, document your findings. This record should include:
- Voltage Readings: Note the voltage for each battery.
- Condition of Wires: Describe any repairs needed.
- Overall Performance: Summarize the cart's operational status.
Following these steps will help ensure that your golf cart remains in optimal condition, enhancing both safety and performance on the course. Regular electrical inspections are a vital aspect of golf cart maintenance, promoting longevity and reliability.
Common Electrical Issues Found in Golf Carts and How to Diagnose Them
Golf carts are essential for both recreational and utility purposes, but they can encounter a range of electrical issues that may hinder performance. Recognizing and diagnosing these problems is crucial for maintaining optimal functionality. Below are some of the most prevalent electrical issues found in golf carts and guidance on how to identify them.
1. Battery Problems
Battery issues are among the most frequent electrical problems in golf carts. Symptoms may include:
- Weak or No Power: If your golf cart struggles to start or moves sluggishly, it may indicate a low battery charge.
- Corroded Terminals: Inspect battery terminals for corrosion, which can impede electrical flow.
- Uneven Battery Voltage: Use a multimeter to check voltage across individual batteries in a series. A significant voltage drop in one battery can affect overall performance.
2. Wiring Issues
Faulty wiring can lead to a variety of problems, including intermittent power loss or complete electrical failure. To diagnose wiring issues:
- Visual Inspection: Look for frayed, cracked, or damaged wires. Pay special attention to connections at the battery and controller.
- Loose Connections: Ensure all wiring connections are tight and secure. Loose connections can cause voltage drops.
- Continuity Test: Use a multimeter to check for continuity in the wiring. A lack of continuity may indicate a break in the wire.
3. Controller Malfunctions
The controller is the brain of your golf cart’s electrical system. If it fails, the cart may not operate correctly. Symptoms of controller issues include:
- Erratic Speed Control: If your cart speeds up or slows down unexpectedly, the controller may be malfunctioning.
- No Response: A complete lack of response when pressing the accelerator can indicate a faulty controller.
- Overheating: If the controller becomes excessively hot, it may be failing and requires immediate inspection.
4. Solenoid Problems
The solenoid is a key component that acts as a switch for the golf cart’s electrical system. To diagnose solenoid issues:
- Clicking Noise: A clicking sound when you press the accelerator may indicate a faulty solenoid.
- Testing Voltage: Use a multimeter to check for voltage across the solenoid terminals when the accelerator is pressed. No voltage suggests a problem.
- Visual Inspection: Check for signs of burning or damage on the solenoid itself.
5. Lights and Accessories Malfunction
Electrical issues can also affect lights and accessories in your golf cart. To troubleshoot:
- Dim or Non-Functional Lights: Check the bulbs and fuses. Replacing blown fuses may resolve the issue.
- Accessory Power Issues: If accessories like radios or GPS devices are not working, inspect the wiring and connections specific to those components.
- Battery Drain: Excessive use of accessories can lead to battery drain. Consider using a voltmeter to monitor battery levels while accessories are in use.
By understanding these common electrical issues and how to diagnose them, you can ensure your golf cart remains in top condition, maximizing its performance and longevity. Regular inspections and maintenance can prevent many of these problems, allowing for a smoother and more enjoyable ride.
Preventive Maintenance Tips for Golf Cart Electrical Systems
Maintaining the electrical systems of your golf cart is essential for ensuring optimal performance and longevity. Regular preventive maintenance can help you avoid costly repairs and keep your cart running smoothly. Here are some practical tips tailored for the electrical components of your golf cart.
Regular Battery Maintenance
One of the most critical aspects of your golf cart's electrical system is the battery. Follow these steps to ensure its longevity:
- Check Water Levels: Regularly inspect the electrolyte levels in each battery cell. Top up with distilled water as needed, ensuring the plates are covered.
- Clean Terminals: Corrosion can hinder electrical connections. Clean the battery terminals and cable connectors with a mixture of baking soda and water to prevent buildup.
- Monitor Voltage: Use a multimeter to check the voltage levels. Ideally, a fully charged 6-volt battery should read about 6.3 volts.
Inspect Wiring and Connections
The wiring in your golf cart is crucial for proper electrical flow. Make it a habit to:
- Look for Wear and Tear: Inspect wires for fraying or damage, which can lead to short circuits. Replace any compromised wiring immediately.
- Tighten Connections: Ensure that all connections are secure. Loose connections can cause intermittent power loss and poor performance.
- Use Heat Shrink Tubing: When repairing or replacing wires, consider using heat shrink tubing to protect connections from moisture and corrosion.
Check the Charger
Your golf cart charger is vital for battery health. Ensure it is functioning correctly by:
- Testing Charger Output: Verify that your charger is delivering the correct voltage to the batteries. This can be done with a multimeter.
- Inspecting Cables: Look for any signs of damage or wear on the charger cables. Replace them if you notice any fraying or breaks.
- Keeping it Clean: Dust and debris can interfere with the charger's performance. Regularly clean the charger to maintain efficiency.
Evaluate the Controller and Solenoid
The controller and solenoid play significant roles in regulating power. To keep them functioning optimally:
- Visual Inspection: Regularly check for signs of overheating or damage. Any burnt marks should be addressed immediately.
- Test Functionality: Ensure the solenoid engages when the accelerator is pressed. A malfunction can lead to power issues.
- Keep Connections Tight: Just like the battery connections, ensure that the controller and solenoid connections are secure to prevent power loss.
By following these preventive maintenance tips, you can enhance the reliability and performance of your golf cart's electrical systems. Regular attention to these areas not only helps avoid unexpected breakdowns but also promotes a longer lifespan for your golf cart.
Understanding the Importance of Regular Golf Cart Electrical Inspections
Regular electrical inspections for golf carts are crucial for maintaining optimal performance and ensuring safety. The electrical system is the heart of your golf cart, and neglecting its upkeep can lead to various operational issues.
Key Benefits of Routine Inspections
Performing regular inspections offers several advantages:
- Enhanced Safety: Identifying potential electrical issues early can prevent accidents caused by faulty wiring or malfunctioning components.
- Improved Performance: A well-maintained electrical system ensures that your golf cart operates efficiently, providing a smoother ride and better battery life.
- Cost Savings: Regular inspections can help detect minor problems before they escalate into costly repairs, saving you money in the long run.
Common Electrical Issues in Golf Carts
Understanding typical electrical problems can help you appreciate the need for inspections:
- Battery Failures: Over time, batteries can lose capacity, leading to reduced performance. Inspections can identify when batteries need replacement.
- Corroded Connections: Corrosion can disrupt the flow of electricity, causing intermittent issues. Regular checks can catch this before it affects performance.
- Wiring Problems: Damaged or frayed wires can lead to shorts or complete electrical failure. Inspections help ensure all wiring is intact and secure.
How Often Should You Schedule Inspections?
It’s advisable to have your golf cart’s electrical system inspected at least once a year. However, more frequent inspections may be necessary if you frequently use your cart or if it experiences heavy wear and tear.
Signs That Indicate the Need for Immediate Inspection
Be on the lookout for the following signs that may indicate a problem with your golf cart’s electrical system:
- Dim Lights: If your headlights or dashboard lights appear dim, it may signal an electrical issue.
- Unusual Noises: Any clicking or buzzing sounds when operating the cart can indicate electrical malfunctions.
- Battery Warning Lights: If your cart has a battery warning indicator that lights up, it’s time for an inspection.
Regular golf cart electrical inspections are an essential part of maintaining your vehicle’s functionality and safety. By prioritizing these inspections, you can ensure a reliable and enjoyable experience on the golf course or wherever you choose to drive your cart.
We value your insights and experiences, and we'd love to hear your thoughts on Golf Cart Electrical Inspection Techniques! Whether you have questions, tips, or personal anecdotes to share, your contributions can enrich our community's understanding. Please feel free to drop your comments below—your perspective matters, and together we can enhance our knowledge on this important topic!
Leave a Reply