
This article outlines crucial golf cart electrical maintenance procedures to ensure peak performance and reliability. Readers will discover essential electrical system troubleshooting techniques and effective repair methods for golf cart wiring, enabling them to tackle common issues and enhance their vehicle's functionality. By following these steps for optimizing golf cart electrical systems, you can keep your cart running smoothly and efficiently.
- Essential Tools for Golf Cart Electrical System Repairs
- Common Electrical Issues in Golf Carts and Their Solutions
- Step-by-Step Guide to Troubleshooting Your Golf Cart's Electrical System
- Preventative Maintenance Tips for Golf Cart Electrical Systems
- When to Seek Professional Help for Golf Cart Electrical Repairs
Essential Tools for Golf Cart Electrical System Repairs
When it comes to maintaining and repairing the electrical systems of golf carts, having the right tools is crucial. Whether you're troubleshooting issues or performing routine maintenance, the following tools will ensure that you can tackle any electrical repair with confidence.
1. Multimeter
A multimeter is an indispensable tool for diagnosing electrical problems in golf carts. It measures voltage, current, and resistance, allowing you to pinpoint issues in the electrical system.
- Digital Multimeter: Offers precise readings and often includes features like auto-ranging.
- Analog Multimeter: A more traditional option that can be useful for basic tests.
2. Wire Strippers and Crimpers
Properly handling wires is vital in electrical repairs. Wire strippers and crimpers allow you to prepare and connect wires efficiently.
- Automatic Wire Stripper: Saves time and reduces the risk of damaging wires.
- Crimping Tool: Essential for securely attaching connectors to wires.
3. Socket and Wrench Set
A comprehensive socket and wrench set is necessary for removing and securing various components in the golf cart's electrical system.
- Metric and Standard Sizes: Ensure you have both types to accommodate different fasteners.
- Ratchet Wrench: Provides ease of use in tight spaces.
4. Soldering Iron
For more permanent repairs, a soldering iron is essential for joining wires and components.
- Temperature-Controlled Soldering Iron: Allows for precise heating and prevents damage to sensitive components.
- Solder Wire: Choose lead-free options for safety and environmental considerations.
5. Electrical Tape and Heat Shrink Tubing
These materials are vital for insulating and protecting electrical connections.
- Electrical Tape: Available in various colors, it helps in identifying different circuits.
- Heat Shrink Tubing: Provides a more durable and waterproof seal for connections.
6. Battery Tester
A battery tester is crucial for assessing the health of your golf cart's battery.
- Load Tester: Measures the battery's ability to hold a charge under load conditions.
- Digital Battery Tester: Provides clear readings of voltage and overall battery condition.
7. Safety Gear
When working on electrical systems, safety should always be a priority.
- Insulated Gloves: Protect against electrical shocks.
- Safety Goggles: Shield your eyes from debris and accidental sparks.
Equipping yourself with these essential tools will facilitate effective golf cart electrical system repairs. Not only will you be prepared for common issues, but you'll also enhance the overall performance of your golf cart.
Common Electrical Issues in Golf Carts and Their Solutions
Golf carts are essential for navigating courses and communities, but like any vehicle, they can experience electrical problems. Understanding these common issues and their solutions can help you maintain optimal performance and ensure a smooth ride.
1. Battery Drain
One of the most frequent electrical issues in golf carts is battery drain. This can occur due to:
- Leaving lights on: Ensure all lights and accessories are turned off when not in use.
- Old batteries: Regularly check the age of your batteries; most have a lifespan of 4-6 years.
- Faulty connections: Inspect battery terminals for corrosion or loose connections that can lead to power loss.
To combat battery drain, consider investing in a quality battery maintenance charger, such as the NOCO Genius G3500, priced around $49.95. This charger can help keep your batteries in peak condition.
2. Failing Solenoid
The solenoid acts as a switch for the electrical system. A malfunction can prevent the cart from starting. Signs of a failing solenoid include:
- No clicking sound when turning the key.
- The cart not responding when the accelerator is pressed.
To resolve this issue, you may need to replace the solenoid. A reliable option is the Golf Cart Solenoid 36V/48V, which typically costs around $25.
3. Faulty Wiring
Wiring issues can lead to intermittent electrical failures or complete loss of power. Common causes include:
- Wear and tear: Over time, wires can fray or become damaged.
- Improper installation: Poorly installed aftermarket parts can lead to shorts or disconnections.
Regularly inspect your wiring for any signs of damage. If necessary, a wiring harness replacement, such as the EZGO Wiring Harness for approximately $150, can restore functionality.
4. Overheating Controller
The speed controller regulates the power to the motor. Overheating can occur due to:
- Heavy loads: Carrying too much weight can strain the system.
- Continuous use: Prolonged operation without breaks can cause overheating.
If you suspect overheating, allow the controller to cool down before further use. For replacement, consider the Club Car Controller, available for around $200.
5. Inconsistent Performance
If your golf cart's speed fluctuates or it hesitates while accelerating, this could indicate:
- Weak batteries: Ensure all batteries are charged and in good condition.
- Dirty connections: Clean terminals and connections to improve conductivity.
Cleaning the battery terminals with a mixture of baking soda and water can enhance performance.
By addressing these common electrical issues promptly and effectively, you can enjoy a well-functioning golf cart that meets your needs. Understanding and applying essential golf cart electrical system repair steps for optimal performance will not only prolong the life of your vehicle but also enhance your overall golfing experience.
Step-by-Step Guide to Troubleshooting Your Golf Cart's Electrical System
When your golf cart experiences electrical issues, identifying the root cause can seem daunting. This guide provides a clear, step-by-step approach to help you troubleshoot your golf cart's electrical system effectively. By following these procedures, you can restore your cart's performance and enjoy smooth rides once again.
1. Gather Necessary Tools
Before you begin troubleshooting, ensure you have the following tools at hand:
- Multimeter: For measuring voltage, current, and resistance.
- Screwdriver Set: To access battery compartments and electrical connections.
- Wire Brush: For cleaning battery terminals and connections.
- Safety Gloves: To protect your hands during inspection.
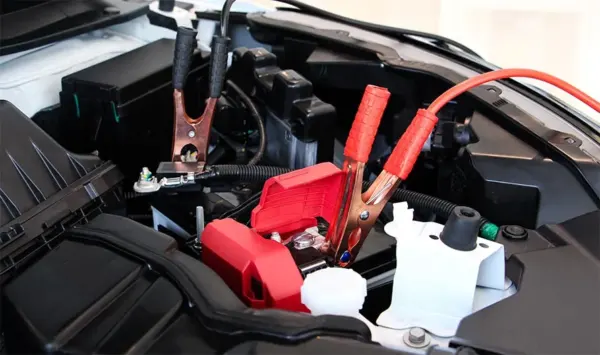
2. Inspect the Battery
Start with the battery, as it is the heart of your golf cart's electrical system. Follow these steps:
Check Battery Voltage
Use the multimeter to measure the voltage of each battery cell. A fully charged 6-volt battery should read around 6.3 volts, while a 12-volt battery should read approximately 12.6 volts. If readings are significantly lower, consider recharging or replacing the battery.
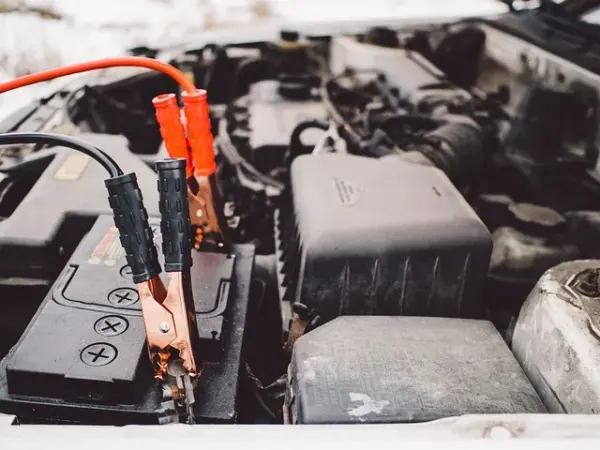
Examine Connections
Inspect all battery terminals and connections for corrosion or loose wiring. Clean any corrosion using a wire brush, and tighten loose connections to ensure optimal conductivity.
3. Test the Fuses and Circuit Breakers
Faulty fuses or tripped circuit breakers can disrupt the electrical flow. Here’s how to check them:
- Locate the fuse box in your golf cart.
- Remove and visually inspect each fuse for signs of damage or burning.
- Replace any blown fuses with the correct amperage rating.
- Reset any tripped circuit breakers by pushing them back into place.
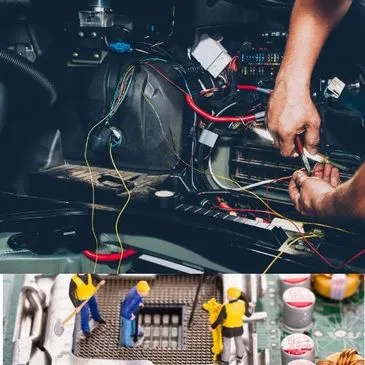
4. Examine the Wiring System
A thorough inspection of the wiring is crucial. Look for the following:
Frayed or Damaged Wires
Inspect the wiring harness for any signs of wear, such as fraying or cuts. If you find damaged wires, they will need to be replaced to ensure safe operation.
Loose Connections
Check all connectors for tightness. Loose connections can lead to intermittent power issues, so make sure they are secure.
5. Test the Solenoid
The solenoid is a key component in the electrical system. To test it:
- Disconnect the battery to ensure safety.
- Locate the solenoid and check for signs of overheating or damage.
- Use the multimeter to check continuity across the solenoid terminals. If there is no continuity, it may need replacement.
6. Inspect the Controller
The controller regulates the power to the motor. To ensure it is functioning properly:
Check for Error Codes
Some controllers have LED indicators that display error codes. Refer to the user manual to interpret these codes and determine if any repairs are necessary.
Examine Connections
As with the solenoid, inspect all connections to the controller for tightness and signs of corrosion. Clean and secure any loose connections.
7. Test the Motor
If all other components check out, the issue may lie within the motor itself. Follow these steps:
- Disconnect the motor from the electrical system.
- Use the multimeter to test for continuity across the motor terminals.
- Listen for unusual sounds when powering the motor directly from the battery. If it does not operate smoothly, replacement may be necessary.
By following this step-by-step guide, you can effectively troubleshoot your golf cart's electrical system and address common issues that may arise. This systematic approach not only enhances your understanding of the system but also ensures optimal performance for your golf cart.
Preventative Maintenance Tips for Golf Cart Electrical Systems
Maintaining the electrical systems of your golf cart is essential for ensuring optimal performance and longevity. Here are some practical tips to keep your golf cart’s electrical components in top shape:
Regular Battery Inspection
Performing regular checks on your golf cart's batteries is crucial. Look for signs of corrosion on the terminals, which can hinder performance. Clean any buildup using a mixture of baking soda and water. Ensure the battery connections are tight and secure to prevent electrical failures.
Check Wiring and Connectors
Examine the wiring and connectors for any signs of wear or damage. Look for frayed wires or loose connections that could lead to shorts or electrical failures. If you find any issues, replace the damaged wiring promptly to maintain the integrity of the electrical system.
Use Quality Connectors
When replacing connectors, opt for high-quality, weather-resistant options to ensure durability. This will help prevent oxidation and ensure reliable connections, which are vital for the performance of the electrical system.
Monitor Charging Practices
Adopt good charging habits to extend the life of your golf cart batteries. Avoid overcharging, as this can lead to battery damage. Use a smart charger that automatically adjusts the charge based on battery needs, typically costing around $150 to $300, depending on the brand and features.
Inspect Fuses and Circuit Breakers
Regularly check the fuses and circuit breakers for any signs of wear or failure. Replace any blown fuses immediately, and ensure that circuit breakers are functioning properly to protect the electrical system from overload.
Keep the Electrical Components Clean
Dirt and moisture can lead to corrosion and malfunction in electrical systems. Use a damp cloth to wipe down electrical components regularly, and consider applying a protective spray designed for electrical systems to guard against moisture and grime.
Maintain a Dry Environment
Whenever possible, store your golf cart in a dry place to minimize exposure to moisture. If outdoor storage is necessary, consider using a waterproof cover to protect the electrical systems from the elements.
Schedule Professional Inspections
Even with regular DIY maintenance, it’s wise to have your golf cart’s electrical systems professionally inspected at least once a year. A technician can identify potential issues before they become major problems, ensuring that your golf cart remains in optimal condition.
By implementing these preventative maintenance tips, you can significantly enhance the performance and lifespan of your golf cart's electrical systems, ensuring smooth rides for years to come.
When to Seek Professional Help for Golf Cart Electrical Repairs
Understanding when to seek professional assistance for your golf cart's electrical repairs is crucial for maintaining optimal performance. Ignoring electrical issues can lead to more significant problems, ultimately costing more in repairs. Here are some indicators that it’s time to consult an expert:
Signs Indicating the Need for Professional Help
- Persistent Battery Problems: If your golf cart frequently struggles to hold a charge or requires constant recharging, it’s essential to consult a technician. This could indicate deeper electrical system issues.
- Unusual Noises: Any strange sounds, such as buzzing or clicking, when starting or operating your golf cart may point to electrical faults that require expert diagnosis.
- Dim or Flickering Lights: Inconsistent lighting can signal problems within the electrical system, including wiring issues or failing components.
- Inconsistent Performance: If your golf cart experiences sudden power drops or inconsistent acceleration, this could indicate electrical malfunctions needing professional intervention.
Complicated Electrical Systems
Golf carts often have complex electrical systems that include various components such as controllers, solenoids, and batteries. If you encounter issues that are beyond basic troubleshooting—like:
- Controller replacement
- Wiring harness repairs
- Battery management system diagnostics
it is advisable to seek professional help. Experts possess the necessary tools and knowledge to perform these repairs correctly, ensuring safety and longevity for your golf cart.

Safety Considerations
Electrical repairs can be hazardous. If you are unsure about handling electrical components, it’s best to consult a professional. Attempting repairs without proper knowledge can lead to personal injury or further damage to your golf cart. Signs that indicate potential danger include:
- Burning smells
- Visible sparks
- Overheating components
Recognizing these warning signs early can prevent accidents and ensure your golf cart operates smoothly.
By understanding these key indicators, you can ensure that your golf cart remains in excellent condition. Timely professional intervention not only helps maintain the integrity of your golf cart's electrical system but also enhances your overall driving experience.
We’d love to hear your thoughts and questions about Golf Cart Electrical System Repair Steps! Your insights and inquiries can enrich our discussion and help others who may be facing similar challenges. Whether you have tips to share or specific concerns you'd like addressed, please feel free to leave a comment below. Together, we can foster a supportive community where everyone benefits from shared knowledge and experience!
Leave a Reply