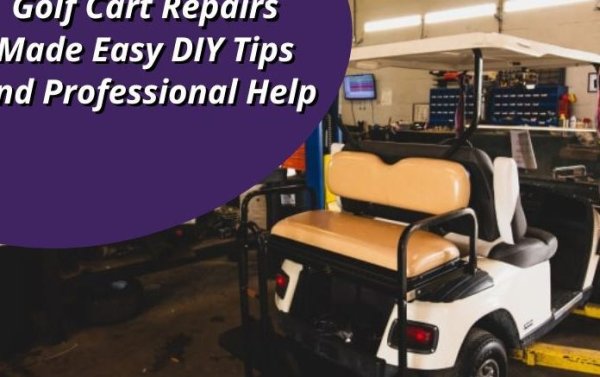
This article provides essential golf cart wiring repair strategies that will help you identify and fix common electrical issues quickly. You'll discover practical golf cart electrical issue solutions and straightforward methods to troubleshoot various components, ensuring your vehicle stays in top condition. Whether you're a seasoned owner or new to golf carts, these electrical troubleshooting guidelines will equip you with the knowledge needed for efficient repairs.
- Common Electrical Issues in Golf Carts and How to Identify Them
- Step-by-Step Guide to Diagnosing Golf Cart Electrical Problems
- Essential Tools for Effective Golf Cart Electrical Troubleshooting
- Preventive Maintenance Tips to Avoid Electrical Failures in Golf Carts
- When to Seek Professional Help for Golf Cart Electrical Repairs
Common Electrical Issues in Golf Carts and How to Identify Them
Golf carts are essential for easy navigation on golf courses and other terrains, but like any vehicle, they can experience electrical issues. Recognizing these problems early can save you time and money. Here are some common electrical issues you might encounter with your golf cart and tips on how to identify them.
1. Battery Problems
A faulty battery is one of the most prevalent issues in golf carts. Symptoms include:
- Slow Acceleration: If your cart struggles to pick up speed, the battery may not be providing sufficient power.
- Corrosion: Check for white or green buildup around battery terminals, indicating corrosion that can hinder performance.
- Frequent Charging: If you find yourself recharging more often than usual, it could be a sign of a failing battery.
Identifying Battery Issues
To diagnose battery problems, use a multimeter to check the voltage. A fully charged battery should read around 12.6 volts. Anything significantly lower may indicate the need for replacement.
2. Faulty Wiring
Wiring issues can lead to various problems, including:
- Inconsistent Power Supply: If your cart intermittently loses power, there could be a break or short in the wiring.
- Burning Smell: A burnt wire can emit a distinct smell, signaling immediate attention is needed.
- Visible Damage: Inspect wires for fraying or damage, which can lead to short circuits.
Identifying Wiring Problems
Perform a visual inspection of all wiring connections and harnesses. Use a continuity tester to check for breaks in the circuit.
3. Solenoid Malfunctions
The solenoid is a critical component that controls the flow of electricity to the motor. Signs of a malfunction include:
- No Response When Pressing the Pedal: If the cart doesn’t move at all, the solenoid might be stuck.
- Clicking Sound: A clicking noise when attempting to start the cart can indicate a faulty solenoid.
Identifying Solenoid Issues
To test the solenoid, use a multimeter to check for continuity. A lack of continuity suggests that the solenoid needs replacement.
4. Motor Problems
Motor issues can also arise, often indicated by:
- Unusual Noises: Grinding or whining sounds may suggest mechanical failure within the motor.
- Overheating: If the motor gets excessively hot during operation, it may be working harder than it should.
Identifying Motor Malfunctions
Examine the motor for signs of wear or damage. If necessary, perform a bench test to check for proper functionality.
5. Charger Issues
Problems with the charger can lead to inadequate battery performance. Look out for:
- Charging Light Malfunctions: If the indicator light doesn’t turn on, the charger may not be working.
- Inconsistent Charging Times: If the charger takes longer than usual to charge, it may need servicing or replacement.
Identifying Charger Problems
Check the output voltage of the charger with a multimeter. A reading significantly below the expected voltage indicates a malfunction.
By recognizing these common electrical issues in golf carts and knowing how to identify them, you can effectively address problems as they arise, ensuring a smooth ride on the course. Remember, regular maintenance and prompt attention to electrical issues can prolong the life of your golf cart and enhance your overall experience.
Step-by-Step Guide to Diagnosing Golf Cart Electrical Problems
Diagnosing electrical issues in your golf cart can be a daunting task, but with a systematic approach, you can efficiently identify and resolve these problems. This guide will provide you with clear steps to troubleshoot electrical issues, ensuring your golf cart runs smoothly again.
1. Safety First: Prepare Your Work Area
Before diving into diagnostics, it's crucial to prioritize safety. Follow these steps to prepare:
- Ensure the golf cart is turned off and disconnected from any power source.
- Wear safety gloves and goggles to protect yourself from any potential hazards.
- Work in a well-ventilated area to avoid inhaling any fumes from the batteries.
2. Visual Inspection of Electrical Components
Start with a thorough visual inspection of the golf cart's electrical system. Look for:
- Corroded battery terminals: Clean them with a wire brush and baking soda solution if needed.
- Frayed wires: Check for any exposed or damaged wiring that could cause shorts.
- Loose connections: Ensure all connections are tight and secure, particularly at the battery and motor terminals.
3. Testing the Battery
A significant number of electrical issues stem from battery problems. Here’s how to test your battery:
Using a Multimeter
1. Set your multimeter to the DC voltage setting.
2. Connect the positive lead to the positive terminal and the negative lead to the negative terminal of the battery.
3. A fully charged battery should read around 12.6 volts or higher. If it reads below 12.4 volts, consider charging or replacing the battery.
Load Testing
If your battery voltage is adequate but you still experience issues, perform a load test:
- Use a battery load tester to apply a load equivalent to half of the battery's CCA (Cold Cranking Amps) rating for 15 seconds.
- If the voltage drops below 9.6 volts during the test, the battery may be failing.
4. Inspecting the Solenoid and Controller
The solenoid and controller are critical components in the electrical system. To check them:
- Solenoid check: Listen for a clicking sound when you press the accelerator. If there’s no sound, the solenoid may be defective.
- Controller diagnostics: Check for error codes on the controller, if applicable. Consult your owner's manual for specific error code meanings.
5. Testing the Motor
If all previous components are functioning properly, it's time to check the motor:
Visual Inspection
- Look for any physical damage, such as cracks or excessive wear.
Resistance Testing
1. Disconnect the motor wires.
2. Use a multimeter to measure resistance across the motor terminals.
3. A reading that is too high or too low can indicate motor failure.
6. Final Steps: Reassemble and Test
Once you've identified and addressed any issues, reassemble the components carefully. Before taking the golf cart for a test drive:
- Double-check all connections.
- Ensure the battery is securely fastened.
- Perform a brief test run in a safe area.
Following this detailed guide can help you effectively troubleshoot and resolve golf cart electrical problems, enhancing your overall experience on the course. Remember, addressing issues promptly can prevent further damage and costly repairs.
Essential Tools for Effective Golf Cart Electrical Troubleshooting
When facing electrical issues with your golf cart, having the right tools can make all the difference. Here’s a detailed look at essential tools that will help you diagnose and repair electrical problems efficiently.
1. Multimeter
A multimeter is a fundamental tool for anyone troubleshooting golf cart electrical systems. It allows you to measure voltage, current, and resistance.
- Digital Multimeter: Offers precise readings and is easy to use.
- Analog Multimeter: Useful for visualizing changes in readings over time.
2. Battery Load Tester
To assess the health of your golf cart's batteries, a battery load tester is essential. This tool helps determine if your batteries can hold a charge under load.
- Handheld Load Tester: Compact and easy to use, typically priced around $30.
- Advanced Load Tester: Offers additional features like temperature compensation, usually available for $100 or more.
3. Wire Strippers and Crimpers
Properly managing wires is crucial in any electrical repair. Wire strippers and crimpers help you create clean connections and ensure reliable operation.
- Automatic Wire Stripper: Makes stripping wires quick and effortless.
- Crimping Tool: Ensures a secure connection when attaching terminals to wires.
4. Fuse Tester
A fuse tester is vital for checking the integrity of fuses in your golf cart. It helps identify blown fuses quickly, preventing unnecessary troubleshooting.
- Inline Fuse Tester: Allows you to test fuses without removing them, making it convenient.
- Multifunction Fuse Tester: Can also check other electrical components, generally available for around $25.
5. Electrical Tape and Heat Shrink Tubing
After repairs, ensuring that connections are insulated is crucial to prevent shorts. Electrical tape and heat shrink tubing are essential for securing and protecting wiring.
- Electrical Tape: Available in various colors, typically costs around $5 per roll.
- Heat Shrink Tubing: Comes in different sizes and can be purchased for about $10 for a pack.
6. Circuit Tester
A circuit tester is a simple yet effective tool for checking the flow of electricity in your golf cart's wiring system. It helps identify faulty circuits quickly.
- Pen Circuit Tester: Easy to use and portable, priced around $15.
- Multifunction Circuit Tester: Offers additional features, typically available for about $30.
By utilizing these essential tools, you can efficiently diagnose and resolve electrical issues in your golf cart. Each tool plays a critical role in ensuring that your troubleshooting process is thorough and effective, allowing for quick repairs and minimal downtime on the course.
Preventive Maintenance Tips to Avoid Electrical Failures in Golf Carts
Maintaining your golf cart's electrical system is crucial for ensuring smooth operation and prolonging its lifespan. Here are essential preventive maintenance tips that can help you avoid electrical failures in your golf cart.
Regular Battery Maintenance
The battery is the heart of your golf cart’s electrical system. To keep it in optimal condition, follow these steps:
- Check Water Levels: Regularly inspect the water levels in your battery cells. If the levels are low, top them off with distilled water.
- Clean Terminals: Keep battery terminals free of corrosion. Use a mixture of baking soda and water to clean them, ensuring a good connection.
- Charge Properly: Avoid overcharging or undercharging your batteries. Follow the manufacturer's guidelines for charging times and voltage.
Inspect Wiring and Connections
Wiring issues can lead to significant electrical failures. Make it a habit to:
- Examine Wires: Look for any frayed or damaged wires that may need replacing.
- Secure Connections: Ensure that all connections are tight and free from dirt or corrosion.
- Use Quality Connectors: Invest in high-quality connectors to reduce the risk of electrical issues.
Monitor Electrical Components
Pay attention to the various electrical components in your golf cart, including:
- Lights and Indicators: Regularly check the functionality of headlights, taillights, and dashboard indicators.
- Fuses: Inspect fuses for signs of wear or damage. Replace any blown fuses promptly to avoid circuit failures.
- Solenoids and Relays: Test solenoids and relays to ensure they are operating correctly. Malfunctioning components can disrupt the electrical flow.
Keep the Cart Clean and Dry
Moisture and debris can wreak havoc on your golf cart’s electrical system. To protect it:
- Store in a Dry Area: When not in use, keep your golf cart in a covered area to prevent exposure to rain and moisture.
- Clean Regularly: Use a damp cloth to wipe down electrical components, ensuring they are free of dust and grime.
- Check for Leaks: Inspect the cart for any leaks that could lead to water damage in the electrical system.
By implementing these preventive maintenance tips, you can significantly reduce the likelihood of electrical failures in your golf cart, ensuring it remains reliable for your golfing adventures. Regular attention to your golf cart's electrical system not only enhances performance but also extends its longevity.
When to Seek Professional Help for Golf Cart Electrical Repairs
Understanding when to seek professional assistance for golf cart electrical issues is crucial for maintaining the longevity and performance of your vehicle. While some problems can be resolved with basic troubleshooting, others require the expertise of a qualified technician. Here are some key indicators that it’s time to call in the professionals.
Signs Indicating Professional Assistance is Needed
- Persistent Electrical Issues: If you find that the same electrical problem keeps reoccurring despite your attempts at repair, it’s a clear sign that deeper issues may exist.
- Unusual Sounds or Smells: Any strange noises, such as buzzing or clicking, or the presence of burnt odors can indicate serious electrical faults. These should be addressed immediately by a professional.
- Battery Problems: If your golf cart battery frequently dies or fails to hold a charge, it may require testing or replacement, which is best handled by an expert.
- Inconsistent Performance: If your golf cart is showing erratic behavior—like sudden stops or slow acceleration—this often points to electrical issues that necessitate professional evaluation.
- Faulty Wiring or Connections: Visible damage to wiring or loose connections can lead to safety hazards and should be repaired by a qualified technician.
Why Professional Help is Essential
Seeking professional help for golf cart electrical repairs ensures that:
- Safety is Prioritized: Professionals are trained to handle high-voltage systems safely, reducing the risk of electric shock or fire.
- Accurate Diagnostics: Experienced technicians have the tools and knowledge to diagnose complex electrical problems accurately, which can save time and money in the long run.
- Quality Repairs: Professionals use high-quality parts and have the skills necessary to perform repairs that last, ensuring your golf cart operates smoothly.

Choosing the Right Technician
When selecting a professional for your golf cart electrical repairs, consider the following:
- Experience: Look for technicians who specialize in golf cart repairs and have a proven track record.
- Certifications: Ensure they have the necessary certifications and training to handle electrical systems.
- Customer Reviews: Check reviews and testimonials from previous clients to gauge their reliability and quality of service.
By recognizing the signs that indicate the need for professional help, you can ensure your golf cart remains in optimal condition, allowing you to enjoy your rides without worry.
We truly value your insights and experiences! If you have any questions or thoughts regarding Golf Cart Electrical Troubleshooting Tips, we warmly invite you to share them in the comments below. Your input not only enriches our discussion but also helps fellow enthusiasts navigate their own challenges. Let’s come together to foster a supportive community where we can learn from one another!
Leave a Reply