
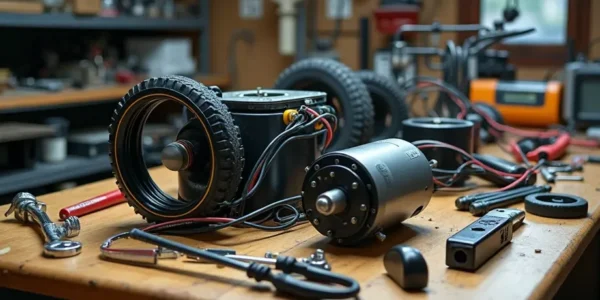
This article outlines crucial golf cart electrical system maintenance procedures to ensure your vehicle operates at peak efficiency. You'll discover essential golf cart wiring troubleshooting techniques and step-by-step guidance for resolving common electrical issues. Whether you're a novice or an experienced enthusiast, these golf cart electrical repair guidelines will help you achieve optimal performance and reliability.
- Understanding the Basics of Golf Cart Electrical Wiring
- Essential Tools Needed for Golf Cart Electrical Wiring Repair
- Step-by-Step Guide to Diagnosing Electrical Issues in Golf Carts
- Common Golf Cart Electrical Wiring Problems and Their Solutions
- Safety Precautions When Performing Electrical Repairs on Golf Carts
Understanding the Basics of Golf Cart Electrical Wiring
Golf carts are increasingly popular for personal use, recreational activities, and even commercial purposes. A fundamental aspect of maintaining these vehicles is understanding their electrical wiring. Proper knowledge of golf cart electrical systems can enhance performance and ensure longevity. This section delves into the essential components and principles of golf cart electrical wiring.
Key Components of Golf Cart Electrical Systems
The electrical system of a golf cart consists of several critical components that work together seamlessly. Familiarizing yourself with these parts is vital for effective troubleshooting and maintenance.
- Battery: The heart of the golf cart, providing the necessary power. Most carts use 6V or 12V lead-acid batteries.
- Controller: This device regulates the power flow from the battery to the motor, allowing for speed control and efficient energy use.
- Motor: Converts electrical energy into mechanical energy, propelling the cart forward.
- Wiring Harness: A collection of wires that connect various components, facilitating electrical flow.
- Fuse: Protects the electrical system from overload by breaking the circuit if excessive current flows.
Basic Wiring Principles
Understanding a few basic principles of wiring can significantly aid in maintaining and repairing your golf cart. Here are some essential guidelines:
- Color Coding: Familiarize yourself with standard wire color codes, as they indicate specific functions (e.g., black for negative, red for positive).
- Series vs. Parallel Wiring: Know the difference between these configurations. Series wiring connects batteries in a chain, increasing voltage, while parallel wiring maintains voltage but increases capacity.
- Connection Types: Recognize various connection types, such as soldering and crimping, to ensure secure and reliable connections.
Common Electrical Issues and Solutions
Understanding potential electrical problems can save time and resources. Here are a few common issues along with their solutions:
- Dead Batteries: Ensure batteries are fully charged and check for corrosion on terminals. Replace any defective batteries as needed.
- Faulty Wiring: Inspect wires for fraying or breaks. Replace damaged wires and ensure all connections are tight.
- Controller Malfunction: If the cart is unresponsive, the controller may need resetting or replacing. Consult the manufacturer’s guidelines for troubleshooting.
By mastering the basics of golf cart electrical wiring, owners can optimize their vehicles' performance and tackle minor repairs confidently. Understanding these foundational elements empowers you to maintain your cart effectively, ensuring it remains a reliable mode of transport for years to come.
Essential Tools Needed for Golf Cart Electrical Wiring Repair
When tackling golf cart electrical wiring repair, having the right tools is crucial for a successful and efficient job. Here’s a detailed list of essential tools that can help you perform effective repairs on your golf cart's electrical system.
Basic Hand Tools
- Screwdriver Set: A set that includes both flathead and Phillips screwdrivers is necessary for removing and securing various components.
- Wire Strippers: Essential for stripping the insulation off electrical wires, ensuring proper connections.
- Needle-Nose Pliers: Useful for gripping, twisting, and cutting wire in tight spaces.
Electrical Diagnostic Tools
- Multimeter: A multimeter is indispensable for measuring voltage, current, and resistance, helping diagnose electrical issues.
- Test Light: This tool allows you to quickly check for voltage in a circuit, confirming whether power is flowing.
Wiring and Connection Tools
- Crimping Tool: Necessary for securely attaching connectors to wires, ensuring a stable electrical connection.
- Heat Shrink Tubing: Used to insulate and protect wire connections, preventing shorts and enhancing durability.
- Electrical Tape: Essential for wrapping exposed wires and connections, providing insulation and preventing moisture ingress.
Safety Equipment
- Safety Goggles: Protect your eyes from debris and accidental sparks while working on electrical components.
- Insulated Gloves: Wearing insulated gloves can help prevent electric shock while handling wires and connections.
Organizational Tools
- Toolbox or Organizer: Keeping your tools organized helps streamline the repair process and ensures that everything is easily accessible.
- Label Maker: Use a label maker to identify wires and connections, which can simplify future repairs and maintenance.
Having these essential tools at your disposal not only facilitates efficient golf cart electrical wiring repair but also enhances your ability to troubleshoot issues effectively. Being well-equipped is the first step towards ensuring optimal performance of your golf cart's electrical system.
Step-by-Step Guide to Diagnosing Electrical Issues in Golf Carts
Diagnosing electrical issues in golf carts can be a straightforward process if approached methodically. This guide provides a clear and structured method for identifying and resolving common electrical problems, ensuring your golf cart operates efficiently.
Step 1: Gather Necessary Tools
Before you begin the diagnosis, assemble the following tools:
- Multimeter - For measuring voltage and continuity.
- Screwdriver Set - To access battery compartments and wiring.
- Wire Strippers - For repairing or replacing damaged wires.
- Electrical Tape - To secure any splices or repairs.
- Safety Gloves - To protect your hands during inspection.
Step 2: Inspect the Battery System
The battery is often the source of electrical problems. Follow these sub-steps to assess its condition:
Check Battery Voltage
Use your multimeter to measure the voltage of each battery in the series. A fully charged battery should read around 12.6 volts or higher. If any battery reads below 12 volts, it may require charging or replacement.
Examine Battery Connections
Ensure all connections are tight and free of corrosion. Corroded terminals can impede electrical flow, leading to performance issues. Clean any corrosion with a mixture of baking soda and water, followed by a thorough rinse and drying.
Step 3: Evaluate the Wiring Harness
The wiring harness is essential for the proper functioning of your golf cart. Inspect it for:
- Frayed or Damaged Wires - Look for any visible signs of wear.
- Loose Connections - Ensure all plugs and connectors are secure.
- Short Circuits - Check for any wires that may be pinched or touching metal parts.
Step 4: Test the Fuses
Locate the fuse box and check each fuse to ensure they are intact. Replace any blown fuses with ones of the same amperage rating to maintain the electrical system's integrity.
Step 5: Assess the Controller and Motor
If the previous steps do not reveal issues, focus on the controller and motor:
Controller Inspection
Look for any signs of damage or overheating. A malfunctioning controller can prevent the motor from receiving power.
Motor Functionality
Test the motor by bypassing the controller momentarily (if safe to do so) to see if it operates directly. If the motor runs, the controller may need replacement.
Step 6: Check the Charger
If the golf cart does not charge properly, inspect the charger:
- Indicator Lights - Ensure they are functioning correctly.
- Output Voltage - Use the multimeter to check if the charger outputs the correct voltage when plugged in.
Following this detailed step-by-step guide will help you effectively diagnose and resolve electrical issues in your golf cart. Keeping your cart’s electrical system in top shape ensures optimal performance and longevity, enhancing your golfing experience.
Common Golf Cart Electrical Wiring Problems and Their Solutions
Golf carts rely heavily on their electrical systems, and various wiring issues can arise, impacting performance and safety. Identifying these problems early on can save time and costly repairs. Below are some common electrical wiring issues along with effective solutions.
1. Loose or Corroded Connections
Loose connections can lead to intermittent power loss or complete failure of electrical components. Corrosion can exacerbate this issue, particularly in humid environments.
- Solution: Regularly inspect all battery terminals and connectors. Clean corroded areas with a wire brush and apply a protective grease to prevent future corrosion.
- Solution: Ensure all connections are tightened properly. Use a torque wrench for battery terminals to achieve the manufacturer’s recommended torque specifications.
2. Damaged Wiring Insulation
Over time, the insulation on wires can wear down due to exposure to elements, heat, or physical abrasion. This can lead to short circuits and potential fire hazards.
- Solution: Examine wiring for any signs of fraying or damage. Replace any affected wires with high-quality, UV-resistant automotive wire.
- Solution: Use heat shrink tubing or electrical tape to cover any minor abrasions and protect against moisture.
3. Faulty Voltage Regulator
A malfunctioning voltage regulator can cause inconsistent voltage levels, leading to performance issues or damage to electrical components.
- Solution: Test the voltage output with a multimeter. If the voltage is outside the acceptable range, replace the voltage regulator with a compatible model, such as the 48V Voltage Regulator priced around $50.
- Solution: Ensure all connections to the regulator are secure and free from corrosion.
4. Battery Issues
Batteries are the heart of any golf cart's electrical system. Problems can arise from faulty batteries or poor connections.
- Solution: Regularly check battery health using a hydrometer. Replace any weak batteries with a quality option like the Trojan T875, which retails for approximately $200.
- Solution: Ensure batteries are connected in the correct series or parallel configuration as per manufacturer guidelines.
5. Blown Fuses
A blown fuse can disrupt power to critical components like lights and controllers, leading to functionality issues.
- Solution: Inspect the fuse box for any blown fuses. Replace them with fuses that match the original specifications, typically costing around $5 each.
- Solution: Investigate the underlying cause of the blown fuse, as repeated issues may indicate a deeper electrical problem.
Addressing these common golf cart electrical wiring problems promptly can enhance the longevity and reliability of your vehicle. By implementing the suggested solutions, you can ensure your golf cart remains in optimal working condition.
Safety Precautions When Performing Electrical Repairs on Golf Carts
When undertaking electrical repairs on golf carts, prioritizing safety is essential. Following specific precautions can prevent accidents and ensure a successful repair process. Here are crucial safety measures to consider:
Personal Protective Equipment (PPE)
Wearing the right personal protective equipment is the first step in ensuring your safety during electrical repairs. Consider the following items:
- Insulated Gloves: Protects your hands from electrical shocks.
- Safety Glasses: Shields your eyes from potential sparks or debris.
- Non-slip Footwear: Reduces the risk of slips, especially in wet conditions.
- Hard Hat: Offers head protection if working in areas with overhead hazards.
Power Disconnection
Before starting any electrical work, ensure the power supply is completely disconnected. This includes:
- Turning Off the Key: Always remove the key from the ignition to prevent accidental start-up.
- Disconnecting the Battery: Remove the negative terminal first to avoid short circuits.
- Using a Lockout Tag: If possible, apply a lockout/tagout device to the battery to prevent re-energization.
Proper Tools and Equipment
Using the right tools is vital for both safety and effectiveness. Ensure you have:
- Insulated Tools: Use tools that are specifically designed to handle electrical components safely.
- Multimeter: Essential for testing electrical connections and diagnosing issues.
- Wire Strippers: Necessary for safely preparing wires for connections without damaging them.
Work Environment Considerations
The environment where you perform repairs significantly impacts safety. Keep these tips in mind:
- Dry Area: Work in a dry location to minimize the risk of electric shock.
- Good Ventilation: Ensure proper airflow, especially when working with batteries that may emit gases.
- Organized Workspace: Maintain a clutter-free area to avoid tripping hazards and to easily access tools.

Awareness of Electrical Components
Understanding the components you are working with can help mitigate risks. Be aware of:
- Voltage Levels: Familiarize yourself with the voltage specifications of your golf cart's electrical system.
- Battery Type: Different batteries (lead-acid, lithium) have unique handling and safety requirements.
- Wiring Diagrams: Use the golf cart's wiring diagrams to ensure correct connections and avoid mistakes.
By adhering to these safety precautions, you can effectively and safely conduct electrical repairs on golf carts, ensuring both personal safety and the optimal performance of the vehicle. Remember, taking the time to prepare and follow these guidelines is crucial for a successful repair process.
We value your insights and experiences, and we would love to hear from you! If you have any questions, thoughts, or tips regarding Golf Cart Electrical Wiring Repair Steps, please feel free to share them in the comments. Your contributions not only enrich our community but also help fellow enthusiasts navigate their own repair journeys. Let’s spark a conversation and learn from one another!
Leave a Reply