
This article explores key golf cart ignition switch solutions to ensure your vehicle operates smoothly. You'll discover common issues, practical troubleshooting tips, and effective golf cart starter switch repairs that can enhance performance and reliability. Whether you're a seasoned enthusiast or a casual user, these essential golf cart ignition repairs will help keep your ride in top condition.
- Common Symptoms of a Faulty Golf Cart Ignition Switch
- Step-by-Step Guide to Diagnose Golf Cart Ignition Switch Issues
- Essential Tools Needed for Golf Cart Ignition Switch Repairs
- How to Replace a Golf Cart Ignition Switch: A Comprehensive Tutorial
- Preventative Maintenance Tips for Extending the Life of Your Golf Cart Ignition Switch
Common Symptoms of a Faulty Golf Cart Ignition Switch
Experiencing issues with your golf cart can be frustrating, especially when it comes to starting the engine. A faulty ignition switch is often at the root of these problems. Recognizing the symptoms early can save you time and money in repairs. Here are some common signs that indicate your golf cart ignition switch may need attention.
1. Engine Won't Start
One of the most apparent symptoms of a malfunctioning ignition switch is when the engine fails to start. If turning the key does not engage the starter or you hear no sounds at all, the ignition switch might be the culprit.
2. Intermittent Starting Issues
If your golf cart starts only sometimes, this inconsistency can signal a faulty ignition switch. You may notice that jiggling the key or adjusting its position affects whether the engine turns over, indicating poor electrical connections within the switch.
3. Dashboard Lights Malfunction
A faulty ignition switch can lead to erratic behavior in your dashboard lights. If the lights flicker or fail to illuminate when you turn the key, this may point to an issue with the ignition switch’s electrical contacts.
4. Difficulty in Turning the Key
Struggling to turn the key in the ignition can be a sign of wear and tear on the ignition switch. If you experience resistance or feel the key sticking, it may be time to inspect the ignition switch for damage or corrosion.
5. No Power to Accessories
If your golf cart’s accessories, such as headlights or radio, do not function when the key is turned to the "on" position, this could indicate that the ignition switch is failing to supply power. A properly functioning ignition switch should allow electrical flow to all essential components.
Identifying and Addressing the Issue
If you encounter any of these symptoms, it's essential to investigate further. Here are some steps to consider:
- Visual Inspection: Check for any visible signs of wear or damage on the ignition switch.
- Electrical Testing: Use a multimeter to test the voltage at the ignition switch to determine if it is functioning correctly.
- Consult a Professional: If you're unsure about diagnosing the problem, consider seeking help from a golf cart technician who can provide expert insight and repair options.
Taking note of these symptoms can help you maintain your golf cart's performance and ensure a smooth ride on the course. Addressing ignition switch issues promptly can prevent more extensive repairs down the line, allowing you to enjoy uninterrupted golfing experiences.
Step-by-Step Guide to Diagnose Golf Cart Ignition Switch Issues
Diagnosing issues with your golf cart's ignition switch can seem daunting, but following a systematic approach will help you identify and resolve problems effectively. This guide will walk you through each step to ensure your golf cart operates smoothly.
1. Gather Necessary Tools
Before starting your diagnosis, ensure you have the following tools handy:
- Multimeter - For checking voltage and continuity
- Screwdriver set - To access the ignition switch
- Wire strippers - For any necessary wire repairs
- Wrench set - To remove battery connections
2. Safety First
Always prioritize safety:
- Disconnect the battery to prevent any accidental short circuits.
- Wear protective gear such as gloves and safety glasses.
3. Visual Inspection
Start with a thorough visual inspection of the ignition switch and surrounding components:
- Look for any loose wires or corrosion at the terminals.
- Check for physical damage to the ignition switch housing.
- Inspect the keyhole for debris or obstruction.
4. Test the Battery Voltage
Using your multimeter, check the battery voltage:
- A fully charged battery should read around 12.6 volts or more.
- If the voltage is low, consider recharging or replacing the battery.
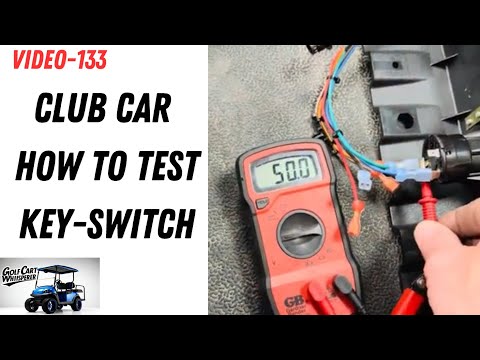
5. Check Ignition Switch Continuity
To determine if the ignition switch is functioning correctly:
- Set your multimeter to the continuity setting.
- Disconnect the wires from the ignition switch.
- Test each terminal on the ignition switch; there should be continuity when the key is turned.
- If there is no continuity, the switch may need to be replaced.
6. Examine Wiring Connections
Inspect the wiring connected to the ignition switch:
- Look for any frayed wires or loose connections.
- Secure any loose connections and repair any damaged wires.
7. Replace the Ignition Switch if Necessary
If all tests indicate the ignition switch is faulty, consider replacing it:
- Purchase a compatible ignition switch, typically priced between $20 to $50.
- Follow the manufacturer's instructions for installation.
8. Reconnect the Battery
Once repairs are complete, reconnect the battery:
- Ensure all connections are tight and secure.
- Test the ignition switch to verify it functions correctly.
This methodical approach to diagnosing golf cart ignition switch issues can lead to a smoother operation and enhance your overall golfing experience. Taking these steps will help ensure your golf cart is ready for the course whenever you are.
Essential Tools Needed for Golf Cart Ignition Switch Repairs
When addressing the golf cart ignition switch repairs, having the right tools is crucial for ensuring a smooth and efficient process. Below is a list of essential tools that will help you tackle these repairs effectively.
Basic Hand Tools
To begin, the following hand tools are fundamental for any ignition switch repair:
- Screwdrivers: A set of both flathead and Phillips screwdrivers will allow you to remove screws and access the ignition switch easily.
- Socket Wrench Set: This is essential for loosening and tightening nuts and bolts that secure the ignition switch in place.
- Pliers: Needle-nose pliers can be particularly helpful for gripping and manipulating small wires and connectors.
Electrical Tools
Since the ignition switch involves electrical components, certain tools are necessary to handle these safely:
- Multimeter: This device is vital for diagnosing electrical issues, allowing you to measure voltage, current, and resistance in the ignition circuit.
- Wire Strippers: These are useful for removing insulation from wires when making connections or replacements.
- Heat Shrink Tubing: To ensure secure and insulated connections, heat shrink tubing can be applied over soldered or twisted wires.
Safety Equipment
Safety should always be a priority during repairs. Consider including the following items in your toolkit:
- Safety Glasses: Protect your eyes from debris or accidental sparks while working on electrical components.
- Gloves: A pair of insulated gloves can help prevent electrical shock and keep your hands safe from sharp edges.
Replacement Parts
In addition to tools, having the right replacement parts on hand can expedite the repair process:
- Ignition Switch: Ensure you have a compatible ignition switch for your specific golf cart model. Prices can range from $30 to $80 depending on the brand and features.
- Wiring Harness: A new wiring harness may be necessary if the existing one is damaged. These typically cost between $15 and $50.
Equipping yourself with these essential tools and components will streamline your golf cart ignition switch repairs and help ensure that your cart operates smoothly and reliably.
How to Replace a Golf Cart Ignition Switch: A Comprehensive Tutorial
Replacing a golf cart ignition switch is a vital task that ensures your vehicle operates smoothly and efficiently. This guide provides a detailed walkthrough for those looking to perform this essential maintenance.
Understanding the Golf Cart Ignition Switch
The ignition switch is a crucial component of your golf cart's electrical system. It controls the flow of electricity from the battery to the starter and other electrical systems. If your cart experiences issues starting or the electrical components malfunction, it may be time to replace the ignition switch.
Tools and Materials Needed
Before starting the replacement process, gather the following tools and materials:
- Flathead screwdriver
- Phillips screwdriver
- Socket wrench set
- Wire cutters
- New ignition switch (compatible with your golf cart model)
- Electrical tape
Step-by-Step Replacement Process
Follow these steps to replace your golf cart ignition switch effectively:
1. Safety First
Ensure the golf cart is turned off and disconnected from the battery. This prevents any electrical shocks or shorts during the replacement process.
2. Remove the Old Ignition Switch
- Locate the ignition switch on your golf cart’s dashboard.
- Use a flathead screwdriver to gently pry off the decorative cover, if applicable.
- Unscrew the ignition switch using the appropriate screwdriver or socket wrench.
- Carefully disconnect the wiring harness from the old switch. Take note of the wiring configuration or take a picture for reference.
3. Install the New Ignition Switch
- Connect the wiring harness to the new ignition switch, ensuring each wire is connected to the correct terminal.
- Secure the new ignition switch in place by screwing it into the dashboard.
- If there is a cover, snap it back into place to protect the switch.
4. Reconnect the Battery
Reconnect the battery terminals, ensuring they are tight and secure.
5. Test the New Switch
Turn the ignition key to check if the golf cart starts. Verify that all electrical components are functioning correctly, including lights and accessories.
Troubleshooting Common Issues
If the golf cart does not start after replacing the ignition switch, consider the following:
- Check all connections to ensure they are secure and correctly positioned.
- Inspect the battery for charge and connections.
- Examine fuses and circuit breakers for any blown components.
By following these steps, you can successfully replace your golf cart ignition switch, ensuring that your vehicle is ready for the next round on the course. Regular maintenance of this component is crucial for smooth operation and can save you from more significant electrical issues down the road.
Preventative Maintenance Tips for Extending the Life of Your Golf Cart Ignition Switch
Maintaining your golf cart ignition switch is crucial for ensuring reliable performance and longevity. By implementing a few simple preventative measures, you can avoid costly repairs and enhance the overall lifespan of this vital component. Here are some effective tips to keep your ignition switch functioning smoothly.
Regular Cleaning
Dirt and debris can accumulate around the ignition switch, leading to operational issues. To prevent this, consider the following:
- Use a soft cloth: Wipe down the ignition area regularly with a soft, lint-free cloth to remove dust and grime.
- Compressed air: Utilize compressed air to blow out any debris that may be lodged within the switch or surrounding area.
Inspect Wiring Connections
Loose or damaged wiring can lead to ignition switch failure. Regular inspections can help identify potential problems early on:
- Check for corrosion: Inspect all wiring connections for signs of corrosion, which can impede electrical flow.
- Ensure tight connections: Make sure all connections are secure and properly attached to prevent intermittent issues.
Monitor Battery Health
The ignition switch relies heavily on battery performance. Keeping your battery in good condition is essential:
- Check voltage levels: Regularly test your battery to ensure it is providing adequate voltage for the ignition system.
- Clean battery terminals: Keep terminals free of corrosion and dirt to maintain optimal connectivity.
Use Quality Replacement Parts
If you need to replace your ignition switch, opting for high-quality components can make a significant difference:
- OEM parts: Consider using Original Equipment Manufacturer (OEM) parts for compatibility and reliability.
- Reputable brands: Brands like Club Car and EZGO offer durable ignition switches that can withstand wear and tear.
Routine Testing
Regularly testing the ignition switch can help identify issues before they escalate:
- Perform functional tests: Start your golf cart periodically to ensure the ignition switch is operating smoothly.
- Listen for unusual sounds: Be alert to any clicking or grinding noises when turning the key, which may indicate a problem.
By following these preventative maintenance tips, you can significantly extend the life of your golf cart ignition switch and ensure a smooth and enjoyable ride on the course. Prioritizing the health of this essential component will keep your golf cart operating at peak performance for years to come.
We truly value your insights and experiences, and we'd love to hear your thoughts on Golf Cart Ignition Switch Fixes! Whether you have questions, tips, or personal stories to share, your contributions can foster a rich conversation that benefits us all. Please feel free to leave your comments below—let's learn from each other and enhance our understanding together!
Leave a Reply