
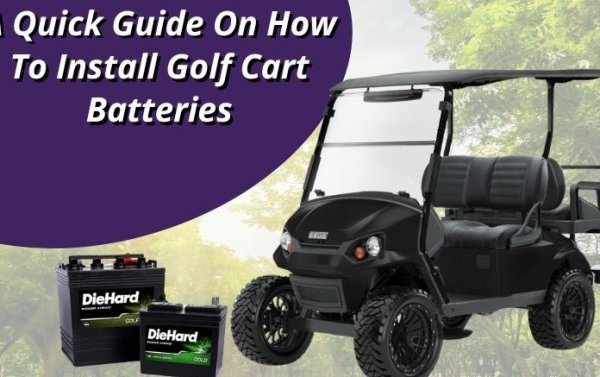
This article provides a comprehensive guide on essential procedures for replacing your golf cart's battery. You will discover crucial battery swap procedures that ensure a smooth transition, along with tips to maintain optimal performance. Whether you're a seasoned golfer or a new enthusiast, these battery change guidelines will help you navigate the process efficiently. Get ready to learn the best practices for successful golf cart battery upgrades and keep your cart running smoothly on the course.
Understanding the Importance of Golf Cart Battery Maintenance
Maintaining your golf cart battery is crucial for ensuring optimal performance and longevity. A well-maintained battery not only extends its lifespan but also enhances the overall efficiency of your golf cart. This section delves into why battery maintenance should be a priority for every golf cart owner.
The Role of Battery Maintenance
Regular maintenance of your golf cart battery plays a significant role in its functionality. Here are some key aspects to consider:
- Preventing Sulfation: Sulfation occurs when lead sulfate crystals build up on the battery plates, which can hinder performance. Regular maintenance helps to minimize this issue.
- Ensuring Proper Charging: Keeping your battery charged correctly can prevent deep discharges that damage battery cells. Understanding the charging cycle is essential.
- Water Levels: Checking and maintaining the electrolyte levels in flooded lead-acid batteries is vital. Low water levels can lead to overheating and reduced capacity.
Signs of Neglect
Being aware of the signs that indicate your battery may need attention can save you from costly replacements. Look out for:
- Corrosion: White, crusty deposits on battery terminals signal a need for cleaning and maintenance.
- Slow Performance: If your golf cart is sluggish or takes longer to charge, it may indicate battery issues.
- Shortened Run Time: A noticeable decrease in how long your golf cart runs on a single charge can be a sign of battery deterioration.
Benefits of Regular Maintenance
Investing time in regular battery maintenance yields numerous benefits:
- Cost Efficiency: Proper maintenance can reduce the need for frequent replacements, saving you money in the long run.
- Improved Performance: A well-maintained battery ensures your golf cart operates at its best, providing a smoother ride.
- Safety: Maintaining your battery reduces the risk of leaks or failures, promoting safer operation.
Essential Practices for Golf Cart Battery Maintenance
To ensure your golf cart battery remains in top condition, consider the following essential practices:
- Regularly clean battery terminals and cables to prevent corrosion.
- Check and maintain the electrolyte levels, adding distilled water as needed.
- Charge the battery fully after each use to avoid deep discharges.
- Store the golf cart in a climate-controlled environment to prevent temperature-related issues.
Understanding and implementing proper golf cart battery maintenance is integral to enjoying a reliable and efficient ride. By prioritizing these practices, you can ensure your battery remains in excellent condition, ultimately enhancing your golfing experience.
Essential Tools Needed for Golf Cart Battery Replacement
When it comes to replacing your golf cart battery, having the right tools on hand is crucial for a smooth and efficient process. Below is a detailed list of the essential tools you will need, along with their specific purposes, ensuring you are well-prepared for the task ahead.
1. Safety Gear
Before you begin any battery replacement, prioritize safety. Equip yourself with the following:
- Safety Goggles: Protects your eyes from battery acid and debris.
- Gloves: Insulated gloves will safeguard your hands from electrical shocks and chemical exposure.
- Apron: A rubber or plastic apron can shield your clothing from spills.
2. Basic Hand Tools
These tools are fundamental for removing and installing your golf cart battery:
- Wrenches: A set of adjustable wrenches will help you loosen and tighten battery terminals securely.
- Screwdrivers: A flathead and Phillips screwdriver are necessary for any screws that may hold the battery in place.
- Socket Set: A socket set can make it easier to access tight spaces around the battery compartment.
3. Battery Lifting Equipment
Golf cart batteries can be heavy, so using the right lifting equipment is essential:
- Battery Jack: A battery jack or hoist will assist in lifting and lowering the battery safely without strain.
- Straps: Use heavy-duty lifting straps to secure the battery during the removal process.
4. Cleaning Supplies
Maintaining a clean work area is important for safety and efficiency:
- Baking Soda and Water: This mixture can neutralize battery acid spills on terminals and surrounding areas.
- Wire Brush: A wire brush will help clean corroded battery terminals, ensuring a good connection with the new battery.
5. Voltage Tester
To ensure your new battery is functioning properly, a voltage tester is indispensable:
- Digital Multimeter: This tool allows you to measure the voltage of the battery and confirm it meets the required specifications for your golf cart.
6. Battery Terminal Protection
After installing your new battery, it’s wise to protect the terminals:
- Terminal Protector Spray: This spray prevents corrosion and extends the life of the battery terminals.
- Grease or Petroleum Jelly: Applying a thin layer can also help reduce corrosion.
Equipping yourself with these essential tools will ensure that your golf cart battery replacement process is efficient and safe. By having everything prepared, you can avoid unnecessary delays and focus on enjoying your time on the course.
Step-by-Step Guide to Safely Remove Old Golf Cart Batteries
Removing old golf cart batteries can be a straightforward task if done correctly. Follow this detailed guide to ensure a safe and efficient removal process.
Gather Necessary Tools and Supplies
Before starting, make sure you have the following items on hand:
- Safety goggles – Protects your eyes from any potential acid splashes.
- Gloves – Use heavy-duty rubber gloves to protect your hands.
- Wrench set – Required for loosening battery terminals.
- Battery terminal puller – Helps safely remove the terminals without damage.
- Container for old batteries – Ensure you have a safe place to store the old batteries for recycling.
Ensure Safety Precautions
Taking safety measures is crucial when handling batteries. Here’s how to prepare:
- Work in a well-ventilated area to avoid inhaling harmful gases.
- Keep a bucket of baking soda and water nearby to neutralize any acid spills.
- Make sure to disconnect all power sources to the golf cart before starting.
Disconnect the Battery Cables
Follow these steps to disconnect the battery safely:
- Begin by removing the negative terminal (usually marked with a minus sign) using the appropriate wrench.
- Next, disconnect the positive terminal (marked with a plus sign).
- Use the battery terminal puller if the terminals are stuck.
Remove the Batteries from the Cart
After disconnecting the cables, proceed with battery removal:
- Check for any securing brackets or straps holding the batteries in place and remove them.
- Carefully lift the batteries out of the cart, ensuring to use proper lifting techniques to avoid injury.
- Place the old batteries in the designated container for recycling.
Clean the Battery Compartment
Once the old batteries are removed, clean the compartment:
- Inspect for any corrosion or acid residue.
- Use a mixture of baking soda and water to neutralize any acid, applying it with a cloth.
- Wipe down the area thoroughly and let it dry completely before installing new batteries.
Recycle Old Batteries Responsibly
Ensure you dispose of old batteries properly:
- Contact your local recycling center to find out where you can drop off used batteries.
- Some retailers offer battery recycling programs, so check with local stores.
Following these steps will help you safely remove old golf cart batteries, ensuring both your safety and the environment’s. Remember to consult your golf cart’s manual for any specific instructions related to your model.
How to Properly Install New Golf Cart Batteries
Installing new golf cart batteries correctly is essential for optimal performance and longevity. Follow these detailed steps to ensure a successful battery replacement.
Gather Necessary Tools and Materials
Before starting the installation process, make sure you have the following tools and materials on hand:
- Wrench set (for terminal connections)
- Safety goggles (to protect your eyes)
- Gloves (to safeguard your hands)
- New batteries (ensure they are the correct type for your golf cart)
- Battery terminal cleaner (for maintenance)
Prepare Your Golf Cart
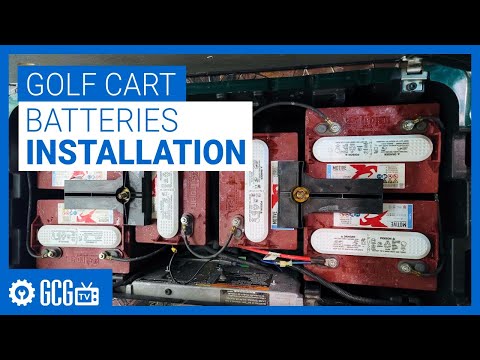
Start by ensuring your golf cart is on a flat surface. Turn off the ignition and remove the key to prevent any accidental starts. If your cart has a battery cover, take it off to access the battery compartment.
Remove Old Batteries
1. Disconnect the Negative Terminal: Always start by disconnecting the negative (-) terminal to prevent electrical shorts.
2. Remove the Positive Terminal: After the negative terminal is disconnected, proceed to remove the positive (+) terminal.
3. Take Out the Old Batteries: Carefully lift out the old batteries, ensuring not to damage any surrounding components.
Install the New Batteries
1. Place the New Batteries: Position the new batteries in the same orientation as the old ones. Ensure they fit securely in the compartment.
2. Connect the Positive Terminal: Attach the positive (+) terminal first. Make sure the connection is tight to avoid any issues.
3. Connect the Negative Terminal: After securing the positive terminal, connect the negative (-) terminal.
4. Check Connections: Double-check that both terminals are securely connected and free of corrosion. Use a battery terminal cleaner if needed.
Final Steps
- Reattach Any Covers: If your golf cart has a battery cover, replace it to protect the batteries from dirt and moisture.
- Test the Installation: Turn on the ignition and test the golf cart to ensure everything is functioning properly.
By following these steps, you can ensure a proper installation of new golf cart batteries, enhancing both performance and safety. Regular maintenance and proper installation techniques are crucial in extending the lifespan of your golf cart batteries.
Tips for Extending the Life of Your Golf Cart Batteries
To ensure that your golf cart batteries remain efficient and durable, it’s essential to implement practices that promote their longevity. Here are some effective strategies you can adopt:
Regular Maintenance Checks
Performing routine inspections can help identify potential issues before they become major problems. Consider the following maintenance tasks:
- Inspect Battery Terminals: Ensure that the terminals are clean and free from corrosion. A buildup can impede performance.
- Check Fluid Levels: For flooded lead-acid batteries, regularly check the electrolyte levels and top them off with distilled water as needed.
- Monitor Voltage: Use a multimeter to check the voltage levels of your batteries periodically. This can help you detect weak cells early.
Optimal Charging Practices
How you charge your batteries significantly affects their lifespan. Follow these charging tips:
- Avoid Overcharging: Use a quality charger that automatically shuts off when the batteries are fully charged.
- Charge After Each Use: Regularly charging your batteries after each use can prevent deep discharges that shorten their lifespan.
- Use the Correct Charger: Ensure you are using a charger compatible with your battery type (e.g., AGM, gel, or flooded) for optimal performance.
Proper Storage Techniques
When your golf cart is not in use, how you store it can impact battery health:
- Store in a Cool, Dry Place: Extreme temperatures can harm battery performance. Aim for a storage environment between 32°F and 80°F.
- Disconnect Batteries: If storing for an extended period, disconnect the batteries to prevent any slow drain.
- Charge Before Storage: Ensure your batteries are fully charged before storing them for an extended time to prevent sulfation.
Usage Considerations
How you operate your golf cart can also play a significant role in battery longevity:
- Avoid Sudden Stops and Starts: Smooth acceleration and braking can help reduce the strain on the batteries.
- Limit Heavy Loads: Overloading your golf cart can lead to excessive battery drain. Always adhere to the manufacturer's weight recommendations.
- Regularly Rotate Use: If you have multiple batteries, rotate their use to ensure even wear and performance across all cells.
Implementing these strategies can significantly enhance the longevity and performance of your golf cart batteries. By prioritizing regular maintenance, optimal charging, proper storage, and mindful usage, you can enjoy a reliable and efficient golf cart experience for years to come.
We truly value your thoughts and insights! If you have any questions or opinions regarding the steps for replacing golf cart batteries, we invite you to share them in the comments below. Your experiences and perspectives can not only enrich our discussion but also help others who may be navigating the same process. Let’s connect and learn together!
Leave a Reply