
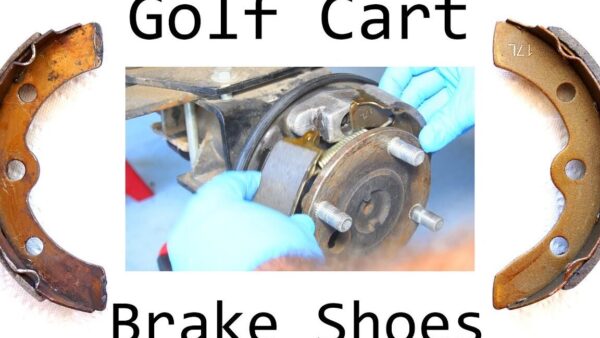
This article provides a comprehensive guide on golf vehicle brake pad exchange procedures, detailing essential golf cart brake lining swap methods. Readers will discover a step-by-step approach to ensure a successful golf cart brake shoe replacement process, along with tips for maintenance and safety to enhance their overall driving experience.
- Understanding the Importance of Brake Pad Maintenance for Golf Carts
- Essential Tools Needed for Golf Cart Brake Pad Replacement
-
Step-by-Step Guide to Replacing Golf Cart Brake Pads
- Tools and Materials Needed
- Step 1: Safety First
- Step 2: Lift the Golf Cart
- Step 3: Remove the Wheel
- Step 4: Access the Brake Assembly
- Step 5: Remove Old Brake Pads
- Step 6: Clean the Brake Assembly
- Step 7: Install New Brake Pads
- Step 8: Reassemble the Brake Components
- Step 9: Lower the Golf Cart
- Step 10: Reconnect the Battery and Test
- Common Mistakes to Avoid During Brake Pad Replacement
- Signs That Indicate It's Time for Brake Pad Replacement on Your Golf Cart
Understanding the Importance of Brake Pad Maintenance for Golf Carts
Maintaining the brake pads of your golf cart is crucial for ensuring safety, performance, and longevity. Proper brake pad care not only enhances the driving experience but also prevents costly repairs down the line.
Why Brake Pads Matter
Brake pads play a vital role in the overall braking system of your golf cart. They are responsible for creating the friction necessary to slow down or stop the vehicle effectively. Here are some reasons why maintaining them is essential:
- Safety: Worn-out brake pads can lead to reduced stopping power, increasing the risk of accidents.
- Performance: Well-maintained brake pads ensure smooth and responsive braking, enhancing overall driving comfort.
- Cost Efficiency: Regular maintenance can prevent more severe damage to the braking system, saving you money on repairs.
Signs That Your Brake Pads Need Attention
Recognizing the signs of worn brake pads is essential for timely maintenance. Look out for the following indicators:
- Squeaking or Grinding Noises: Unusual sounds when braking often indicate that the pads are worn down.
- Reduced Stopping Power: If your golf cart takes longer to stop, it may be time to inspect the brake pads.
- Vibration: A vibrating brake pedal can signal uneven wear or damage to the brake pads.
Essential Steps for Golf Cart Brake Pad Maintenance
To ensure your golf cart’s brake pads remain in optimal condition, consider these essential maintenance steps:
- Regular Inspections: Check brake pads every few months for wear and tear.
- Cleaning: Keep the brake components clean to avoid debris buildup that can affect performance.
- Replacement: Replace brake pads when they reach a thickness of 1/8 inch or less to maintain efficiency.
Investing time in brake pad maintenance can enhance your golf cart's safety and performance, ensuring a smooth ride on the course or around your neighborhood. Prioritizing this aspect of your vehicle will ultimately contribute to a better and safer golfing experience.
Essential Tools Needed for Golf Cart Brake Pad Replacement
When undertaking the task of replacing brake pads on your golf cart, having the right tools is crucial for ensuring the process is efficient and safe. Below is a list of essential tools that will make your brake pad replacement smoother and more effective.
Basic Hand Tools
- Socket Set: A complete socket set, preferably metric, is essential for removing bolts and nuts that secure the brake components. Look for a set that includes both standard and deep sockets.
- Wrench Set: An adjustable wrench or a set of combination wrenches will help in loosening and tightening various fittings.
- Screwdrivers: A flathead and a Phillips screwdriver are necessary for removing any screws holding the brake assembly together.
Specialized Tools
- Brake Caliper Tool: This tool is specifically designed to compress the caliper piston, making it easier to install new brake pads. Look for a tool that is compatible with your golf cart model.
- Torque Wrench: Ensuring that bolts are tightened to the manufacturer’s specifications is vital for safety. A torque wrench allows for precise torque settings.
Safety Gear
- Safety Glasses: Protect your eyes from debris while working on your golf cart.
- Gloves: Durable work gloves will protect your hands from sharp edges and provide a better grip on tools.
Additional Supplies
- Brake Cleaner: A can of brake cleaner will help in cleaning the brake components, ensuring they function properly.
- Grease or Brake Lubricant: Applying lubricant to the caliper pins and brake pads can prevent squeaking and ensure smooth operation.
- Rags or Shop Towels: Keep these handy for cleaning up spills and wiping down components during the replacement process.
Having these essential tools at your disposal will not only streamline the brake pad replacement process but also enhance your overall experience while maintaining your golf cart.
Step-by-Step Guide to Replacing Golf Cart Brake Pads
Replacing the brake pads on your golf cart is essential for maintaining safety and performance. This guide will walk you through the process, ensuring you have all the necessary information to execute this task effectively.
Tools and Materials Needed
Before you start, gather the following tools and materials:
- Socket wrench set
- Jack and jack stands
- New brake pads (specific to your golf cart model)
- Brake cleaner
- Lubricant (high-temperature brake grease)
- Safety goggles and gloves
Step 1: Safety First
Ensure your golf cart is parked on a flat surface. Engage the parking brake and disconnect the battery to prevent any electrical issues while working.
Step 2: Lift the Golf Cart
Using the jack, lift the front or rear of the golf cart, depending on where the brake pads need replacement. Secure the cart with jack stands to ensure stability during the process.
Step 3: Remove the Wheel
Utilize your socket wrench to remove the lug nuts and take off the wheel. This will give you access to the brake assembly.
Step 4: Access the Brake Assembly
Locate the brake caliper or drum, depending on your golf cart model. For disc brakes, you’ll need to remove the caliper by unbolting it. For drum brakes, remove the drum to access the brake pads.
Step 5: Remove Old Brake Pads
Carefully slide out the old brake pads from their housing. Inspect them for wear and tear, and note any specific issues that may need addressing during reinstallation.
Step 6: Clean the Brake Assembly
Use brake cleaner to thoroughly clean the caliper or drum area. This step is crucial to remove dust and debris that could interfere with the new pads.
Step 7: Install New Brake Pads
Insert the new brake pads into the caliper or drum. Ensure they fit snugly in place. Apply a small amount of high-temperature brake grease to the backing of the pads to minimize noise and friction.
Step 8: Reassemble the Brake Components
Reattach the brake caliper or drum, ensuring all bolts are tightened securely. Replace the wheel and tighten the lug nuts in a star pattern to ensure even pressure.
Step 9: Lower the Golf Cart
Carefully lower the golf cart back to the ground using the jack, and remove the jack stands.
Step 10: Reconnect the Battery and Test
Reconnect the battery and take the golf cart for a short test drive. Pay attention to the brakes to ensure they are functioning correctly. Listen for any unusual sounds and check for proper stopping power.
Following this step-by-step guide will help you successfully replace the brake pads on your golf cart, ensuring a safer and smoother ride. Regular maintenance of your brake system is vital for optimal performance, enhancing your overall golfing experience.
Common Mistakes to Avoid During Brake Pad Replacement
Replacing brake pads is a critical maintenance task for your golf cart that can enhance safety and performance. However, there are several common mistakes that can lead to improper installation or premature wear. Below are key pitfalls to steer clear of during the process.
1. Skipping the Inspection of Brake Components
Before replacing brake pads, it’s essential to inspect other related components, such as the rotors and calipers. Neglecting this step can result in:
- Uneven wear: Worn rotors can cause new pads to wear out quickly.
- Brake fluid leaks: Failing calipers can lead to reduced braking efficiency.
2. Using Incompatible Brake Pads
Ensure you select the right type of brake pads designed for your specific golf cart model. Using incompatible pads can lead to:
- Increased noise: Mismatched materials may cause squeaking or grinding sounds.
- Reduced braking power: Improper pads can compromise safety.
3. Neglecting Proper Lubrication
Many users forget to lubricate the brake hardware. Proper lubrication is vital for:
- Reducing friction: This helps the components move smoothly, preventing sticking.
- Extending lifespan: Well-lubricated parts are less likely to wear out quickly.
4. Failing to Bed In New Brake Pads
After installing new brake pads, it’s crucial to bed them in properly. This process helps to:
- Enhance performance: Proper bedding allows pads to conform to the rotor surface.
- Prevent noise: It minimizes the risk of squeaking during operation.
5. Over-Tightening Hardware
During installation, it’s important to avoid over-tightening the bolts and screws. This mistake can lead to:
- Component damage: Stripped threads or cracked parts can occur.
- Increased wear: Excessive pressure may lead to uneven pad wear.
By being mindful of these common mistakes during brake pad replacement, you can ensure a safer and more effective upgrade for your golf cart’s braking system. Proper attention to detail not only enhances performance but also prolongs the life of your brake components.
Signs That Indicate It's Time for Brake Pad Replacement on Your Golf Cart
Recognizing when your golf cart's brake pads need replacement is crucial for ensuring safety and optimal performance. Here are key indicators that suggest it might be time for a change:
1. Squeaking or Squealing Noises
If you hear a persistent squeaking or squealing sound when applying the brakes, this is often a sign that the brake pads are worn down. Many brake pads are equipped with a wear indicator that emits these sounds to alert you to their condition.
2. Reduced Stopping Power
A noticeable decrease in braking efficiency is a critical warning sign. If you find that your golf cart takes longer to stop or requires more pressure on the brake pedal, this indicates that the brake pads may be too worn to function effectively.
3. Vibration or Pulsation
When braking, if you feel a vibration or pulsation through the brake pedal, it may suggest that the brake pads are unevenly worn or that the brake rotors are damaged. This can affect the overall braking performance and should be addressed promptly.
4. Brake Warning Light
Many modern golf carts come equipped with a dashboard warning light for the brakes. If this light illuminates, it may signal that the brake pads are reaching the end of their lifespan or that there is an issue with the braking system that requires immediate attention.
5. Visual Inspection
Performing a visual inspection of the brake pads can provide clear signs of wear. If the pads appear thin, cracked, or uneven, it’s a strong indication that they need to be replaced. Ideally, brake pads should have at least a quarter-inch of material remaining.
6. Increased Brake Dust
If you notice an unusual amount of brake dust accumulating on the wheels, this could indicate that the brake pads are deteriorating. Excessive dust can not only be a sign of worn pads but can also affect the overall braking performance.

Regular Maintenance Checks
To prevent any unexpected issues with your golf cart's braking system, regular maintenance checks are essential. Keep an eye on the performance and condition of your brake pads to ensure safe and smooth rides.
Identifying these signs early can help you maintain your golf cart's braking system effectively, ensuring safety and longevity in your vehicle. Prioritize your golf cart's brake pad health for a reliable driving experience.
We would love to hear your thoughts and questions about Golf Cart Brake Pad Replacement Steps! Your insights and inquiries can help foster a vibrant community of enthusiasts eager to share knowledge and experiences. Whether you have tips to offer or need clarification on specific steps, please don’t hesitate to leave a comment. Together, we can make this journey even more enjoyable and informative for everyone involved!
Leave a Reply