
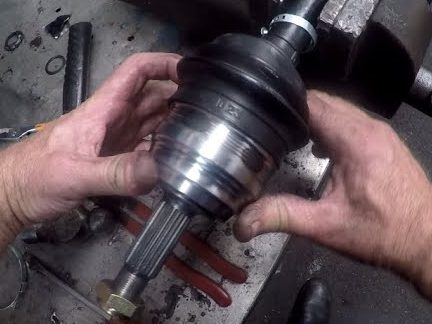
This article offers an in-depth look at golf cart axle joint replacement, providing essential information on the maintenance and repair processes necessary for keeping your vehicle in optimal condition. Readers will discover step-by-step instructions, tips for identifying wear and tear, and guidance on selecting the right parts for effective golf vehicle CV joint repair. Whether you're a seasoned technician or a DIY enthusiast, this comprehensive guide will equip you with the knowledge needed for successful golf cart drive joint replacement.
- Understanding the Importance of Golf Cart CV Joint Replacement
- Signs That Indicate Your Golf Cart Needs CV Joint Replacement
- Step-by-Step Guide to Golf Cart CV Joint Replacement
- Common Mistakes to Avoid During Golf Cart CV Joint Replacement
- Choosing the Right Parts for Golf Cart CV Joint Replacement
Understanding the Importance of Golf Cart CV Joint Replacement
When it comes to maintaining your golf cart, the CV joint plays a crucial role in ensuring smooth and efficient operation. Understanding the significance of timely CV joint replacement can enhance your cart's performance and prolong its lifespan.
What is a CV Joint?
A CV joint (Constant Velocity joint) connects the drive shaft to the wheels, allowing for flexibility and power transfer even when the wheels are turning at different angles. This component is vital for smooth driving and helps maintain traction, especially on uneven terrain.
Signs You Need a CV Joint Replacement
Recognizing the symptoms of a failing CV joint is essential for preventing further damage. Look for the following indicators:
- Clicking noises when turning or accelerating.
- Vibration during driving, especially at higher speeds.
- Grease leaks around the joint area.
- Difficulty steering or a noticeable change in handling.
Benefits of Timely Replacement
Replacing a worn-out CV joint can provide several advantages:
- Improved Performance: A new CV joint ensures optimal power transfer, enhancing acceleration and handling.
- Increased Safety: Maintaining the integrity of the CV joint reduces the risk of sudden failure, which could lead to accidents.
- Cost-Effective: Addressing CV joint issues early can prevent more extensive repairs down the line, saving you money in the long run.
Choosing the Right Replacement Parts
When it comes to selecting replacement CV joints for your golf cart, consider the following factors:
- Compatibility: Ensure that the CV joint matches your golf cart's make and model.
- Quality: Opt for reputable brands that offer durable and reliable parts. For example, companies like Garia and EZGO provide high-quality CV joints tailored for various golf cart models.
- Warranty: Look for parts that come with a warranty, indicating confidence in their durability.
By understanding the importance of golf cart CV joint replacement and being proactive about maintenance, you can enjoy a smoother ride and extend the life of your vehicle. Regular checks and timely replacements not only enhance performance but also contribute to a safer driving experience on the course.
Signs That Indicate Your Golf Cart Needs CV Joint Replacement
Recognizing when your golf cart requires a CV joint replacement is essential for maintaining optimal performance and safety. Here are key indicators that suggest it might be time for this important maintenance:
1. Unusual Noises
If you hear clicking or popping sounds while turning or accelerating, it can be a sign that the CV joint is worn out. These noises often indicate that the joint is no longer functioning properly and may need replacement.
2. Vibrations During Operation
Experiencing vibrations or shaking in the steering wheel or throughout the cart while driving can indicate an issue with the CV joint. This can lead to further damage if not addressed promptly.
3. Grease Leakage
Inspecting your golf cart for grease leaks around the CV joint area is crucial. If you notice any grease accumulation, it may suggest that the protective boot has been compromised, leading to dirt and debris entering the joint, which can necessitate replacement.
4. Difficulty Steering
If your golf cart becomes difficult to steer or feels unresponsive, it may be a sign of a failing CV joint. This symptom can affect your control and safety while driving.
5. Uneven Tire Wear
Check for uneven tire wear on your golf cart. A malfunctioning CV joint can lead to improper alignment and uneven distribution of weight, causing tires to wear out more quickly on one side.
6. Increased Play in the Steering Wheel
Noticeable play or looseness in the steering wheel can indicate that the CV joint is not holding its position as it should. This can lead to handling issues and may require immediate attention.
Maintenance Tips
To prolong the life of your CV joint and ensure your golf cart runs smoothly, consider the following maintenance tips:
- Regularly inspect the CV joint and surrounding areas for wear and tear.
- Keep the protective boot intact and free of cracks or tears.
- Schedule routine maintenance checks to catch potential issues early.
By being vigilant about these signs and conducting regular maintenance, you can help ensure that your golf cart remains in peak condition, reducing the likelihood of needing a CV joint replacement.
Step-by-Step Guide to Golf Cart CV Joint Replacement
Replacing the CV joint in your golf cart is essential for maintaining smooth operation and ensuring longevity. Follow this detailed guide to effectively replace the CV joint while avoiding common pitfalls.
Tools and Materials Needed
Before starting, gather the following tools and materials to ensure a smooth replacement process:
- Socket set (including metric sizes)
- Wrench set
- Jack and jack stands
- CV joint replacement kit (specific to your golf cart model)
- Grease (for lubrication)
- Safety gloves and goggles
- Torque wrench
Step 1: Safety First
Ensure your golf cart is on a flat surface. Engage the parking brake and disconnect the battery to prevent any electrical issues during the replacement process.
Step 2: Lift the Golf Cart
Using a jack, lift the front or rear of the golf cart, depending on which CV joint requires replacement. Secure it with jack stands to prevent any accidental drops.
Step 3: Remove the Wheel
Using a socket wrench, remove the lug nuts and take off the wheel. This step provides easier access to the CV joint.
Step 4: Disconnect the CV Joint
Locate the CV joint and identify the retaining clips. Use pliers to carefully remove these clips. Next, detach the CV joint from the axle shaft by gently pulling it away.
Step 5: Install the New CV Joint
Take your new CV joint from the replacement kit. Before installation, apply a thin layer of grease to the joint to ensure smooth movement. Align it with the axle shaft and push it into place until you hear a click, indicating it is securely attached.
Step 6: Reattach Retaining Clips
Using the pliers, carefully reattach the retaining clips to secure the new CV joint in position. Ensure they are firmly in place to avoid future issues.
Step 7: Reassemble the Wheel
Place the wheel back onto the hub and hand-tighten the lug nuts. Lower the golf cart back to the ground and use a torque wrench to tighten the lug nuts to the manufacturer's specifications.
Step 8: Reconnect the Battery
Reconnect the battery terminals, ensuring all connections are tight and secure.
Step 9: Test the Golf Cart
Before taking your golf cart for a spin, perform a quick test. Check for any unusual noises or vibrations while driving at low speed.
Following these steps will help you successfully replace the CV joint in your golf cart, enhancing its performance and extending its lifespan. Always refer to your specific golf cart manual for any model-specific instructions or torque specifications.
Common Mistakes to Avoid During Golf Cart CV Joint Replacement
Replacing the CV joint in your golf cart can enhance its performance and extend its lifespan. However, several common mistakes can undermine your efforts. Here’s a guide to help you navigate the replacement process smoothly and effectively.
1. Skipping the Inspection Process
Before diving into the replacement, it’s crucial to conduct a thorough inspection of the CV joint and surrounding components. Failing to do so may lead to overlooking additional issues that could complicate the repair. Look for:
- Cracks or damage in the CV boot
- Excessive play in the joint
- Signs of grease leakage
2. Using Incorrect Tools
Utilizing the wrong tools can lead to improper installation or damage to the components. Ensure you have the following tools on hand:
- Socket set for removing bolts
- Torque wrench to ensure proper tightness
- Grease gun for lubricating the joint
3. Neglecting to Follow Manufacturer Specifications
Each golf cart model may have specific requirements for CV joint replacement. Always refer to the manufacturer’s manual for guidelines on:
- Recommended torque settings
- Type of grease to use
- Proper alignment procedures
4. Rushing the Installation
Taking your time during the installation process is vital. Rushing can lead to mistakes such as:
- Improper alignment of the joint
- Missing critical steps in the assembly
- Forgetting to secure all bolts
5. Failing to Test Drive After Replacement
Once the CV joint is replaced, it’s essential to test drive the golf cart. This step helps identify any issues with the installation, such as:
- Unusual noises
- Vibrations during operation
- Difficulty steering
Taking the time to address these common pitfalls will ensure a successful golf cart CV joint replacement, leading to improved performance and longevity of your vehicle.
Choosing the Right Parts for Golf Cart CV Joint Replacement
When it comes to golf cart CV joint replacement, selecting the appropriate components is crucial for ensuring optimal performance and longevity of your vehicle. The CV joint plays a vital role in transferring power from the engine to the wheels, allowing for smooth movement and steering. Here’s a guide to help you make informed decisions when sourcing parts for this essential repair.
Understanding the Components
Before purchasing, it’s essential to understand the specific parts involved in a CV joint assembly. Key components include:
- CV Joint Boot: Protects the joint from dirt and debris.
- CV Joint Housing: Houses the internal components and ensures stability.
- Grease: Lubricates the joint for smooth operation.
- Snap Rings: Keep the joint secured in place.
Quality vs. Cost
When choosing parts, it’s tempting to go for the cheapest option. However, quality should be a priority. Low-quality components may save you money initially but can lead to frequent replacements and increased repair costs in the long run. Look for parts from reputable manufacturers that offer warranties. Brands like Golf Cart King and Genuine Yamaha Parts are known for their reliable products.
Compatibility Considerations
Ensure that the parts you select are compatible with your specific golf cart model. Different brands and models may have unique specifications. Check the following:
- Model Year: Ensure parts are designed for your golf cart’s production year.
- Make and Model: Different manufacturers may have distinct designs.
- OEM vs. Aftermarket: Decide whether you want original equipment manufacturer (OEM) parts or high-quality aftermarket alternatives.
Seeking Professional Advice
If you are uncertain about which parts to purchase, consider consulting with a professional mechanic or a golf cart specialist. They can provide insights based on their experience and help you avoid common pitfalls in part selection.

Where to Purchase Parts
You can find golf cart CV joint replacement parts at various retailers. Some options include:
- Local Golf Cart Dealers: Often have OEM parts readily available.
- Online Retailers: Websites like Amazon or specialized golf cart parts stores offer a wide selection.
- Auto Parts Stores: Many carry aftermarket options that may fit your needs.
By taking the time to choose the right parts for your golf cart’s CV joint replacement, you’ll enhance your vehicle's reliability and performance, ensuring many enjoyable rounds of golf ahead.
We truly value your thoughts and insights! If you have any questions or opinions about Golf Cart CV Joint Replacement, we warmly invite you to share them in the comments below. Your experiences and perspectives not only enrich our community but also help others who may be navigating similar challenges. Let’s keep the conversation going—your voice matters!
Leave a Reply