
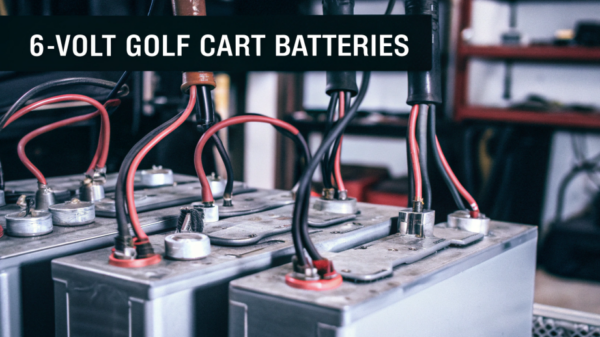
In this article, readers will discover essential golf cart wiring advice that enhances performance and ensures reliability. From understanding the basics of electrical connections for golf carts to troubleshooting common issues, these wiring strategies will help you maintain your vehicle effectively. Whether you're a novice or an experienced owner, these electrical setup recommendations will provide valuable insights for optimal operation.
Understanding the Basics of Golf Cart Electrical Wiring
When delving into the world of golf cart electrical systems, it’s crucial to grasp the fundamental components and their functions. Understanding these basics will empower you to maintain, troubleshoot, and enhance the performance of your golf cart effectively.
Key Components of Golf Cart Electrical Wiring
A golf cart's electrical system consists of several essential parts that work together seamlessly. Familiarizing yourself with these components can help you make informed decisions regarding upgrades and repairs.
- Batteries: Typically, golf carts are powered by 6-volt, 8-volt, or 12-volt lead-acid batteries. Understanding the configuration and capacity is vital for optimal performance.
- Controller: The controller regulates the power flow from the batteries to the motor, influencing speed and acceleration.
- Motor: Electric motors convert electrical energy into mechanical energy, propelling the cart forward.
- Wiring Harness: This collection of wires connects all electrical components, ensuring they communicate effectively.
- Fuse and Circuit Breaker: These safety devices protect the electrical system from overloads and short circuits.
Wiring Basics: Color Codes and Connections
Understanding color codes in wiring is essential for any electrical work on your golf cart. Each color typically represents a specific function:
- Red: Positive connections
- Black: Negative connections
- Green: Ground connections
- Yellow: Power connections to accessories
Properly identifying these wires ensures that connections are made correctly, minimizing the risk of short circuits or component damage.
Common Wiring Issues to Watch For
While golf cart electrical systems are generally reliable, certain issues can arise. Here are some common wiring problems to look out for:
- Corroded Connections: Moisture can lead to corrosion, which impedes electrical flow.
- Frayed Wires: Wear and tear can expose wiring, posing a safety hazard.
- Loose Connections: Ensure all connections are secure to prevent intermittent power loss.
Maintaining the integrity of your golf cart's electrical wiring is essential for its performance and longevity. By understanding these basic concepts and components, you can take proactive steps to ensure your golf cart operates smoothly and efficiently, enhancing your overall golfing experience.
Common Electrical Issues in Golf Carts and Their Solutions
Golf carts, like any other vehicle, can experience electrical issues that may hinder their performance. Understanding these common problems and their solutions is crucial for maintaining your cart's efficiency. Here, we delve into prevalent electrical issues and provide practical solutions to keep your golf cart running smoothly.
1. Battery Drain
One of the most frequent problems faced by golf cart owners is battery drain. This can occur due to various reasons, including:
- Age of the Batteries: Older batteries may not hold a charge effectively.
- Overuse: Continuous use without adequate charging can lead to depletion.
- Faulty Charger: A malfunctioning charger can fail to recharge the batteries properly.
Solution:
To address battery drain, regularly check the age and condition of your batteries. Consider upgrading to high-quality golf cart batteries, such as the Trojans T-105, which are known for their longevity and performance. Ensure your charger is functioning correctly, and always charge your batteries after use.
2. Electrical Short Circuits
Electrical shorts can cause various issues, including sudden power loss or malfunctioning components. Common causes include:
- Damaged Wiring: Frayed or exposed wires can lead to shorts.
- Moisture: Water exposure can cause electrical components to short out.
Solution:
Inspect the wiring for any signs of wear or damage. Use waterproof connectors and sealants to protect against moisture. If you encounter a short circuit, it may be necessary to replace the damaged wiring or consult a professional for repairs.
3. Inconsistent Lighting
If the lights on your golf cart flicker or do not work, it may indicate an electrical issue. Possible causes include:
- Loose Connections: Poor connections can lead to inconsistent power.
- Burnt Out Bulbs: Regular wear and tear can cause bulbs to fail.
Solution:
Check all connections to ensure they are tight and free from corrosion. Replace any burnt-out bulbs with reliable options, such as LED bulbs, which offer better longevity and energy efficiency.
4. Slow or Unresponsive Acceleration
If your golf cart is slow to accelerate or feels unresponsive, it could be an electrical issue related to the controller or throttle. Common causes include:
- Faulty Controller: The speed controller may not be functioning correctly.
- Throttle Issues: Problems with the throttle sensor can lead to acceleration issues.
Solution:
Test the controller and throttle system for faults. If necessary, replace the speed controller with a model compatible with your golf cart, such as the Curtis 1206M, known for its reliability and performance.
5. Charging Problems
If your golf cart fails to charge or shows a slow charging rate, this can be frustrating. Common reasons include:
- Defective Charger: An unreliable charger may not supply adequate power.
- Battery Issues: Weak or failing batteries can affect charging.
Solution:
Test the charger with a multimeter to ensure it is delivering the correct voltage. If the charger is defective, consider replacing it with a high-quality option like the DPI Accusense, which provides efficient charging. Additionally, check the batteries and replace any that are no longer holding a charge.
By addressing these common electrical issues proactively, you can enhance your golf cart's performance and longevity. Regular maintenance and timely repairs are key to ensuring your golf cart remains in top condition.
Essential Tools for Golf Cart Electrical Wiring Repairs
When it comes to maintaining your golf cart, having the right tools for electrical wiring repairs is crucial. These tools not only ensure that your repairs are done effectively but also enhance the longevity and performance of your golf cart. Here’s a detailed list of essential tools you should consider for golf cart electrical wiring tasks.
1. Wire Strippers
Wire strippers are indispensable for any electrical work. They allow you to remove insulation from electrical wires without damaging the wire itself. Look for models that offer adjustable settings for various wire gauges, such as the Klein Tools 11063, which typically retails for around $24.99.
2. Multimeter
A multimeter is essential for diagnosing electrical issues. It measures voltage, current, and resistance, helping you identify problems in the wiring system. The Fluke 117 Electrician’s Multimeter, priced at approximately $199.99, is a reliable choice for accurate readings.
3. Soldering Iron
For secure connections, a soldering iron is necessary. It allows you to solder wires together, ensuring a solid and lasting bond. The Weller WLC100 40-Watt Soldering Station, available for about $49.99, is a popular option among DIY enthusiasts.
4. Heat Shrink Tubing
Using heat shrink tubing can protect and insulate your wiring repairs. This tubing shrinks when heated, creating a waterproof seal around connections. You can find a variety pack of heat shrink tubing for approximately $15.99, which is suitable for various applications.
5. Electrical Tape
Electrical tape is a must-have for insulating and securing electrical connections. It comes in different colors and sizes, allowing for easy identification of wires. A standard roll of 3M Electrical Tape typically costs around $5.99.
6. Crimping Tool
A crimping tool is essential for connecting terminals and connectors to wires. The Klein Tools 3005CR, priced at approximately $22.99, is an excellent choice for making reliable connections.
Bonus Tools
While the tools listed above are fundamental, consider adding these to your toolkit for comprehensive repairs:
- Wire Connectors: Useful for joining wires without soldering.
- Safety Goggles: Protect your eyes while working on electrical components.
- Gloves: Insulated gloves can prevent electrical shocks.
Equipping yourself with these essential tools for golf cart electrical wiring repairs will not only streamline the repair process but also enhance your ability to maintain optimal performance in your golf cart.
Step-by-Step Guide to Wiring a Golf Cart Battery System
Wiring a golf cart battery system correctly is essential for optimal performance and longevity. This guide will walk you through the process in a straightforward manner, ensuring you have the knowledge to tackle this task with confidence.
Tools and Materials Needed
Before starting, gather the following tools and materials:
- Wrenches and socket set
- Cable connectors
- Battery cables (6 AWG or 4 AWG recommended)
- Multimeter
- Wire brush
- Safety goggles and gloves
Step 1: Safety First
Always prioritize safety when working with batteries. Wear safety goggles and gloves to protect yourself from acid spills and electrical shocks. Ensure the golf cart is turned off, and disconnect any power sources before proceeding.
Step 2: Identify Battery Configuration
Determine if your golf cart uses a series or parallel battery configuration. Most electric golf carts use six 6-volt batteries in series for a total of 36 volts or four 12-volt batteries in series for 48 volts. Understanding your setup is crucial for proper wiring.
Series Configuration
- Connect the positive terminal of the first battery to the negative terminal of the second battery.
- Continue this pattern until all batteries are connected.
- The last battery's positive terminal will be your output, while the first battery's negative terminal will serve as the ground.
Parallel Configuration
- Connect all positive terminals together.
- Connect all negative terminals together.
- This configuration maintains the voltage while increasing capacity.
Step 3: Clean Battery Terminals
Use a wire brush to clean the terminals of each battery. This ensures a solid connection, which is vital for efficient power transfer. Remove any corrosion that may impede electrical flow.
Step 4: Connect Battery Cables
Using the appropriate gauge battery cables, connect the batteries based on your configuration. For example:
- In a series setup, use a cable to connect the positive terminal of one battery to the negative terminal of the next.
- In a parallel setup, use cables to connect all positive terminals and another set for the negative terminals.
Ensure all connections are tight and secure to avoid resistance and potential overheating.
Step 5: Testing the System
After wiring the batteries, use a multimeter to test the voltage output. This step is crucial to ensure everything is functioning as expected.
- Set the multimeter to the appropriate voltage range.
- Check the voltage at the output terminals. For a 36-volt system, you should read around 36 volts, and for a 48-volt system, approximately 48 volts.
If the readings are incorrect, double-check your connections.
Step 6: Final Checks and Maintenance
Once everything is connected and tested, perform a final inspection:
- Ensure all connections are tight and free of corrosion.
- Check that the batteries are securely mounted to prevent movement during operation.
- Regularly inspect the system for signs of wear or corrosion, as this can impact performance.
By following this step-by-step guide, you can successfully wire your golf cart battery system, ensuring reliable operation and longevity. These essential golf cart electrical wiring tips will help you maintain optimal performance for your cart.
Safety Precautions for Golf Cart Electrical Wiring Projects
When embarking on golf cart electrical wiring projects, adhering to strict safety precautions is paramount. These measures not only ensure personal safety but also contribute to the longevity and performance of your golf cart. Below are essential guidelines to follow.
Personal Safety Gear
Before starting any electrical work, equip yourself with the right personal protective equipment (PPE). This includes:
- Safety glasses: Protect your eyes from debris and accidental sparks.
- Insulated gloves: Prevent electric shocks while handling wires.
- Non-slip footwear: Reduce the risk of slipping while working on uneven surfaces.
Proper Workspace Preparation
Creating a safe workspace is crucial. Ensure the following:
- Clear area: Remove any clutter or obstacles that could lead to accidents.
- Good lighting: Adequate illumination helps in spotting potential hazards and makes wiring tasks easier.
- Dry environment: Avoid working in wet conditions to minimize the risk of electric shock.
Electrical Safety Measures
When working with electrical components, it is essential to observe strict safety protocols:
- Disconnect the battery: Always disconnect the battery before starting any wiring project to prevent accidental short circuits.
- Use a multimeter: Test for voltage and ensure that circuits are de-energized before handling wires.
- Follow color codes: Adhere to standard wiring color codes to avoid confusion and potential errors.
Handling Tools and Equipment
Proper handling of tools can prevent injuries and ensure efficient work:
- Use insulated tools: Opt for tools with insulated handles to reduce the risk of electrical shock.
- Keep tools organized: Store tools in a designated area to avoid tripping hazards.
- Inspect tools regularly: Check for wear and tear to ensure they are in good working condition.

Emergency Preparedness
Being prepared for emergencies can make a significant difference:
- Have a first aid kit: Keep a well-stocked first aid kit accessible in case of minor injuries.
- Know the emergency shutdown procedures: Familiarize yourself with the location and operation of circuit breakers.
- Keep a fire extinguisher nearby: Ensure it is rated for electrical fires to handle any unforeseen situations.
Implementing these safety precautions will enhance the safety and efficiency of your golf cart electrical wiring projects. By focusing on these guidelines, you can ensure a smoother, safer experience while optimizing your golf cart’s performance.
We’d love to hear your thoughts! If you have any questions or insights about Golf Cart Electrical Wiring Tips, please don’t hesitate to share them in the comments. Your experiences and opinions are invaluable to our community, and together, we can enhance our understanding and skills. Let’s keep the conversation going!
Leave a Reply