
In this article, readers will discover a comprehensive overview of golf cart controller substitution, including step-by-step instructions and helpful tips for a successful golf cart control unit change. Whether you're a seasoned mechanic or a novice, you'll find valuable insights to guide you through the golf cart controller swap process, ensuring your vehicle operates at its best.
- Understanding the Role of Golf Cart Controllers in Performance
- Signs That Indicate You Need a Golf Cart Controller Replacement
- Step-by-Step Guide to Golf Cart Controller Replacement
- Choosing the Right Replacement Controller for Your Golf Cart
- Common Issues After Golf Cart Controller Replacement and How to Fix Them
Understanding the Role of Golf Cart Controllers in Performance

Golf cart controllers play a pivotal role in determining how well your cart performs. These devices serve as the brain of the golf cart, managing the electrical flow from the battery to the motor. By understanding their function, you can make informed decisions about upgrades and replacements, ultimately enhancing your golf cart's efficiency and responsiveness.
Key Functions of Golf Cart Controllers
Golf cart controllers are responsible for several critical tasks that directly affect performance:
- Speed Regulation: Controllers adjust the voltage sent to the motor, allowing for smooth acceleration and deceleration.
- Direction Control: They facilitate forward and reverse movements, enabling seamless transitions based on driver input.
- Energy Management: Controllers optimize battery usage, extending the lifespan of your batteries and enhancing overall performance.
- Regenerative Braking: Some advanced controllers can channel energy back to the batteries during braking, increasing efficiency.
Types of Golf Cart Controllers
There are generally two types of controllers used in golf carts: DC (Direct Current) and AC (Alternating Current). Each type has its unique features and benefits:
DC Controllers
- More commonly found in older models.
- Generally less expensive, making them a popular choice for budget-conscious users.
- Offer basic speed and torque control.
AC Controllers
- Found in newer, high-performance golf carts.
- Provide smoother acceleration and better torque management.
- Can support advanced features like regenerative braking and improved energy efficiency.
Impact on Performance and Efficiency
The choice of golf cart controller can significantly influence your cart's performance:
- Acceleration: A high-quality controller allows for quicker acceleration, enhancing the driving experience.
- Top Speed: Controllers can unlock higher top speeds, making your golf cart more competitive on the course.
- Battery Life: Efficient controllers help conserve battery power, leading to longer rides between charges.
Investing in the right controller can lead to noticeable improvements in your golf cart's handling and efficiency. Whether you're looking to replace an old controller or upgrade for better performance, understanding these components is essential for maximizing your golf cart experience.
Signs That Indicate You Need a Golf Cart Controller Replacement
Identifying the need for a golf cart controller replacement can significantly enhance your cart's performance and longevity. Below are some key indicators that may suggest it’s time to consider a replacement for your golf cart controller.
1. Unresponsive Acceleration
If your golf cart struggles to accelerate or responds sluggishly when pressing the pedal, this may indicate a failing controller. A properly functioning controller should provide smooth and immediate acceleration.
2. Intermittent Power Loss
Experiencing sudden power losses while driving can signal that the controller is malfunctioning. If your cart unexpectedly cuts off, especially on inclines, it’s essential to investigate the controller's condition.
3. Overheating Issues
Frequent overheating of the controller can lead to significant damage. If you notice that the controller feels excessively hot to the touch, this could be a sign of internal failure, necessitating a replacement.
4. Error Codes or Warning Lights
Modern golf carts often come equipped with diagnostic features. If you see error codes or warning lights on the dashboard, consult your owner's manual. These alerts can provide specific indications of controller issues.
5. Unusual Noises
Listen for any strange sounds, such as clicking or buzzing, coming from the controller. These noises may indicate internal damage or electrical issues that warrant a replacement.
6. Poor Battery Performance
If your golf cart’s battery drains faster than usual, the controller might be at fault. A failing controller can cause the system to draw more power than necessary, leading to decreased battery life.
7. Inconsistent Speed Control
When the speed of your golf cart varies unexpectedly, this inconsistency can often be traced back to a faulty controller. A reliable controller should maintain a steady speed according to your input.
8. Age of the Controller
If your golf cart controller is several years old, it may simply be time for an upgrade. Technology evolves, and newer controllers offer improved efficiency and features.
9. Difficulty in Engaging Reverse Gear
If you experience trouble switching to reverse or if the cart does not engage properly, the controller could be malfunctioning. A smooth transition between forward and reverse is crucial for safe operation.
Recognizing these signs early can prevent more significant issues down the line and ensure your golf cart operates smoothly. If you observe one or more of these symptoms, it may be prudent to explore your options for golf cart controller replacement.
Step-by-Step Guide to Golf Cart Controller Replacement
Replacing the controller in your golf cart can significantly enhance its performance and extend its lifespan. This guide provides a detailed approach to ensure you complete the replacement process efficiently and safely.
Tools and Materials Needed
Before starting the replacement, gather the following tools and materials:
- Socket set (typically 10mm and 12mm sockets)
- Screwdriver set (both Phillips and flathead)
- Multimeter (for electrical testing)
- Replacement controller (specific to your golf cart model)
- Wire connectors and electrical tape
- Safety gloves and goggles
Step 1: Disconnect the Battery
Before you begin any work, safety is paramount. Disconnect the negative terminal of the battery to prevent any electrical shocks. This step ensures that you can work safely without the risk of short circuits.
Step 2: Locate the Controller
The controller is typically found under the seat or beneath the rear compartment, depending on your golf cart model. For Club Car models, refer to your owner's manual to find the club car controller location for specific instructions on locating the controller.
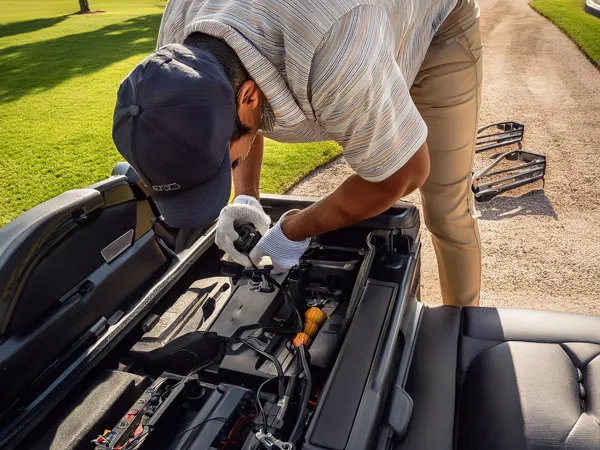
Step 3: Remove the Old Controller
Carefully unscrew the mounting brackets holding the controller in place. Once loose, gently disconnect all wiring harnesses attached to the controller. It’s advisable to label each wire or take a photo for reference during reinstallation.
Step 4: Install the New Controller
Take your new controller and connect the wiring harnesses according to your earlier notes or photos. Ensure that each connection is secure to prevent any operational issues. Once connected, mount the new controller using the screws or brackets you removed earlier.
Step 5: Reconnect the Battery
Once the new controller is securely in place, reconnect the negative terminal of the battery. This step re-establishes the electrical connection necessary for the controller to function.
Step 6: Test the Golf Cart
With everything connected, it’s time to test your golf cart. Turn on the ignition and check the functionality of the accelerator and brakes. If everything operates smoothly, you’ve successfully replaced the controller.
Tips for Successful Replacement
- Always refer to your golf cart's specific manual for wiring diagrams and specifications.
- If you're unsure about any step, consult a professional technician to avoid potential damage.
- Regular maintenance of your golf cart can prevent the need for frequent controller replacements.
By following this step-by-step guide to golf cart controller replacement, you can enhance your cart's performance and enjoy a smoother ride on the course.
Choosing the Right Replacement Controller for Your Golf Cart

When it comes to maintaining or upgrading your golf cart, selecting the right replacement controller is essential for optimal performance and longevity. The controller plays a pivotal role in regulating the power delivered to the motor, affecting speed, acceleration, and overall efficiency. Here’s a guide to help you navigate your options effectively.
Understanding Your Golf Cart's Specifications
Before you start shopping for a replacement controller, it’s crucial to understand your golf cart's specifications. Consider the following aspects:
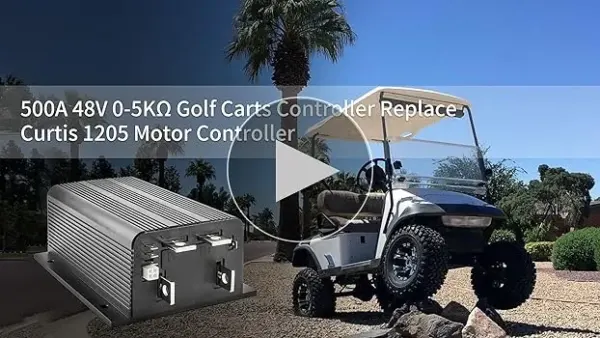
- Voltage Rating: Most golf carts operate on 36V or 48V systems. Ensure that the replacement controller matches your cart's voltage.
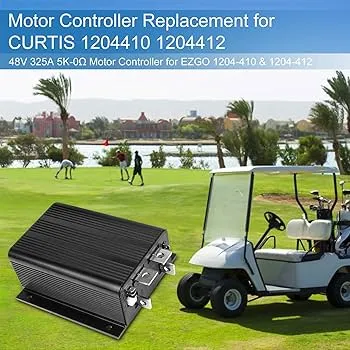
- Motor Compatibility: Verify that the controller is compatible with your cart's motor type, whether it’s a series wound or separately excited motor.
- Current Rating: Check the amperage rating of the controller to ensure it can handle your motor’s demands. A controller with a higher amperage rating can improve performance.
Types of Controllers
There are various types of controllers available, each designed for specific applications. Familiarize yourself with the common types to make an informed decision:
- PWM (Pulse Width Modulation) Controllers: These are energy-efficient and provide smoother acceleration and deceleration.
- AC Controllers: Best suited for high-performance applications, AC controllers offer superior efficiency and power delivery.
- DC Controllers: Common in older models, these controllers are simpler but may lack the efficiency of modern alternatives.
Key Features to Look For
When selecting a replacement controller, certain features can enhance your golf cart's performance:
- Programmable Settings: Some controllers allow you to adjust settings for speed and torque, offering customization based on your driving style.
- Diagnostic Capabilities: Advanced controllers come with built-in diagnostics to help troubleshoot issues quickly.
- Water Resistance: Consider a controller with a water-resistant design if you frequently drive in wet conditions.
Top Recommendations
Here are a few highly regarded replacement controllers that have proven effective for various golf cart models:
- Alltrax XCT Series: Known for its durability and efficiency, the Alltrax XCT series offers programmable features and can handle up to 600 amps, priced around $500.
- Navitas AC Controller: Ideal for performance enthusiasts, this controller provides superior efficiency and power, retailing at approximately $700.
- Adger Golf Cart Controller: A reliable option for basic needs, it supports up to 300 amps and is available for around $300.
By taking into account your golf cart’s specifications, understanding the types of controllers available, and focusing on key features, you can make a well-informed choice. This approach not only enhances your cart's performance but also ensures a seamless driving experience.
Common Issues After Golf Cart Controller Replacement and How to Fix Them
Replacing the controller in your golf cart can significantly enhance its performance, but it may also lead to some common issues. Understanding these challenges and how to address them is essential for maintaining optimal functionality. Below are several issues you might encounter post-replacement, along with effective solutions.
1. Inconsistent Power Delivery
After installing a new controller, you may notice that your golf cart does not deliver power consistently. This can manifest as sudden drops in speed or erratic acceleration.
Solution:
- Check Wiring Connections: Ensure that all wiring connections are secure and free from corrosion. A loose or corroded connection can lead to intermittent power issues.
- Inspect the Controller Settings: Some controllers come with adjustable settings. Make sure they are configured correctly for your specific golf cart model.
2. Overheating Issues
A common problem following a controller replacement is overheating, which can damage both the controller and the motor.
Solution:
- Ventilation: Ensure that the controller is installed in a well-ventilated area. If it’s enclosed, consider adding ventilation holes or relocating it.
- Check Current Draw: Use a multimeter to monitor the current draw. If it exceeds the manufacturer's specifications, further investigation into the motor and battery condition may be necessary.
3. Error Codes Displayed
Many modern controllers are equipped with diagnostic systems that display error codes when something goes wrong. If your cart shows a fault code, it can indicate specific issues.
Solution:
- Refer to the Manual: Each controller will have its own set of error codes. Consult the user manual to interpret the codes and follow the recommended troubleshooting steps.
- Reset the Controller: Sometimes, simply resetting the controller can clear error codes. Follow the manufacturer's reset procedure to see if this resolves the issue.
4. Battery Drain Problems
Post-replacement, you might experience faster battery drain, leading to shorter run times.
Solution:
- Check for Short Circuits: Inspect all connections for potential short circuits, which can cause excessive battery drain.
- Battery Condition: Ensure that your batteries are in good condition and fully charged. Old or damaged batteries can exacerbate drain issues.
5. Reduced Speed or Performance
If your golf cart is not reaching the expected speeds after a controller swap, this could indicate a compatibility issue.
Solution:
- Verify Compatibility: Double-check that the new controller is compatible with your golf cart model. Using an incompatible controller can lead to performance issues.
- Calibration: Some controllers may require calibration after installation. Refer to the user manual for instructions on how to calibrate the controller for optimal performance.
By being aware of these potential issues and their solutions, you can ensure that your golf cart operates smoothly after a controller replacement. Regular maintenance and attention to detail will help you enjoy a reliable and efficient ride.
We value your thoughts and insights, so we warmly invite you to share your opinions or any questions you may have about Golf Cart Controller Replacement in the comments below. Your perspective is important, and engaging in this discussion can help us all gain a deeper understanding of the topic. Whether you're a seasoned expert or just starting out, your contributions can make a difference. We look forward to hearing from you!
Leave a Reply