
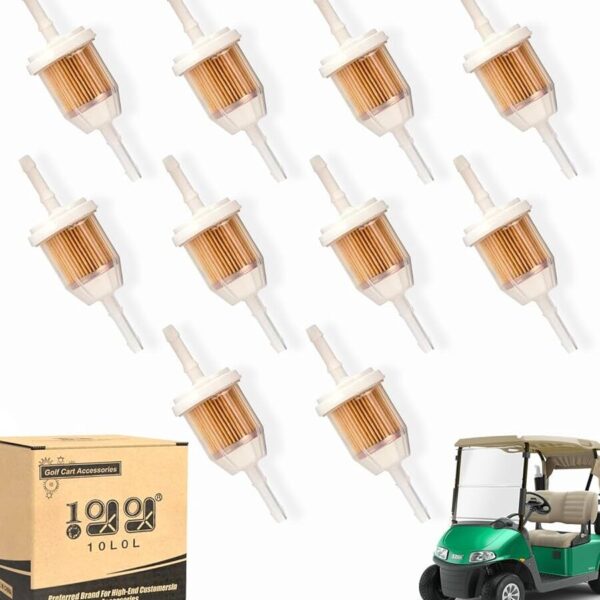
This article provides a comprehensive overview of golf cart fuel filter replacement, detailing the importance of maintaining this crucial component for optimal performance. Readers will discover step-by-step instructions for performing a golf cart fuel filter swap, along with tips on selecting the right filter and troubleshooting common issues. Whether you're a novice or experienced owner, this guide will enhance your understanding of fuel filter maintenance for golf carts.
- Understanding the Importance of Golf Cart Fuel Filter Replacement
- Step-by-Step Guide to Replacing Your Golf Cart Fuel Filter
- Signs That Indicate It's Time for a Fuel Filter Change in Your Golf Cart
- Choosing the Right Fuel Filter for Your Golf Cart Model
- Common Mistakes to Avoid During Golf Cart Fuel Filter Replacement
Understanding the Importance of Golf Cart Fuel Filter Replacement
Maintaining your golf cart’s performance is essential for an enjoyable golfing experience, and one critical aspect of this maintenance is the timely replacement of the fuel filter. A clean fuel filter ensures that the engine receives a steady flow of clean fuel, preventing potential issues that could hinder your cart’s operation.
Why the Fuel Filter Matters
The fuel filter serves as the first line of defense against contaminants in the fuel system. Here are some key reasons why regular fuel filter replacement is crucial:
- Prevents Engine Damage: Dirt and debris can enter the engine, causing wear and tear that can lead to costly repairs.
- Improves Fuel Efficiency: A clogged filter restricts fuel flow, making the engine work harder and reducing overall fuel efficiency.
- Enhances Performance: A clean fuel filter helps maintain optimal engine performance, ensuring smooth acceleration and power delivery.
Signs It’s Time for a Replacement
Recognizing when to replace the fuel filter can save you from more significant issues down the road. Look for these indicators:
- Difficulty Starting: If your golf cart struggles to start or takes longer than usual, it might be time for a new filter.
- Reduced Power: A noticeable decrease in acceleration or power can signal a clogged filter.
- Unusual Noises: Hearing strange noises from the engine can indicate fuel flow issues linked to a dirty filter.
Recommended Replacement Schedule
To maintain optimal performance, it's advisable to replace the fuel filter based on your golf cart's usage. A general guideline includes:
- Every 100 hours of operation: For regular users, this is a good benchmark to follow.
- Annually: If you use your golf cart seasonally, an annual replacement can help keep it in top shape.
Regularly replacing the fuel filter is an essential practice for ensuring your golf cart operates efficiently and reliably. By staying proactive about maintenance, you can enjoy uninterrupted rides on the course while maximizing your cart's lifespan.
Step-by-Step Guide to Replacing Your Golf Cart Fuel Filter
Replacing the fuel filter in your golf cart is essential for maintaining optimal performance and ensuring that your vehicle runs smoothly. This step-by-step guide will walk you through the process, making it easy and efficient.
Tools and Materials You Will Need
Before starting, gather the following tools and materials to ensure a seamless replacement process:
- New fuel filter: Choose a high-quality filter compatible with your golf cart model, such as the EZGO 70026-G01 or Yamaha G22 Fuel Filter, typically priced around $10-$20.
- Wrench set: A variety of sizes to remove any bolts securing the filter.
- Fuel line disconnect tool: Useful for easily detaching the fuel lines.
- Shop rags: For cleaning up any spills and maintaining a tidy workspace.
- Safety goggles: To protect your eyes during the process.
Step 1: Safety First
Before beginning the replacement, ensure that your golf cart is parked on a level surface and the ignition is turned off. Disconnect the battery to prevent any electrical issues or accidental starts.
Step 2: Locate the Fuel Filter
Identify the location of the fuel filter in your golf cart. Typically, it is found along the fuel line, near the engine compartment. Refer to your owner's manual if you need assistance in pinpointing its exact location.
Step 3: Remove the Old Fuel Filter
Using the wrench, carefully loosen the bolts or clamps securing the old fuel filter. If applicable, use the fuel line disconnect tool to detach the fuel lines. Be prepared for a small amount of fuel spillage, so keep the shop rags handy.
Step 4: Install the New Fuel Filter
Take your new fuel filter and ensure it is oriented correctly, matching the flow direction indicated on the filter itself. Attach the fuel lines securely and tighten any clamps or bolts that were removed.
Step 5: Reconnect the Battery and Test
Once the new fuel filter is in place, reconnect the battery. Start your golf cart and let it idle for a few minutes. Check for any leaks around the new filter to ensure a proper seal.
Step 6: Clean Up
After confirming that everything is functioning correctly, clean any spilled fuel with the shop rags and dispose of them properly. Store your tools safely for future maintenance tasks.
By following this step-by-step guide to replacing your golf cart fuel filter, you ensure your vehicle continues to perform at its best, allowing for enjoyable and efficient rides on the course. Regular maintenance, including timely fuel filter replacement, is key to prolonging the life of your golf cart.
Signs That Indicate It's Time for a Fuel Filter Change in Your Golf Cart
Recognizing when to change your golf cart's fuel filter is crucial for maintaining optimal performance. A clean fuel filter ensures that your engine runs smoothly and efficiently. Here are some key indicators that it may be time for a replacement.
1. Reduced Engine Performance
If you notice a decrease in your golf cart's power or sluggish acceleration, it could be a sign that the fuel filter is clogged. A restricted fuel flow can hinder engine performance, making it difficult for your cart to reach its full potential.
2. Difficulty Starting the Engine
Struggling to start your golf cart can often be attributed to a failing fuel filter. If the engine turns over but doesn’t start, it may not be receiving enough fuel due to a blockage in the filter.
3. Unusual Engine Sounds
Listen for any strange noises coming from the engine. If you hear sputtering or backfiring, this could indicate that the fuel filter is not allowing adequate fuel to flow, leading to inconsistent engine performance.
4. Frequent Fuel Pump Issues
If you find yourself frequently replacing the fuel pump, a dirty or clogged fuel filter might be the underlying cause. A compromised filter can put extra strain on the pump, leading to premature failure.
5. Fuel Smell or Leaks
A noticeable fuel odor around your golf cart or visible leaks can indicate that the fuel filter is compromised. If the filter is not effectively containing fuel, it may need immediate replacement to prevent potential hazards.
Regular Maintenance Tips
To ensure the longevity of your golf cart's fuel system, consider the following maintenance tips:
- Check the fuel filter every 100 hours of operation.
- Replace the filter as part of your annual golf cart maintenance routine.
- Use high-quality fuel to reduce contaminants that may clog the filter.
Staying vigilant for these signs can help you maintain your golf cart's performance and prolong its lifespan. By addressing fuel filter issues promptly, you can ensure a smooth and enjoyable ride on the course.
Choosing the Right Fuel Filter for Your Golf Cart Model
Selecting the appropriate fuel filter for your golf cart is crucial for maintaining optimal performance and longevity. With various models on the market, understanding your specific needs can make a significant difference. Here’s how to ensure you choose the right fuel filter tailored to your golf cart model.
Understand Your Golf Cart Model
Before purchasing a fuel filter, it’s essential to identify your golf cart’s make and model. Different models often require specific filters that match their engine design and fuel system. Check your owner’s manual or consult with a local dealer for the exact specifications.
Types of Fuel Filters
Golf cart fuel filters typically fall into two categories: inline filters and cartridge filters. Each type has its advantages:
- Inline Filters: These are easy to install and can be placed anywhere along the fuel line. They are suitable for most golf cart models and are effective in preventing debris from entering the engine.
- Cartridge Filters: Usually found in more complex fuel systems, these filters may require more effort to replace but offer superior filtration capabilities.
Filter Size and Compatibility
When selecting a fuel filter, consider both the size and compatibility with your engine. A filter that is too large or too small can disrupt fuel flow, leading to performance issues. Look for filters specifically designed for your golf cart model. For instance, the EZGO TXT 1994-2013 Fuel Filter is designed for a seamless fit, ensuring efficient filtration without compromising fuel delivery.
Quality and Brand Reputation
Opt for fuel filters from reputable brands known for their durability and performance. Filters like Golf Cart King Fuel Filter are often recommended for their reliability and efficiency. Investing in a high-quality filter can save you from frequent replacements and potential engine problems.
Replacement Frequency
Regular maintenance is key to ensuring your golf cart runs smoothly. Depending on usage, it’s advisable to replace the fuel filter every 2 to 3 years or as specified by the manufacturer. Signs that it may be time for a replacement include decreased engine performance, hard starting, or unusual noises during operation.
By understanding your golf cart model and the different types of fuel filters available, you can make an informed decision that enhances your golf cart's performance. Prioritize quality and compatibility to ensure that your golf cart runs efficiently for years to come.
Common Mistakes to Avoid During Golf Cart Fuel Filter Replacement
When undertaking the essential task of replacing your golf cart's fuel filter, it’s important to be aware of common pitfalls that can lead to performance issues or damage. Here are some key mistakes to avoid to ensure a smooth and effective fuel filter replacement.
1. Ignoring the Manufacturer's Specifications
Always consult your golf cart's owner manual for specific instructions regarding fuel filter replacement. Failing to follow these guidelines can result in using the wrong filter type, which may not fit properly or function effectively.
2. Skipping the Fuel System Depressurization
Before replacing the fuel filter, depressurizing the fuel system is crucial. Neglecting this step can lead to fuel spills and create a hazardous environment. To depressurize, locate the fuel pump fuse and remove it while running the engine until it stalls.
3. Overlooking the Fuel Line Condition
While replacing the fuel filter, inspect the fuel lines for cracks or wear. A damaged line can cause leaks, which may compromise the entire fuel system. If you notice any issues, replace the fuel line along with the filter.
4. Not Using Proper Tools
Using the right tools is essential for a successful replacement. A fuel line disconnect tool can help you safely remove and replace the filter without damaging the lines. Additionally, a wrench or socket set is often required to secure the filter in place.
5. Forgetting to Check for Leaks
After installation, it's vital to check for leaks. Start your golf cart and inspect the area around the new filter. If you notice any fuel seeping, turn off the engine immediately and reassess your connections.
6. Rushing the Installation Process
Take your time during the replacement process. Rushing can lead to mistakes such as cross-threading bolts or improperly securing connections. Careful attention to detail ensures that the filter is installed correctly, contributing to optimal performance.
7. Not Cleaning the Area
Before starting the replacement, clean the area around the fuel filter. Dust and debris can contaminate the fuel system during the process, leading to potential engine issues. A clean workspace minimizes the risk of introducing foreign particles into the fuel system.

Final Thoughts
Avoiding these common mistakes can greatly enhance the effectiveness of your golf cart fuel filter replacement. By ensuring adherence to guidelines, using the correct tools, and taking your time, you can maintain your golf cart’s performance and longevity.
We would love to hear your thoughts and questions about Golf Cart Fuel Filter Replacement! Your insights and inquiries not only enrich our community but also help others who may be navigating similar concerns. Please feel free to share your experiences or any specific queries you might have in the comments below—your voice is valuable, and together, we can enhance our understanding of this important topic. Thank you for being a part of our conversation!
Leave a Reply