

This article provides a comprehensive guide on replacing golf cart drive belts, offering clear, step-by-step instructions to help you through the process. You will discover essential tools needed, safety tips, and detailed methods for changing golf cart drive belts effectively. Whether you're a beginner or have some experience, this resource will equip you with the knowledge required for swapping out golf cart drive belts with confidence.
Understanding the Importance of Golf Cart Drive Belts
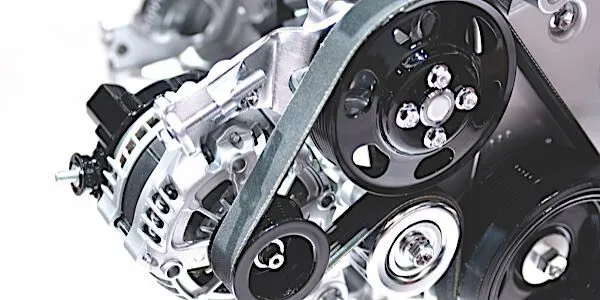
When it comes to maintaining the efficiency and performance of your golf cart, drive belts play a crucial role. These components are essential for transferring power from the engine to the wheels, ensuring a smooth and effective ride. Understanding their importance can help you keep your golf cart in top condition and extend its lifespan.
Key Functions of Golf Cart Drive Belts
Golf cart drive belts serve several important functions:
- Power Transmission: Drive belts connect the engine to the transmission, allowing the vehicle to move. A well-functioning belt ensures that power is effectively transferred, which is vital for performance.
- Acceleration Control: These belts help regulate acceleration. A worn or damaged belt can lead to sluggish performance, making it difficult to achieve the desired speed.
- Noise Reduction: Properly functioning drive belts can minimize engine noise and vibrations, leading to a more comfortable riding experience.
Signs of Worn or Damaged Drive Belts
Recognizing the signs of wear can help you address issues before they escalate. Look for:
- Cracks or Fraying: Inspect the belt for visible damage, such as cracks or frayed edges, which can indicate it's time for a replacement.
- Squeaking Sounds: A squeaking noise when accelerating can be a sign that the belt is slipping or worn out.
- Sluggish Performance: If your golf cart struggles to accelerate or feels less responsive, it may be due to a failing drive belt.
Maintaining Your Golf Cart Drive Belts
To ensure your golf cart runs smoothly, regular maintenance is key. Consider the following tips:
- Routine Inspections: Regularly check the drive belts for signs of wear and tear.
- Proper Tension: Ensure that the belts are properly tensioned to avoid slipping and excessive wear.
- Use Quality Replacement Parts: When it's time to replace the belts, opt for high-quality products like the Gates PowerGrip Belt, which typically retails around $30, known for its durability and performance.
Understanding the role of golf cart drive belts and maintaining them can significantly enhance your cart's performance and reliability. By recognizing signs of wear and taking proactive measures, you can enjoy a smoother, more efficient ride.
Tools and Materials Needed for Replacing Golf Cart Drive Belts
When undertaking the task of replacing golf cart drive belts, having the right tools and materials on hand is essential for a smooth and efficient process. Below is a comprehensive list of what you will need to successfully complete this maintenance task.
Essential Tools
To ensure you can effectively remove and install the drive belts, gather the following tools:
- Socket Wrench Set: A variety of socket sizes (typically 10mm to 14mm) will be necessary to remove bolts securing the drive belt.
- Torque Wrench: This tool helps in applying the correct amount of torque to the bolts during reassembly, ensuring optimal performance.
- Screwdrivers: Both flathead and Phillips screwdrivers are important for removing any covers or components obstructing access to the drive belt.
- Pliers: A pair of pliers may be useful for gripping and pulling components during the removal and installation process.
- Utility Knife: This can be handy for cutting any old or worn belts if they are difficult to remove.
Required Materials
In addition to tools, specific materials are needed to ensure your golf cart runs smoothly after replacing the drive belts:
- Replacement Drive Belts: Ensure you purchase the correct size and type for your golf cart model. Prices typically range from $30 to $70 depending on brand and quality.
- Grease or Lubricant: Applying lubricant to the pulleys can reduce friction and prolong the life of the new drive belt.
- Cleaning Solution: A degreaser can help clean the area around the drive belt, ensuring that no debris interferes with the new installation.
- Rags or Towels: Keep these on hand to wipe down components and clean up any spills during the process.
Optional Tools
While the following tools are not strictly necessary, they can make the job easier:
- Impact Wrench: This tool can speed up the removal of stubborn bolts.
- Alignment Tool: Ensures that the drive belt is correctly aligned, which is crucial for performance and longevity.
Being well-equipped with these tools and materials will facilitate a smoother experience when replacing golf cart drive belts, ensuring you can tackle this task with confidence.
Step-by-Step Guide to Remove the Old Golf Cart Drive Belt

If you're looking to replace your golf cart's drive belt, knowing how to safely remove the old one is crucial. This guide provides clear, actionable steps to help you complete this task efficiently.
Tools and Materials Needed
Before starting, gather the following tools and materials:
- Socket wrench set
- Flathead screwdriver
- Replacement drive belt
- Safety gloves
- Safety goggles
Step 1: Safety First
Ensure the golf cart is turned off and parked on a flat surface. Engage the parking brake to prevent any movement during the process. Wearing safety gloves and safety goggles is recommended to protect yourself from potential hazards.
Step 2: Access the Drive Belt
Locate the engine compartment, typically found under the seat or behind a panel. Use the socket wrench to remove any screws or bolts securing the cover, allowing you to access the drive belt area.
Step 3: Remove the Old Drive Belt
To remove the old drive belt, follow these steps:
- Identify the tensioner pulley and relieve tension by either rotating it or loosening its mounting bolts.
- Once tension is released, carefully slide the belt off the pulleys.
- Inspect the old belt for any signs of wear or damage, which can help inform your choice for the new belt.
Step 4: Prepare for Installation of the New Belt
Before installing the new belt, clean any debris or residue from the pulleys. This will ensure optimal performance and longevity of the new drive belt.
Step 5: Install the New Drive Belt
To install the new belt:
- Route the new belt around the pulleys according to the manufacturer's diagram, ensuring it fits snugly.
- Reapply tension by adjusting the tensioner pulley back to its original position.
- Double-check that the belt is aligned properly on all pulleys.
Step 6: Reassemble and Test
Replace the cover and secure it with screws or bolts. Start the golf cart and observe the belt in action. Listen for any unusual sounds and ensure that the drive belt operates smoothly.
This step-by-step guide to remove the old golf cart drive belt not only helps in the replacement process but also contributes to the overall maintenance of your vehicle. Regular checks and timely replacements can enhance the performance and lifespan of your golf cart.
Installing the New Golf Cart Drive Belt: Tips and Techniques
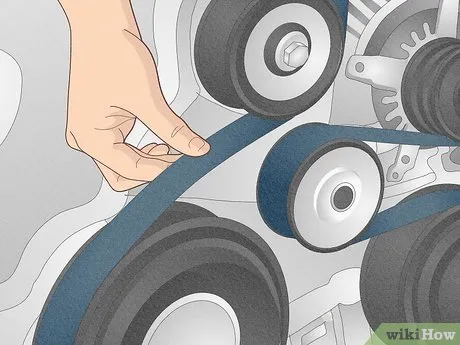
When it comes to maintaining your golf cart, replacing the drive belt is a crucial task that can enhance performance and longevity. This guide offers practical tips and techniques to ensure a smooth installation process.
Gather Your Tools and Materials
Before starting the installation, it’s essential to have the right tools on hand. Here’s a list of items you may need:
- Socket wrench set – for removing bolts
- Screwdrivers – both flathead and Phillips
- Torque wrench – to ensure proper tension
- New drive belt – compatible with your golf cart model
- Safety gloves – to protect your hands
Understanding Your Golf Cart Model
Different golf cart models may have unique requirements for drive belt installation. Familiarize yourself with your specific model's manual to identify any peculiarities or special instructions. Common models include:
- Club Car
- Yamaha
- EZGO
Knowing the layout and components of your golf cart will make the installation process much easier.
Steps for Installation
Follow these steps to successfully replace the drive belt:
1. Prepare the Golf Cart
- Park the golf cart on a flat surface and engage the parking brake.
- Disconnect the battery to prevent any electrical mishaps.
2. Remove the Old Drive Belt
- Access the engine compartment, typically located under the seat.
- Loosen and remove any fasteners or components blocking access to the drive belt.
- Carefully slide the old belt off the pulleys.
3. Install the New Drive Belt
- Position the new belt around the drive and driven pulleys, ensuring it sits properly in the grooves.
- Reassemble any components you previously removed to access the belt.
4. Adjust Tension
- Use a torque wrench to ensure the drive belt is properly tensioned according to your golf cart’s specifications. A loose belt can slip, while an overly tight belt can cause premature wear.
Final Checks
Once the installation is complete, perform these checks:
- Ensure all tools are removed from the engine compartment.
- Reconnect the battery.
- Start the golf cart and listen for any unusual noises, indicating a possible installation issue.
Taking the time to carefully install the new golf cart drive belt can lead to improved performance and a smoother ride. Following these tips and techniques will help you achieve a successful installation while ensuring your golf cart remains in excellent condition.
Common Mistakes to Avoid When Replacing Golf Cart Drive Belts

Replacing golf cart drive belts can enhance performance and prolong the life of your vehicle. However, several common pitfalls can hinder your efforts and lead to complications. Here’s a detailed look at these mistakes to ensure a smooth replacement process.
1. Skipping the Inspection Process
Before you start replacing the drive belt, it’s crucial to inspect the entire drive system. Failing to check for wear on pulleys or other components can lead to recurring issues.
- Look for cracks or fraying on the belt.
- Check for misalignment in the pulleys.
- Examine the tensioner for proper function.
2. Using the Wrong Replacement Parts
Choosing the right drive belt is essential for optimal performance. Always refer to your golf cart's manual to find the correct specifications.
- Verify the belt's size and type—many carts use specific models.
- Consider purchasing OEM parts for better compatibility.
- Compare features and durability ratings when selecting aftermarket options.
3. Neglecting Proper Tension
A common error is not adjusting the tension correctly after installation. An overly tight or loose belt can lead to premature wear or slippage.
Tips for Correct Tension:
- Refer to the manufacturer's guidelines for tension specifications.
- Use a tension gauge to ensure accuracy.
- Check the tension after a short test drive and readjust if necessary.
4. Overlooking Safety Precautions
Safety should always be a priority when working on any vehicle.
- Disconnect the battery to prevent accidental starts.
- Wear protective gloves and goggles to safeguard against debris.
- Ensure the cart is on a stable surface to avoid accidents.

5. Failing to Test After Installation
After replacing the drive belt, testing is essential to confirm everything functions correctly. Skipping this step can result in unexpected failures during use.
- Run the cart at low speed to listen for unusual noises.
- Check for smooth operation without slipping or jerking.
- Monitor for any signs of wear on the new belt shortly after installation.
By being aware of these common mistakes, you can ensure a successful drive belt replacement and maintain your golf cart's performance effectively. Taking the time to follow these guidelines will help you enjoy a smoother ride and extend the lifespan of your vehicle.
We'd love to hear your thoughts and questions about replacing golf cart drive belts! Your insights and inquiries not only enrich our community but also help fellow golf cart enthusiasts navigate this essential maintenance task with confidence. Whether you have tips to share or need clarification on a specific step, please don’t hesitate to drop your comments below. Together, we can make this process smoother and more enjoyable for everyone!
Leave a Reply