
This article offers a detailed golf vehicle alternator maintenance manual designed to enhance your cart's performance. Readers will discover essential tips, step-by-step procedures, and troubleshooting techniques to ensure optimal functionality of their electric vehicles. By following this comprehensive golf cart power supply restoration guide, you can effectively address common issues and prolong the life of your cart’s electrical system.
Understanding the Role of the Alternator in Golf Carts
The alternator is a crucial component in the electrical system of golf carts, responsible for generating electricity to power various systems and recharge the battery. This section delves into its functions, significance, and maintenance, ensuring your golf cart operates efficiently.
What Does the Alternator Do?
The primary role of the alternator in a golf cart includes:
- Generating Electricity: The alternator converts mechanical energy from the engine into electrical energy.
- Charging the Battery: It replenishes the battery's charge while the cart is running, ensuring that the battery remains functional for starting the engine and powering accessories.
- Powering Electrical Components: The alternator supplies power to lights, signals, and other electronic systems, enhancing the overall functionality of the golf cart.
Types of Alternators Used in Golf Carts
Golf carts typically utilize two main types of alternators:
- DC Alternators: Common in older models, these alternators produce direct current and are often simpler in design.
- AC Alternators: More prevalent in modern golf carts, these alternators generate alternating current, which is more efficient for powering various electronic systems.
Importance of the Alternator in Golf Cart Performance
A well-functioning alternator is vital for optimal golf cart performance. Here are some reasons why:
- Battery Longevity: An efficient alternator helps maintain the battery's health by ensuring it stays charged, thus prolonging its lifespan.
- Consistent Power Supply: A reliable alternator guarantees that all electrical components receive the necessary power, preventing malfunctions.
- Fuel Efficiency: By ensuring that the electrical systems operate smoothly, the alternator can contribute to better fuel efficiency in gas-powered carts.
Signs of a Failing Alternator
Identifying issues with the alternator early can save you from costly repairs. Look for these warning signs:
- Dim or Flickering Lights: If the lights on your golf cart are not bright or are flickering, it may indicate alternator problems.
- Electrical Accessories Malfunctioning: Difficulty in operating components like the horn or headlights can signal alternator failure.
- Battery Warning Light: If your cart is equipped with a battery warning light, its illumination could point to an alternator issue.
Maintaining Your Golf Cart’s Alternator
To ensure your alternator functions effectively, consider the following maintenance tips:
- Regular Inspections: Periodically check the alternator for signs of wear or damage.
- Clean Connections: Ensure all electrical connections are clean and free from corrosion to facilitate proper electrical flow.
- Check Voltage Output: Use a multimeter to verify that the alternator is producing the correct voltage, typically between 13.5 to 14.5 volts.
Understanding the alternator's role and maintaining it can greatly enhance your golf cart's performance. Proper care and timely repairs can lead to a more enjoyable and trouble-free golfing experience.
Common Symptoms of a Failing Golf Cart Alternator
Recognizing the signs of a failing golf cart alternator is crucial for maintaining optimal performance. Ignoring these symptoms can lead to more extensive damage and costly repairs. Below are some common indicators that your golf cart's alternator may not be functioning properly.
1. Dimming Lights
One of the first noticeable signs of a malfunctioning alternator is dimming lights. If the headlights or dashboard lights appear to be flickering or losing brightness while driving, it may indicate that the alternator is not generating sufficient power.
2. Difficulty Starting the Cart
If you experience trouble starting your golf cart, it could be a sign of an alternator issue. A failing alternator may not provide enough voltage to the starter motor, making it difficult to crank the engine.
3. Unusual Noises
Listen for any unusual noises coming from the engine compartment. A failing alternator can produce grinding or whining sounds, often due to worn bearings or internal components. These noises are a clear signal that your alternator may require attention.
4. Battery Warning Light
Many golf carts come equipped with a battery warning light on the dashboard. If this light illuminates while driving, it may indicate that the alternator is not charging the battery properly. Ignoring this warning can lead to a complete battery failure.
5. Electrical System Malfunctions
If you notice that various electrical components, such as the horn, wipers, or other accessories, are malfunctioning, it may be due to a failing alternator. Insufficient power output can cause these systems to behave erratically.
6. Burning Smell
A burning smell in your golf cart can indicate overheating components within the alternator. If you detect this odor, it’s essential to inspect the alternator and surrounding parts immediately to prevent further damage.
What to Do If You Experience These Symptoms
If you identify any of these symptoms, consider taking the following steps:
- Check Battery Connections: Ensure that all connections are tight and free of corrosion.
- Inspect the Alternator: Look for any visible signs of damage or wear.
- Consult a Professional: If issues persist, consult a technician experienced in golf cart alternator repair for a thorough evaluation.
Staying proactive about these signs can help you maintain your golf cart's performance and avoid the need for extensive repairs outlined in the Comprehensive Golf Cart Alternator Repair Guide for Optimal Performance.
Step-by-Step Golf Cart Alternator Repair Process
Repairing a golf cart alternator can seem daunting, but with the right guidance, you can tackle it efficiently. This comprehensive golf cart alternator repair guide for optimal performance will walk you through each stage of the repair process.
Gather Your Tools and Materials
Before you begin, ensure you have the following tools and materials ready:
- Wrench set - For removing bolts and connections
- Screwdriver set - To assist in disassembly
- Multimeter - For testing electrical components
- Replacement parts - Such as a new alternator or voltage regulator
- Wire brush - For cleaning corroded connections
- Safety goggles - To protect your eyes during the repair
Step 1: Disconnect the Battery
Safety should always be your first priority. Start by disconnecting the negative terminal of the battery. This prevents any accidental short circuits while you work on the alternator.
Step 2: Remove the Alternator
To access the alternator, follow these sub-steps:
- Locate the alternator, typically found near the engine compartment.
- Remove any belts that are attached to the alternator using your wrench set.
- Unscrew the bolts securing the alternator to its mount and gently lift it out.
Step 3: Inspect the Alternator
Once removed, examine the alternator for any visible signs of damage:
- Check for frayed wires or loose connections.
- Inspect the casing for cracks or corrosion.
- Use the multimeter to test the output voltage; it should read between 13.5 to 14.5 volts.
Step 4: Replace Faulty Components
If your inspection reveals that certain parts are faulty, proceed to replace them:
- For a damaged voltage regulator, carefully unscrew it and install the new one.
- If the alternator itself is defective, replace it with a compatible model, like the EZGO TXT Alternator priced around $150.
Step 5: Reassemble the Alternator
After replacing any faulty components, it’s time to reassemble:
- Reattach the alternator to its mount using the previously removed bolts.
- Reconnect any belts that were removed earlier.
Step 6: Reconnect the Battery and Test
Once everything is securely in place, reconnect the battery:
- Attach the negative terminal back to the battery.
- Start the golf cart and check if the alternator is functioning correctly.
- Use the multimeter again to verify the voltage output.
Following this step-by-step golf cart alternator repair process ensures that your vehicle will operate smoothly, enhancing its overall performance. By understanding the repair process, you can maintain your golf cart in optimal condition and extend its lifespan.
Essential Tools and Parts Needed for Golf Cart Alternator Repairs
When tackling golf cart alternator repairs, having the right tools and parts is crucial for a successful and efficient process. Below, we’ll outline the essential items you’ll need to ensure that your repairs are performed correctly and safely.
Key Tools for Golf Cart Alternator Repairs
To effectively repair the alternator in your golf cart, consider gathering the following tools:
- Socket Set: A complete socket set, including metric and standard sizes, is essential for removing and installing bolts on the alternator.
- Wrench Set: A good set of wrenches will help you access hard-to-reach areas of the alternator.
- Screwdrivers: Both flathead and Phillips screwdrivers are necessary for removing screws and securing components.
- Multimeter: This tool is critical for testing the electrical output of the alternator, ensuring it is functioning correctly.
- Torque Wrench: To ensure that bolts are tightened to the manufacturer’s specifications, a torque wrench is a must-have.
- Pliers: Needle-nose pliers are particularly useful for manipulating wires and connectors.
Essential Parts for Repairing the Alternator
In addition to tools, specific parts may need replacement during the repair process. Here are the essential components to have on hand:
- Replacement Alternator: Choose a quality alternator compatible with your golf cart model, such as the 48V Golf Cart Alternator priced around $150.
- Voltage Regulator: This component helps manage the electrical output; a new voltage regulator can cost about $30.
- Belt: A new drive belt is often necessary if the old one shows signs of wear; expect to pay around $20 for a replacement.
- Wiring Harness: If the wiring is damaged, a new wiring harness, typically around $40, can ensure proper connections.
- Battery: A good battery is crucial for the alternator to function efficiently. Look for a deep-cycle battery, usually priced around $200.
Additional Accessories
In addition to the primary tools and parts, some accessories can enhance your repair experience:
- Safety Glasses: Protect your eyes while working on the electrical components.
- Gloves: A pair of mechanic's gloves can protect your hands from sharp edges and electrical hazards.
- Shop Manual: A repair manual specific to your golf cart model can provide valuable insights and diagrams for the repair process.
By ensuring you have the right tools and parts at your disposal, you can perform golf cart alternator repairs effectively, maintaining the optimal performance of your vehicle. This preparation not only enhances your repair efficiency but also contributes to the longevity of your golf cart.
Preventative Maintenance Tips for Golf Cart Alternators
Maintaining your golf cart alternator is crucial for ensuring a smooth and reliable ride on the course. By following specific preventative maintenance tips, you can enhance the longevity and performance of your alternator, minimizing unexpected breakdowns and costly repairs. Here are some essential strategies to keep your golf cart's electrical system in optimal condition.
Regular Visual Inspections
Performing regular visual inspections of your golf cart's alternator can help you catch potential issues before they escalate. Look for:
- Corrosion: Inspect the terminals and connections for signs of rust or corrosion, which can hinder performance.
- Loose Connections: Ensure that all electrical connections are tight and secure to prevent power loss.
- Physical Damage: Check for any visible damage to the alternator casing or wiring that may affect its operation.
Keep the Battery Charged
A well-charged battery is essential for the alternator to function efficiently. To maintain optimal battery health:
- Regular Charging: Charge your battery regularly, especially if the cart is not used frequently.
- Check Voltage: Use a multimeter to monitor the battery voltage, ensuring it stays within the recommended range (typically 12.6 to 12.8 volts).
Cleanliness Matters
Dirt and debris can impede the performance of your golf cart's alternator. Make sure to:
- Remove Debris: Regularly clean the alternator and surrounding areas to prevent dirt accumulation.
- Use Appropriate Cleaners: Utilize a non-corrosive cleaner to safely remove grime without damaging electrical components.
Monitor Electrical Load
Understanding and managing the electrical load on your golf cart can significantly impact the alternator's efficiency. Consider these tips:
- Avoid Overloading: Ensure that you are not using too many electrical accessories simultaneously, which can strain the alternator.
- Upgrade Wisely: If you need additional electrical features, consider upgrading to a higher-capacity alternator to accommodate the extra load.
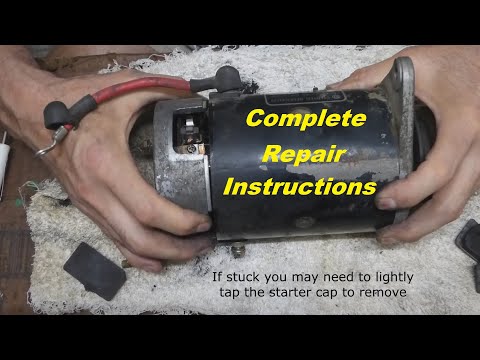
Schedule Professional Maintenance
Regular check-ups by a qualified technician can identify underlying issues that may not be visible during casual inspections. Key services include:
- Wiring Inspection: Have the wiring checked for wear and tear that could lead to electrical failures.
- Alternator Testing: Ensure the alternator is tested for output and performance as part of your routine maintenance.
By implementing these preventative maintenance tips, you can ensure your golf cart's alternator remains in excellent working condition, ultimately enhancing your overall golfing experience. Keeping your alternator well-maintained is a key aspect of the Comprehensive Golf Cart Alternator Repair Guide for Optimal Performance.
We value your thoughts and insights! If you have any opinions, questions, or experiences regarding the Golf Cart Alternator Repair Guide, we warmly invite you to share them in the comments. Your contributions not only enrich our community but also help fellow enthusiasts navigate their own repair journeys. We look forward to hearing from you!
Leave a Reply