
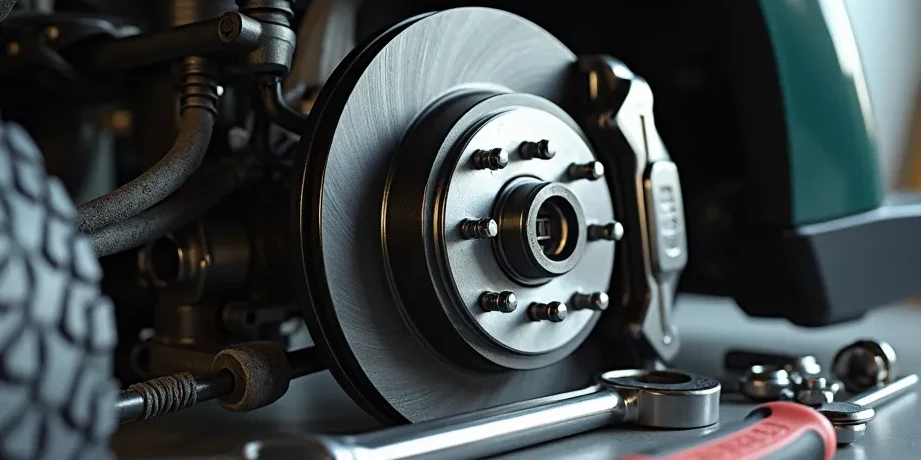
In this article, readers will discover a comprehensive overview of golf cart brake caliper maintenance, including essential tips and techniques for effective golf cart brake caliper restoration. Detailed instructions will guide you through diagnosing issues, sourcing the right parts, and executing repairs to ensure your vehicle operates at peak performance. Whether you're a seasoned mechanic or a beginner, this guide will equip you with the knowledge needed for successful golf cart brake caliper service.
- Understanding the Importance of Golf Cart Brake Caliper Repair
- Common Signs That Your Golf Cart Brake Calipers Need Repair
-
Step-by-Step Guide to Golf Cart Brake Caliper Repair
- Tools and Materials Needed
- Step 1: Safety First
- Step 2: Remove the Wheel
- Step 3: Inspect the Brake Caliper
- Step 4: Disconnect the Brake Caliper
- Step 5: Clean the Area
- Step 6: Install the New Brake Caliper
- Step 7: Reconnect the Brake Line
- Step 8: Refill Brake Fluid
- Step 9: Reattach the Wheel
- Step 10: Test the Brakes
- Tools and Materials Required for Effective Brake Caliper Repair
- Maintenance Tips to Extend the Life of Your Golf Cart Brake Calipers
Understanding the Importance of Golf Cart Brake Caliper Repair
When it comes to maintaining your golf cart, one crucial component that often gets overlooked is the brake caliper. The brake caliper plays a vital role in ensuring your safety and the overall performance of your vehicle. Regular attention to this component can prevent more significant issues down the line.
Why Brake Caliper Functionality Matters
A properly functioning brake caliper is essential for effective braking. Here are some key reasons why you should prioritize golf cart brake caliper repair:
- Safety: The primary function of brake calipers is to clamp down on the brake pads, creating friction that slows or stops the cart. Worn or damaged calipers can lead to decreased braking efficiency, posing safety risks.
- Performance: A malfunctioning caliper can cause uneven wear on brake pads, leading to inconsistent braking performance and potentially damaging other brake components.
- Cost-Effectiveness: Addressing caliper issues early can save you money on more extensive repairs later. Ignoring signs of wear can lead to additional damage that requires costly replacements.
Signs Your Golf Cart Needs Brake Caliper Repair
Recognizing the signs of a failing brake caliper can help you take timely action. Look for the following indicators:
- Unusual Noises: Grinding or squeaking sounds when braking can indicate worn brake pads or caliper issues.
- Pulling to One Side: If your golf cart pulls to one side when braking, it may be a sign of a caliper that is not functioning properly.
- Brake Fluid Leaks: Any visible brake fluid leaks around the caliper can signal that a repair is needed to prevent further complications.
Regular Maintenance and Inspection
Incorporating regular maintenance checks for your golf cart's brake system can enhance its longevity and performance. Consider these practices:
- Conduct visual inspections of the brake calipers and surrounding components.
- Monitor brake fluid levels and check for any signs of leaks.
- Consult with a professional for routine servicing and specialized inspections.
By understanding the importance of golf cart brake caliper repair, you ensure not only the safety of yourself and others but also the optimal performance of your golf cart. Taking proactive measures can lead to a smoother and safer ride on the course.
Common Signs That Your Golf Cart Brake Calipers Need Repair
Recognizing the signs that your golf cart brake calipers may need repair is crucial for ensuring your safety and the optimal performance of your vehicle. Here are some key indicators to watch for:
1. Unusual Noises During Braking
When you press the brake pedal, listen for any grinding or squeaking sounds. These noises often indicate that the brake pads are worn down, leading to metal-on-metal contact. If the brake calipers are malfunctioning, they may not be applying the necessary pressure to the pads, resulting in these alarming sounds.
2. Uneven Brake Wear
Inspect your brake pads regularly. If you notice that one side is significantly more worn than the other, this could suggest a problem with the caliper. An uneven wear pattern can indicate that the caliper is not functioning properly, leading to suboptimal braking performance.
3. Pulling to One Side
If your golf cart tends to pull to one side when braking, this could be a sign of a sticking brake caliper. When the caliper does not release properly, it can cause uneven braking force, making the cart veer off course.
4. Brake Fluid Leaks
Check for any signs of brake fluid leakage around the calipers. A visible leak can compromise the hydraulic system of your brakes, leading to diminished stopping power and potentially dangerous situations.
5. Soft or Spongy Brake Pedal
If you notice that the brake pedal feels soft or spongy when pressed, this could indicate air in the brake lines or a failing caliper. Proper hydraulic pressure is essential for effective braking, and any deficiency should be addressed immediately.
6. Warning Lights
Many modern golf carts are equipped with dashboard warning lights. If you see a brake warning light illuminated, it’s essential to investigate promptly. This could be an early indicator of caliper issues or other brake system malfunctions.
Why Timely Repairs Matter
Addressing these signs promptly can prevent further damage to your golf cart’s braking system. Ignoring these issues may lead to more extensive repairs and increased costs down the line. Regular maintenance and timely repairs will help ensure your golf cart operates safely and efficiently, making your golfing experience enjoyable.
Incorporating these checks into your regular golf cart maintenance routine can help you catch potential issues early and enhance your overall safety on the course.
Step-by-Step Guide to Golf Cart Brake Caliper Repair
Repairing your golf cart’s brake caliper is essential for maintaining safety and performance. This guide provides a thorough, step-by-step approach to ensure your brake caliper functions optimally, enhancing your overall golfing experience.
Tools and Materials Needed
Before you start, gather the following tools and materials to facilitate the repair process:
- Socket wrench set - for loosening and tightening bolts
- Brake cleaner - to clean the caliper and surrounding components
- Replacement brake caliper - ensure it’s compatible with your golf cart model
- Brake fluid - necessary for hydraulic systems
- Torque wrench - for precise tightening of bolts
- Safety goggles - to protect your eyes during the repair
- Gloves - to keep your hands clean and protected
Step 1: Safety First
Ensure your golf cart is on a flat surface and the key is removed from the ignition. Engage the parking brake and use wheel chocks to prevent movement.
Step 2: Remove the Wheel
Using the socket wrench, loosen the lug nuts on the wheel where the brake caliper is located. Remove the wheel completely to access the brake assembly.
Step 3: Inspect the Brake Caliper
Before proceeding with the repair, visually inspect the brake caliper for any signs of damage or wear. Look for leaks, cracks, or corrosion that may necessitate a full replacement.
Step 4: Disconnect the Brake Caliper
Using the socket wrench, remove the bolts securing the brake caliper to the bracket. Carefully slide the caliper off the rotor, being cautious not to damage the brake line.
Step 5: Clean the Area
Spray brake cleaner onto the rotor and surrounding components to remove dust and debris. This step ensures a clean surface for the new caliper.
Step 6: Install the New Brake Caliper
Align the new brake caliper with the mounting bracket and slide it into place. Secure it with the bolts, using the torque wrench to tighten them to the manufacturer’s specifications.
Step 7: Reconnect the Brake Line
Carefully reattach the brake line to the caliper, ensuring a snug fit to prevent leaks. It’s important to check for any cross-threading during this step.
Step 8: Refill Brake Fluid
If you’ve lost brake fluid during the repair, top off the reservoir with new brake fluid. Ensure it meets the specifications outlined in your golf cart’s manual.
Step 9: Reattach the Wheel
Place the wheel back onto the hub and hand-tighten the lug nuts. Lower the golf cart slightly to secure the wheel before fully tightening the lug nuts with the socket wrench.
Step 10: Test the Brakes
Before taking your golf cart out on the course, perform a brake test. Press the brake pedal several times to ensure the caliper is functioning correctly and the brakes engage smoothly.
By following this step-by-step guide to golf cart brake caliper repair, you can ensure your golf cart operates safely and efficiently. Regular maintenance of the brake system not only enhances performance but also extends the life of your cart.
Tools and Materials Required for Effective Brake Caliper Repair
When tackling brake caliper repair, having the right tools and materials is essential for achieving optimal performance. Below is a comprehensive list that covers everything you need to ensure a successful repair process.
Essential Tools
To perform brake caliper repairs efficiently, consider the following tools:
- Socket Set: A good quality socket set, preferably metric and standard, will help you remove and install bolts with ease. Look for sets that include sizes ranging from 10mm to 19mm.
- Torque Wrench: Ensuring that bolts are tightened to the manufacturer’s specifications is crucial. A torque wrench allows for precise adjustments.
- Piston Tool: This tool is designed specifically for compressing the brake caliper piston, making it easier to replace brake pads.
- Brake Line Wrench: A specialized wrench for removing and installing brake lines without damaging the fittings.
- Jack and Jack Stands: A hydraulic jack and sturdy jack stands are necessary for lifting the vehicle safely.
- Brake Bleeder Kit: This kit simplifies the process of bleeding the brake system, ensuring no air is trapped in the lines.
Required Materials
In addition to tools, specific materials are essential for effective brake caliper repair:
- Brake Pads: High-quality brake pads suited for your specific vehicle model ensure optimal braking performance. Expect to spend around $50 to $150 depending on the brand and material.
- Brake Fluid: Use the type recommended by your vehicle manufacturer. Typically, a quart of DOT 3 or DOT 4 brake fluid costs between $10 to $20.
- Caliper Rebuild Kit: This kit usually includes seals, boots, and pistons necessary for a complete caliper overhaul, generally priced around $30 to $60.
- Anti-Squeal Lubricant: A lubricant designed to reduce noise during braking; expect to pay about $5 to $15.
- Brake Cleaner: Essential for cleaning the caliper and surrounding areas to remove grease and debris, typically available for around $5 to $10 per can.
Safety Gear
Don’t forget to equip yourself with safety gear to ensure a safe working environment:
- Gloves: Nitrile gloves protect your hands from chemicals and sharp edges.
- Safety Glasses: Protect your eyes from debris and brake fluid splashes.
- Dust Mask: A mask is advisable when working with brake dust and cleaning solvents.
By gathering these tools and materials, you will be well-prepared to carry out brake caliper repairs effectively, contributing to the overall performance of your vehicle's braking system.
Maintenance Tips to Extend the Life of Your Golf Cart Brake Calipers
To ensure the longevity and optimal performance of your golf cart brake calipers, regular maintenance is essential. By following these specialized tips, you can prevent wear and tear, ensuring your golf cart remains safe and reliable on the course.
Regular Inspections
Conducting routine inspections is crucial for identifying potential issues before they escalate. Check your brake calipers for:
- Leakage: Inspect for fluid leaks around the calipers, which can indicate seal failure.
- Corrosion: Look for signs of rust or corrosion that can weaken the caliper structure.
- Wear and Tear: Examine the brake pads and caliper components for uneven wear.
Clean the Calipers
Keeping your brake calipers clean can significantly enhance their performance. Here’s how to do it:
- Use Brake Cleaner: Apply a quality brake cleaner to remove dust and debris.
- Soft Brush: Use a soft-bristle brush to gently scrub any stubborn dirt.
- Rinse and Dry: Rinse with water and dry thoroughly to prevent moisture accumulation.
Proper Lubrication
Lubricating the moving parts of your brake calipers can reduce friction and wear. Focus on:
- Sliding Pins: Ensure that the sliding pins are well-lubricated to allow smooth movement.
- Brake Pad Contacts: Apply a thin layer of lubricant to the contact points of the brake pads.
Monitor Brake Fluid Levels
Maintaining the correct brake fluid level is vital for effective braking performance. Follow these steps:
- Check Fluid Levels: Regularly check the brake fluid reservoir and top it off with the recommended fluid type.
- Fluid Quality: Inspect the brake fluid for contamination; replace it if it appears dark or murky.

Temperature Management
Overheating can damage your brake calipers. Consider these strategies:
- Avoid Overuse: Limit continuous braking on steep inclines to prevent excessive heat buildup.
- Cooling Periods: Allow your golf cart to cool down between long periods of use, especially in hot weather.
By implementing these maintenance tips, you can significantly extend the life of your golf cart brake calipers, ensuring a safer and more enjoyable ride on the greens. Prioritizing these practices will help you get the most out of your Essential Guide to Golf Cart Brake Caliper Repair for Optimal Performance, keeping your equipment in top condition for years to come.
We genuinely value your insights and experiences, so we warmly invite you to share your thoughts or questions about Golf Cart Brake Caliper Repair in the comments below. Whether you have personal tips, specific queries, or simply want to engage in a discussion, your contributions can help create a richer understanding for everyone in our community. Let's collaborate and enhance our knowledge together!
Leave a Reply