
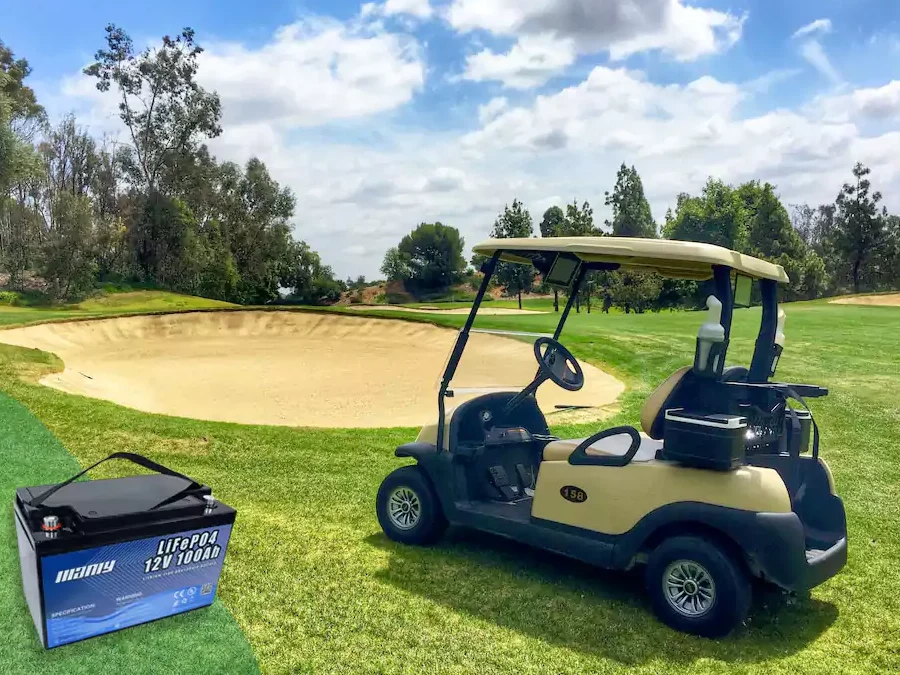
This article provides a comprehensive overview of golf cart brake fluid replacement to ensure optimal performance and safety for your vehicle. Readers will discover essential steps for effectively changing brake fluid, tips for maintaining proper fluid levels, and insights into the importance of regular golf vehicle brake fluid renewal. By following these guidelines, you can enhance the reliability and efficiency of your golf cart's braking system.
- Understanding the Importance of Golf Cart Brake Fluid Replacement
- Signs That Indicate It's Time for Brake Fluid Replacement in Golf Carts
- Step-by-Step Guide to Replacing Brake Fluid in Your Golf Cart
- Choosing the Right Brake Fluid for Your Golf Cart
- Common Mistakes to Avoid When Replacing Golf Cart Brake Fluid
Understanding the Importance of Golf Cart Brake Fluid Replacement
Maintaining the safety and efficiency of your golf cart is paramount, and one critical aspect often overlooked is the replacement of brake fluid. This fluid plays a vital role in ensuring that your braking system functions optimally, providing both safety and performance on the course or around your community.
Why Brake Fluid Matters
Brake fluid serves as the hydraulic medium in your golf cart's braking system. It transmits force from the brake pedal to the brake components, enabling effective stopping power. Over time, brake fluid can absorb moisture and contaminants, which may lead to reduced braking efficiency and potential failure.
Key Reasons for Regular Replacement
1. Moisture Absorption: Brake fluid is hygroscopic, meaning it attracts water. As moisture builds up, it lowers the boiling point of the fluid, increasing the risk of brake fade during operation.
2. Contamination: Dirt and debris can enter the brake fluid reservoir, leading to corrosion of internal components. Regular replacement helps maintain a clean hydraulic system.
3. System Longevity: Fresh brake fluid reduces wear and tear on brake components, potentially extending the life of your braking system and saving you money on repairs.
4. Optimal Performance: Ensuring that the brake fluid is at its best enhances the responsiveness of your brakes, providing a smoother and safer ride.
Signs It’s Time for a Replacement
Recognizing when to replace your golf cart's brake fluid can prevent serious issues down the line. Look out for the following indicators:
- Diminished Braking Response: If you notice a delay or reduced effectiveness when applying the brakes, it may be time to check the fluid.
- Discoloration: Fresh brake fluid is typically clear or slightly yellow. If it appears dark or cloudy, it is a sign that replacement is necessary.
- Unusual Brake Feel: If the brake pedal feels spongy or sinks to the floor, this could indicate air in the system or degraded fluid.
Best Practices for Brake Fluid Replacement
To ensure optimal performance, consider the following steps when replacing your golf cart's brake fluid:
- Use Manufacturer-Recommended Fluid: Always refer to your golf cart's owner manual for the specific type of brake fluid required, as using the wrong type can lead to complications.
- Regular Maintenance Schedule: Incorporate brake fluid checks into your routine maintenance, ideally every 1-2 years, or as recommended by the manufacturer.
- Professional Service: If you are unsure about performing the replacement yourself, consider hiring a professional service. This can ensure that the job is done correctly and safely.
By understanding the significance of golf cart brake fluid replacement, you can enhance the longevity and safety of your vehicle. Regular maintenance not only improves performance but also ensures a smooth and enjoyable ride, making your time on the course more enjoyable.
Signs That Indicate It's Time for Brake Fluid Replacement in Golf Carts
Recognizing when to replace the brake fluid in your golf cart is crucial for maintaining safety and performance. Here are some clear signs that suggest it may be time for a brake fluid replacement.
1. Brake Pedal Feels Soft or Spongy
If you notice that the brake pedal feels unusually soft or spongy when pressed, this can be a strong indicator that the brake fluid is contaminated or has absorbed moisture. A healthy brake system should provide a firm pedal feel, enabling you to have precise control while braking.
2. Warning Light Activation
Most modern golf carts are equipped with a dashboard warning light for the braking system. If this light illuminates, it could signify low brake fluid levels or other issues within the braking system. Addressing this promptly can prevent more severe problems down the line.
3. Visible Fluid Contamination
Inspect the brake fluid reservoir regularly. If the fluid appears dark or cloudy instead of a clear amber color, it may be time for a replacement. Contaminated brake fluid can lead to corrosion within the braking system, compromising its efficiency.
4. Unusual Noises When Braking
Listen for any grinding or squeaking sounds when applying the brakes. These noises can indicate that the brake fluid is not lubricating the components effectively, which may be due to old or degraded fluid.
5. Increased Stopping Distance
If you find that your golf cart takes longer to stop than usual, this could be a sign of degraded brake fluid. Effective brake fluid is essential for optimal brake performance, and any decline can lead to an increased stopping distance, posing a safety risk.
6. Age of Brake Fluid
Even if you haven't noticed any of the above signs, it's good practice to replace brake fluid at regular intervals, typically every 2 years. Over time, brake fluid can absorb moisture, leading to decreased performance and potential damage to the braking system.
Maintenance Tips for Optimal Performance
- Regularly check the brake fluid level and condition.
- Schedule periodic maintenance checks with a qualified technician.
- Use high-quality brake fluid that meets your golf cart manufacturer's specifications.
By being vigilant and recognizing these signs, you can ensure that your golf cart's braking system remains in top condition, enhancing both safety and performance. Regular brake fluid maintenance is an essential aspect of the Essential Guide to Golf Cart Brake Fluid Replacement for Optimal Performance.
Step-by-Step Guide to Replacing Brake Fluid in Your Golf Cart
Replacing the brake fluid in your golf cart is essential for maintaining optimal braking performance and ensuring safety during your rides. This guide provides a clear, step-by-step approach to help you perform this task efficiently.
What You’ll Need
Before starting, gather the necessary tools and materials:
- New Brake Fluid: Ensure you choose the right type for your golf cart, typically DOT 3 or DOT 4.
- Brake Fluid Syringe: A syringe will help in extracting old fluid.
- Wrenches: A set of wrenches for loosening brake bleeder screws.
- Clean Rags: To wipe off any spills and maintain cleanliness.
- Safety Goggles: To protect your eyes from potential splashes.
Step 1: Prepare Your Golf Cart
Ensure your golf cart is parked on a flat surface and turned off. Engage the parking brake to prevent any movement during the process.
Step 2: Locate the Brake Fluid Reservoir
Find the brake fluid reservoir, usually located near the rear of the cart, often labeled for easy identification. Remove the cap carefully to avoid contamination.
Step 3: Remove Old Brake Fluid
Using the brake fluid syringe, extract the old fluid from the reservoir. Be careful not to introduce any debris into the reservoir during this process.
Step 4: Bleed the Brake System
To ensure all old fluid is removed, you will need to bleed the brake lines:
- Locate the bleeder screws on each brake assembly.
- Attach a clear hose to the bleeder screw, placing the other end into a container.
- Open the bleeder screw slightly and pump the brake pedal until you see old fluid and air bubbles in the hose.
- Close the bleeder screw and repeat the process for each brake.
Step 5: Add New Brake Fluid
Once the old fluid is completely removed, refill the reservoir with new brake fluid. Make sure to fill it to the recommended level, as indicated on the reservoir.
Step 6: Re-Bleed the Brakes
After adding new fluid, it’s advisable to bleed the brakes again to remove any air that may have entered during the fluid replacement. Follow the same procedure as outlined in Step 4.
Step 7: Check for Leaks
Inspect all connections and the reservoir for any signs of leakage. This step is crucial for ensuring that your brake system operates safely.
Step 8: Test the Brakes
Finally, take your golf cart for a short test drive in a safe area to ensure the brakes respond correctly. Make several stops to verify that the braking system is functioning optimally.
By following this detailed guide on replacing brake fluid in your golf cart, you can ensure a smoother and safer driving experience. Regular maintenance like this is key to keeping your cart in peak condition and enhancing its performance on the course.
Choosing the Right Brake Fluid for Your Golf Cart
When it comes to maintaining your golf cart, selecting the appropriate brake fluid is crucial for ensuring safety and performance. Understanding the types of brake fluids available can help you make an informed decision tailored to your specific needs.
Types of Brake Fluid
Golf carts typically use two main types of brake fluids: DOT 3 and DOT 4. Each has unique properties that can affect performance and longevity.
- DOT 3: This glycol-based fluid is suitable for most golf carts and offers a lower boiling point, making it effective for standard use.
- DOT 4: This fluid has a higher boiling point and is ideal for carts that experience more demanding conditions, such as steep hills or frequent braking.
Key Factors to Consider
When selecting brake fluid, consider the following factors:
- Compatibility: Ensure the brake fluid is compatible with your golf cart's braking system. Check the owner's manual for specifications.
- Boiling Point: Choose a fluid with a suitable boiling point for your usage. Higher boiling points reduce the risk of vapor lock during heavy use.
- Hygroscopic Nature: Most brake fluids absorb moisture over time, which can lower effectiveness. Regularly check and replace your brake fluid to maintain optimal performance.
Recommended Brake Fluid Brands
Several reputable brands offer high-quality brake fluids for golf carts:
- Prestone DOT 3 Brake Fluid: Priced around $6.99 for a 12 oz. bottle, this fluid is known for its reliability and compatibility.
- Valvoline DOT 4 Brake Fluid: Available for approximately $7.49 for a 12 oz. container, this fluid provides enhanced performance for more demanding applications.
Maintenance Tips
To ensure your golf cart's braking system remains in top condition, follow these maintenance tips:
- Regular Inspections: Periodically check the brake fluid level and condition. Look for discoloration or contamination.
- Fluid Replacement: Replace brake fluid every 1-2 years or as recommended in your golf cart’s manual.
- Storage Conditions: Store brake fluid in a cool, dry place to prevent moisture absorption before use.
Choosing the right brake fluid is a vital part of your golf cart maintenance routine. By understanding the different types available and considering your specific usage conditions, you can ensure optimal braking performance and safety on the course.
Common Mistakes to Avoid When Replacing Golf Cart Brake Fluid
Replacing golf cart brake fluid is a crucial maintenance task that ensures the safe operation of your vehicle. However, there are several common pitfalls that can compromise the effectiveness of this process. Here are key mistakes to steer clear of:
1. Ignoring Manufacturer Specifications
When selecting brake fluid, it’s essential to adhere to the manufacturer’s specifications. Each golf cart model may require a specific type of fluid, such as DOT 3 or DOT 4. Using the wrong fluid can lead to diminished performance and even damage the braking system.
2. Failing to Inspect Brake Components
Before replacing the brake fluid, take the time to inspect other components of the brake system. Look for signs of wear, such as:
- Worn brake pads
- Leaking brake lines
- Corroded fittings
Neglecting these checks may result in further issues down the line.
3. Skipping the Bleeding Process
After draining old brake fluid, it’s critical to bleed the brake lines to remove any air bubbles. Skipping this step can lead to a spongy brake feel and reduced stopping power. Use the proper bleeding technique, either manually or with a vacuum pump, to ensure a complete process.
4. Not Using the Right Tools
Using improper tools can lead to mistakes and accidents. Ensure you have:
- A brake fluid reservoir
- A funnel to prevent spills
- Wrenches for disconnecting lines
Using the right tools makes the process smoother and safer.
5. Overlooking Fluid Disposal Guidelines
Brake fluid is a hazardous material that requires proper disposal. Many individuals mistakenly pour it down the drain or dispose of it with regular trash. Check local regulations for hazardous waste disposal to ensure you are compliant and environmentally responsible.
6. Rushing the Process
Replacing brake fluid is not a task to be hurried. Take your time to follow each step carefully. Rushing can lead to mistakes, such as forgetting to tighten fittings or leaving air in the lines, which can compromise safety.

7. Neglecting Regular Maintenance
Finally, many golfers overlook the importance of regular brake fluid replacement as part of overall maintenance. Make it a habit to check and replace brake fluid at recommended intervals to ensure optimal performance and safety of your golf cart.
By avoiding these common mistakes, you can ensure that your golf cart’s braking system operates effectively, enhancing both safety and performance.
We would love to hear your thoughts and questions about Golf Cart Brake Fluid Replacement! Your insights and inquiries can foster a rich discussion that benefits everyone in our community. Whether you have personal experiences to share or seek clarification on specific aspects, please don’t hesitate to leave a comment. Together, we can enhance our understanding and ensure safe and effective maintenance for all golf carts. Your voice matters!
Leave a Reply