
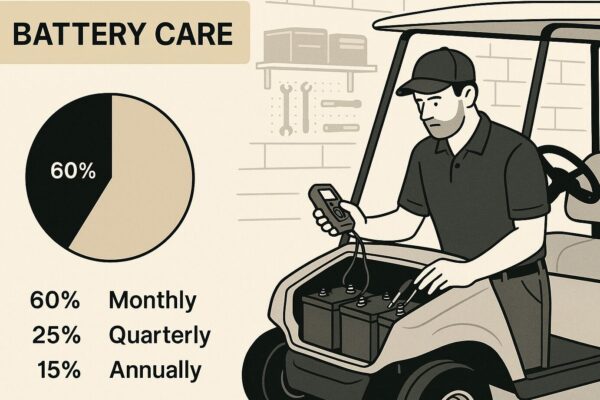
This article provides a comprehensive overview of golf cart electrical panel maintenance and effective strategies for golf cart circuit board restoration. Readers will discover essential tips and techniques for troubleshooting common issues, ensuring optimal performance, and extending the lifespan of their vehicles' electrical systems. Whether you're a seasoned technician or a DIY enthusiast, this guide will equip you with the knowledge needed for successful golf cart electrical system repairs.
Common Issues with Golf Cart Electrical Panels
Golf cart electrical panels are crucial for the efficient functioning of your vehicle, yet they can encounter several issues over time. Understanding these common problems can help you maintain your golf cart effectively and ensure a smooth ride. Below are some frequent issues associated with golf cart electrical panels.
1. Faulty Connections
Electrical panels can suffer from loose or corroded connections, which may disrupt power flow. Look for the following signs of faulty connections:
- Intermittent Power Loss: If your golf cart loses power sporadically, check the connections.
- Visual Corrosion: Rust or corrosion around the terminals can indicate a need for cleaning or replacement.
2. Blown Fuses
Fuses are designed to protect your electrical system from overloads. A blown fuse can result in a complete loss of function for certain components. To address this issue:
- Regular Inspection: Routinely check fuses for signs of damage.
- Replacement: Use fuses rated for your specific golf cart model, typically ranging from $5 to $15.
3. Overheating Components
Overheating can be a serious issue, often caused by excessive current draw or poor ventilation. Signs of overheating include:
- Burning Smell: A distinct odor may indicate damaged wiring.
- Discoloration: Check for any discoloration around electrical components.
Prevention Tips:
- Ensure proper ventilation in the electrical panel area.
- Monitor the load on your golf cart to prevent excessive current draw.
4. Faulty Circuit Breakers
Circuit breakers are essential for protecting the electrical system. A malfunctioning circuit breaker can lead to power failures. If you notice:
- Frequent Tripping: If the circuit breaker trips often, it may be time for replacement.
- Physical Damage: Inspect for cracks or signs of wear.
5. Inadequate Battery Performance
The performance of your golf cart’s electrical panel heavily relies on the battery. Common battery-related issues include:
- Low Voltage: A weak battery can lead to underperformance.
- Leaking Electrolyte: This can indicate a failing battery that needs replacement, usually costing between $100 and $300 depending on the type.
By staying informed about these common issues with golf cart electrical panels, you can enhance the longevity and reliability of your vehicle. Regular maintenance and timely repairs are essential for optimal performance, ensuring that your golf cart remains a dependable mode of transportation on the course.
Step-by-Step Guide to Golf Cart Electrical Panel Repair
Repairing the electrical panel of your golf cart can seem daunting, but with the right approach and tools, it can be accomplished effectively. This guide will walk you through the necessary steps to ensure your golf cart's electrical panel functions optimally.
Gathering the Necessary Tools and Materials
Before you begin the repair process, it’s important to have all required tools and materials at hand. Here’s a list of what you might need:
- Multimeter: Essential for testing voltage and continuity.
- Screwdriver Set: For removing and securing panel screws.
- Wire Strippers: Useful for repairing or replacing damaged wires.
- Electrical Tape: To insulate and protect exposed wires.
- Replacement Fuses: Ensure you have the correct type and rating for your golf cart.
- Connector Kits: For securely rejoining any disconnected wiring.
Step 1: Safety First
Before beginning any repairs, make sure to take the following safety precautions:
- Disconnect the battery to prevent any electrical shocks.
- Wear safety goggles to protect your eyes from dust and debris.
- Use gloves to avoid cuts from sharp edges on the panel.
Step 2: Remove the Electrical Panel
To access the internal components, you will need to remove the electrical panel:
1. Locate the screws securing the panel and use your screwdriver to remove them.
2. Carefully detach the panel from the cart without forcing it to avoid damaging any connectors.
3. Set the panel aside in a safe location to prevent any accidental damage.
Step 3: Inspect for Damage
Once the panel is removed, conduct a thorough inspection:
- Look for burnt fuses: Replace any that are damaged.
- Check for loose connections: Ensure all wires are securely connected.
- Inspect wiring for wear: Look for frayed or broken wires that may need replacing.
Step 4: Test Electrical Components
Using your multimeter, test the following components:
1. Voltage at the battery terminals: Confirm that the battery is providing adequate voltage.
2. Continuity of wires: Check for any breaks in the wiring that could cause power loss.
3. Functionality of switches and relays: Test each switch to ensure it is operating correctly.
Step 5: Make Repairs
Based on your inspection and testing results, proceed with the necessary repairs:
- Replace any damaged fuses with new ones of the same rating.
- Repair or replace faulty wires using your wire strippers and electrical tape to ensure a secure connection.
- Reconnect any loose terminals to ensure proper power flow.
Step 6: Reassemble the Electrical Panel
Once repairs are complete, reassemble the panel:
1. Carefully place the electrical panel back in its original position.
2. Secure the panel with screws, ensuring it is firmly attached.
3. Double-check all connections to ensure everything is properly secured.
Step 7: Reconnect the Battery
After reassembling the panel, it’s time to reconnect the battery:
- Reconnect the positive and negative terminals carefully.
- Turn on the golf cart and test all electrical components to ensure everything is functioning correctly.
This step-by-step guide to golf cart electrical panel repair equips you with the knowledge and techniques needed to address common electrical issues efficiently. Regular maintenance and timely repairs can prolong the life of your golf cart, ensuring you enjoy smooth rides for years to come.
Tools and Materials Needed for Electrical Panel Repair
Repairing an electrical panel requires specific tools and materials to ensure safety and effectiveness. Here’s a comprehensive list to help you prepare for your electrical panel repair project.
Essential Tools
To start your electrical panel repair, you’ll need the following tools:
- Multimeter - A versatile device for measuring voltage, current, and resistance, essential for diagnosing electrical issues. Prices range from $20 to $150 depending on features.
- Screwdrivers - A set of both flathead and Phillips screwdrivers is crucial for opening the panel and securing components. A quality set can cost between $10 and $30.
- Wire Strippers - Used for removing insulation from electrical wires, allowing for proper connections. Basic models start around $15.
- Pliers - Needle-nose pliers and lineman's pliers are helpful for gripping and twisting wires. Expect to spend $10 to $25 for a good pair.
- Socket Wrench Set - Necessary for loosening and tightening bolts within the panel. A complete set typically costs $25 to $75.
Safety Equipment
Safety should always be a priority during electrical repairs. The following items are essential:
- Insulated Gloves - Protects your hands from electric shock. A good pair can be found for $20 to $50.
- Safety Glasses - Prevents debris from entering your eyes during repair work. Prices generally range from $5 to $30.
- Hard Hat - Useful if working in an environment where head protection is necessary. Expect to pay between $10 and $50.
Materials Required
In addition to tools, having the right materials on hand will facilitate a smooth repair process:
- Replacement Circuit Breakers - Ensure compatibility with your electrical panel. Prices vary, typically from $15 to $60 each.
- Electrical Tape - Essential for insulating and securing wire connections. A roll usually costs around $5.
- Wire Connectors - These are crucial for joining wires safely. A pack can cost about $10.
- Heat Shrink Tubing - Used for insulating and protecting electrical connections. A kit is generally priced around $15.
Having the right tools and materials for electrical panel repair is vital to ensure a safe and effective job. Whether you're tackling a minor repair or a more complex issue, being well-prepared can make all the difference.
Preventative Maintenance Tips for Golf Cart Electrical Panels
Ensuring the longevity and efficiency of your golf cart's electrical panel is essential for optimal performance on the course. Implementing effective preventative maintenance practices can prevent costly repairs and enhance your cart's functionality. Here are some targeted tips to keep your golf cart's electrical panel in prime condition.
Regular Inspection of Wiring and Connections
Inspecting the wiring and connections within your golf cart's electrical panel should be a regular part of your maintenance routine. Look for signs of wear and tear, corrosion, or loose connections.
- Visual Checks: Conduct a thorough visual inspection at least once a month.
- Corrosion Prevention: Use a corrosion inhibitor spray on terminals and connectors to reduce rust.
- Tightening Connections: Ensure all connections are secure to prevent electrical arcing.
Battery Maintenance
The health of your golf cart's battery directly affects the performance of the electrical panel. Follow these steps to maintain battery integrity:
- Check Water Levels: Ensure that battery water levels are adequate, topping off with distilled water as necessary.
- Clean Terminals: Clean battery terminals regularly to prevent corrosion, using a mixture of baking soda and water.
- Monitor Voltage: Use a multimeter to regularly check the battery's voltage and replace it if it drops below recommended levels.
Fuse and Circuit Breaker Checks
Fuses and circuit breakers are critical components in safeguarding your golf cart's electrical system. Regular checks can prevent unexpected failures:
- Inspect Fuses: Look for blown fuses and replace them promptly with the correct amperage rating.
- Test Circuit Breakers: Periodically reset circuit breakers to ensure they are functioning correctly.
- Labeling: Clearly label fuses and circuit breakers for easy identification during troubleshooting.
Software and Firmware Updates
Modern golf carts may come equipped with advanced electronic controls. Regular updates can enhance performance and reliability:
- Manufacturer Guidelines: Follow the manufacturer's instructions for software updates.
- Diagnostic Tools: Use diagnostic tools to check for any software issues that could affect electrical panel performance.
Storage Considerations
When not in use, proper storage of your golf cart can prevent electrical issues:
- Indoor Storage: Keep your golf cart in a dry, indoor space to avoid moisture-related electrical problems.
- Disconnecting Batteries: If storing for an extended period, disconnect the battery to prevent drain.
By following these preventative maintenance tips for golf cart electrical panels, you can enhance the performance and longevity of your vehicle. Regular attention to these details will ensure that your golf cart remains a reliable companion on the course.
When to Seek Professional Help for Electrical Panel Repairs
Recognizing the right time to call in a professional for electrical panel repairs is crucial for both safety and functionality. While some minor issues can be managed independently, others require expert intervention to prevent potential hazards. Here are key indicators that signal the need for professional assistance:
Signs of Electrical Panel Malfunction
- Frequent Tripping of Breakers: If your circuit breakers trip often, it may indicate an overload or a fault in the panel that needs expert diagnosis.
- Burning Smells or Discoloration: Any burning odors or visible discoloration around the panel are red flags that should prompt immediate professional evaluation.
- Flickering Lights: Lights that flicker or dim unexpectedly can signal an issue with the electrical panel that needs to be addressed.
- Buzzing Noises: Unusual sounds emanating from the panel can indicate a serious electrical problem requiring immediate attention.
When DIY Repairs are Insufficient
While some electrical panel issues might seem manageable, certain situations necessitate the expertise of a trained technician:
- Complex Wiring Issues: If you encounter complicated wiring configurations or unfamiliar components, it's best to leave the repairs to a professional.
- Code Violations: If your electrical system does not comply with local codes or safety standards, a licensed electrician can ensure that everything is brought up to code.
- Upgrades and Replacements: When considering upgrades, such as transitioning to a smart electrical panel, a professional is essential to handle the complexities involved.
Understanding Risks of Ignoring Electrical Problems
Delaying necessary repairs can lead to increased risks, including:
- Electrical Fires: Faulty panels can create sparks and heat, leading to potential fires.
- Increased Energy Costs: An inefficient electrical panel can cause higher energy bills due to wasted electricity.
- Damage to Appliances: Voltage fluctuations can damage sensitive electronics and appliances connected to the panel.

Choosing the Right Professional
When you decide to seek professional help, ensure you choose a qualified electrician. Look for:
- Licensing and Insurance: Verify that the electrician is licensed and insured to perform electrical work in your area.
- Experience with Electrical Panels: Seek professionals who specialize in electrical panel repairs and upgrades.
- Positive Reviews: Research customer feedback to ensure you hire someone with a solid reputation for quality work.
Understanding these indicators and knowing when to reach out for professional help can safeguard your home and ensure your electrical panel functions optimally.
We’d love to hear your thoughts and experiences regarding Golf Cart Electrical Panel Repair! Your insights and questions are invaluable to our community, and sharing them in the comments not only enriches our discussion but also helps others who may be facing similar challenges. Whether you have tips, concerns, or simply want to learn more, please feel free to join the conversation—we're here to support each other!
Leave a Reply