
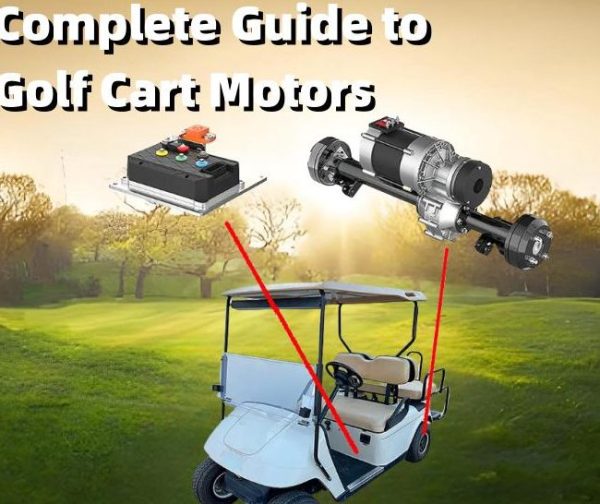
In this article, readers will discover a thorough golf cart engine troubleshooting manual designed to enhance repair efficiency. The content covers essential diagnostic techniques, common issues, and practical solutions to ensure optimal performance of your vehicle. This comprehensive guide to golf cart motor diagnostics will equip you with the knowledge needed to tackle repairs effectively and maintain your cart in peak condition.
Understanding Common Golf Cart Motor Issues
Golf carts are essential for leisurely rides on the golf course or in residential communities. However, like any vehicle, they can experience motor issues that affect their performance. Identifying and addressing these problems early can save time and money in repairs. Below, we delve into common golf cart motor issues and how to recognize them.
1. Motor Overheating
Overheating is a prevalent issue that can lead to severe motor damage if not addressed promptly.
- Causes: Insufficient cooling, low coolant levels, or blocked air vents.
- Signs: Excessive heat emanating from the motor, reduced performance, or unusual smells.
To prevent overheating, ensure regular maintenance checks and keep the motor clean from debris.
2. Electrical Problems
Electrical issues can cause your golf cart to fail to start or operate erratically.
Common Symptoms:
- Dead Battery: A battery that won't hold a charge can hinder operation.
- Loose Connections: Frayed wires or loose terminals can interrupt power flow.
Routine inspections of the electrical system, including the battery and wiring, can help catch these issues early.
3. Performance Loss
A noticeable decrease in speed or acceleration can indicate underlying motor problems.
- Causes: Worn brushes, a failing controller, or issues with the throttle.
- Symptoms: Sluggish response, inability to climb hills, or stalling.
Regularly testing the motor’s performance and checking for wear can help maintain optimal function.
4. Unusual Noises
Strange sounds coming from the motor can signal mechanical problems.
Types of Noises:
- Grinding: Often indicates worn gears or bearings.
- Clicking: May suggest loose components or a failing solenoid.
Listening carefully to your golf cart’s sounds can provide early warnings of potential issues.
5. Lack of Power
If your golf cart struggles to reach its typical speed, it could be a sign of motor trouble.
- Potential Causes: Deteriorating motor components or insufficient power supply.
- Indicators: Slow acceleration, inability to maintain speed, or erratic movement.
Addressing these symptoms quickly can prevent more extensive damage and costly repairs.
Understanding these common golf cart motor issues can aid in early detection and efficient repairs. By keeping a close eye on your vehicle's performance and conducting regular maintenance, you can enjoy smooth rides for years to come.
Step-by-Step Golf Cart Motor Diagnostics Process
Diagnosing issues with your golf cart motor can be crucial for maintaining optimal performance and longevity. This detailed guide walks you through the essential steps in the golf cart motor diagnostics process, ensuring that you can effectively troubleshoot and resolve common problems.
1. Safety First
Before beginning any diagnostic process, ensure your safety and that of your equipment. Follow these precautions:
- Disconnect the battery to prevent electrical shock.
- Wear safety goggles and gloves.
- Work in a well-ventilated area to avoid inhaling fumes.
2. Visual Inspection
Start with a thorough visual inspection of the golf cart motor and its components. Look for:
- Loose or damaged wiring: Check for frayed wires or loose connections that may interrupt power.
- Corrosion: Inspect terminals and connectors for signs of corrosion, which can hinder electrical flow.
- Physical damage: Examine the motor casing and other components for any visible cracks or breaks.
3. Battery Check
The battery is often the root cause of motor issues. To assess its condition:
- Measure the voltage with a multimeter. A fully charged 12-volt battery should read between 12.6 to 12.8 volts.
- Inspect the battery terminals for tightness and cleanliness.
- Consider performing a load test if the battery appears weak.
4. Motor Functionality Test
Once the battery is confirmed to be in good condition, proceed to test the motor itself:
- Reconnect the battery and switch on the cart. Listen for unusual sounds, which may indicate internal damage.
- Use a multimeter to check the motor's resistance. A typical reading should be between 0.5 to 1.5 ohms.
- Inspect the brushes and commutator for wear and tear, replacing them if necessary.
5. Controller Assessment
The controller is pivotal in managing power to the motor. To evaluate its performance:
- Check for error codes if your cart has a digital display.
- Test the controller’s output with a multimeter to ensure it is delivering the correct voltage.
- Inspect the wiring harness connected to the controller for any signs of damage.
6. Performance Test
After completing the diagnostics, conduct a performance test:
- Take the cart for a short drive to observe its responsiveness and speed.
- Monitor for any issues such as stalling, sputtering, or loss of power.
By following this structured golf cart motor diagnostics process, you can identify and address common issues effectively. Each step plays a vital role in ensuring your golf cart operates smoothly, enhancing your overall experience on the course. Regular diagnostics not only help in early detection of problems but also contribute to the longevity of your golf cart motor, ensuring reliable performance for years to come.
Essential Tools for Golf Cart Motor Troubleshooting
Troubleshooting golf cart motors requires a specific set of tools to ensure efficient diagnosis and repair. Having the right equipment can significantly enhance your ability to identify issues and implement solutions. Below is a detailed list of essential tools that every golf cart owner or technician should consider for effective motor troubleshooting.
1. Multimeter
A multimeter is an indispensable tool for diagnosing electrical issues within your golf cart motor. It can measure voltage, current, and resistance, allowing you to pinpoint problems such as:
- Battery health
- Wiring continuity
- Motor functionality
Look for a multimeter with auto-ranging features, such as the Fluke 117, which retails around $200. This tool is user-friendly and provides accurate readings, making it a favorite among technicians.
2. Battery Load Tester
To ensure that your golf cart's battery is performing optimally, a battery load tester is essential. This tool simulates the load on the battery and helps identify weak cells. A recommended model is the Solar BA9, priced at approximately $50. It can quickly indicate whether your battery is capable of holding a charge.
3. Socket and Wrench Set
Having a comprehensive socket and wrench set is crucial for loosening or tightening components within the motor assembly. Look for a set like the Craftsman 320-Piece Mechanics Tool Set, available for around $150. This set includes various sizes to accommodate different bolts and screws.
4. Screwdrivers
A range of screwdrivers, both flathead and Phillips, are necessary for accessing various parts of the golf cart motor. A magnetic screwdriver set, such as the TEKTON 3020, priced at about $25, can help prevent losing screws during repairs.
5. Wire Strippers and Crimpers
For repairs involving wiring, wire strippers and crimpers are essential. These tools allow for precise stripping of wire insulation and secure connections. The Irwin Vise-Grip Wire Stripper, costing around $20, is a reliable choice for quick and efficient wire management.
6. Diagnostic Scan Tool
Investing in a diagnostic scan tool can significantly streamline the troubleshooting process. These tools can read error codes and provide insights into the golf cart's performance. The OBDLink LX Bluetooth scanner, priced at approximately $50, connects to your smartphone for easy monitoring.
7. Tire Pressure Gauge
While it may seem unrelated, maintaining proper tire pressure is vital for optimal motor performance. A digital tire pressure gauge, such as the AstroAI Digital Tire Pressure Gauge, available for about $15, ensures your golf cart rolls smoothly and efficiently.
By equipping yourself with these essential tools, you can effectively troubleshoot and repair your golf cart motor, leading to a more enjoyable and reliable golfing experience.
Signs Your Golf Cart Motor Needs Professional Attention
Recognizing when your golf cart motor requires expert intervention can save you time and money. Here are some clear indicators that it's time to consult a professional for your golf cart motor diagnostics.
Unusual Noises
If your golf cart motor is emitting strange sounds, such as grinding, clanking, or high-pitched whines, it’s a sign that something may be amiss. These noises often indicate internal wear or a malfunctioning component that could worsen if not addressed promptly.
Decreased Performance
Noticeable drops in speed or acceleration can signal a failing motor. If your golf cart struggles to maintain its usual pace, or if you experience sluggishness when climbing hills, it might be time for a comprehensive golf cart motor diagnostics guide for efficient repairs.
Overheating Issues
A golf cart motor that frequently overheats can lead to severe damage if not checked. If you notice the motor casing feels excessively hot to the touch, or if the cart shuts down due to overheating, professional inspection is crucial to avoid further complications.
Electrical Problems
Persistent electrical issues, such as flickering lights or difficulty starting, can indicate motor or wiring problems. These symptoms can often be complex and require a trained technician to assess and resolve.
Inconsistent Power Delivery
If your golf cart experiences intermittent power loss or irregular acceleration, it may suggest an issue with the motor or battery system. This inconsistency can hinder your ability to enjoy a smooth ride, making professional evaluation essential.
Physical Damage
Any visible damage to the motor, such as cracks or leaks, should never be overlooked. These physical signs can lead to more significant issues if not handled by a qualified technician.
Battery and Charging Concerns
Frequent battery failures or charging issues can also point to underlying motor problems. If your battery drains rapidly or doesn’t hold a charge, it may be related to the motor's functionality.
Recognizing these signs early on can help you maintain your golf cart's performance and longevity. If you encounter any of these issues, seeking professional assistance will ensure your golf cart motor receives the attention it requires for optimal operation.
Preventive Maintenance Tips for Golf Cart Motor Longevity
Maintaining your golf cart motor is essential for ensuring its longevity and efficiency. Here are some specialized tips to help you keep your golf cart running smoothly and extend the life of its motor.
Regular Inspection of Electrical Components
Conducting regular inspections of your golf cart's electrical components can prevent major issues down the line. Look for the following:
- Battery Connections: Ensure that all connections are tight and free from corrosion.
- Wiring Insulation: Check for any frayed or damaged wires that could lead to electrical failures.
- Fuses: Replace any blown fuses immediately to prevent electrical overloads.
Proper Battery Maintenance
Batteries are a critical part of your golf cart motor. Follow these guidelines for optimal battery care:
- Regular Charging: Charge the batteries after each use to prevent deep discharge, which can shorten their lifespan.
- Water Levels: Maintain the proper water level in lead-acid batteries, ensuring they are not overfilled or underfilled.
- Cleaning: Keep the battery terminals clean and free from corrosion using a mixture of baking soda and water.
Motor Cooling System Checks
A well-functioning cooling system is vital for motor longevity. Consider these steps:
- Cooling Fan: Inspect the cooling fan for dust accumulation and clean it regularly to ensure optimal airflow.
- Coolant Levels: If your golf cart motor uses coolant, check levels frequently and top off as needed.
- Heat Shields: Ensure that heat shields are in place to protect the motor from excessive heat.
Routine Motor Cleaning
Keeping the motor clean can significantly impact its performance. Implement these cleaning practices:
- Debris Removal: Regularly remove any debris or dirt from around the motor area to prevent overheating.
- Dusting: Use a soft brush or compressed air to gently dust off components without causing damage.
- Protective Coating: Consider applying a protective coating to metal parts to reduce rust and corrosion.

Scheduled Professional Inspections
Having your golf cart motor professionally inspected can help identify issues before they escalate. Schedule regular check-ups with a qualified technician who can perform:
- Comprehensive Diagnostics: Utilize a Comprehensive Golf Cart Motor Diagnostics Guide for Efficient Repairs to ensure all components are functioning properly.
- Performance Testing: Conduct performance tests to identify any inefficiencies or potential problems.
By incorporating these preventive maintenance tips into your routine, you can significantly enhance the longevity and performance of your golf cart motor, ensuring a reliable ride for years to come.
We would love to hear your thoughts and insights on the Golf Cart Motor Diagnostics Guide! Your opinions and questions are invaluable in fostering a rich discussion and helping others in our community. Whether you have tips to share, specific inquiries, or personal experiences related to golf cart motor diagnostics, please don’t hesitate to leave a comment below. Together, we can enhance our understanding and make the most of our golf cart journeys!
Leave a Reply