
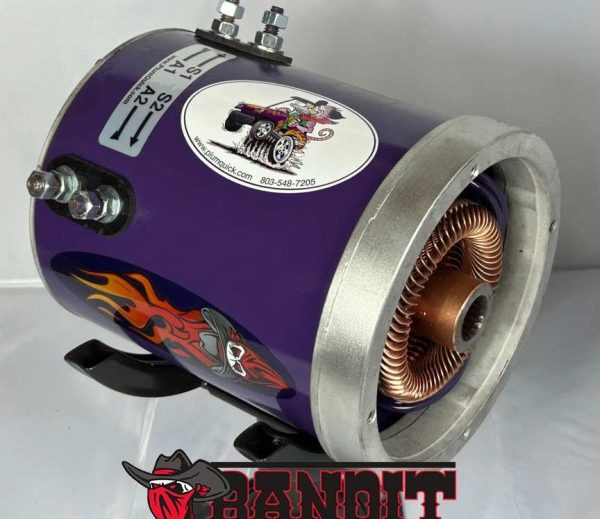
This article outlines crucial golf cart engine setup procedures to ensure a seamless upgrade for your vehicle. Readers will discover detailed guidelines and practical tips that cover everything from selecting the right components to the final adjustments needed for optimal performance. By following these essential golf cart motor fitting instructions, you can enhance your cart's efficiency and longevity.
Essential Tools Needed for Golf Cart Motor Installation
When embarking on the journey of upgrading or replacing your golf cart motor, having the right tools at your disposal is crucial for a smooth and efficient installation process. Below is a detailed list of the essential tools that will make your golf cart motor installation easier and more effective.
Basic Hand Tools
To begin with, you will need a selection of basic hand tools that are fundamental for any motor installation project:
- Socket Set: A comprehensive socket set (ranging from 1/4" to 3/4") is vital for loosening and tightening various bolts.
- Wrenches: Adjustable wrenches and combination wrenches will help you work with different sizes of nuts and bolts.
- Screwdrivers: A set of flathead and Phillips screwdrivers will be necessary for removing covers and securing components.
Specialized Tools
In addition to basic hand tools, some specialized tools can enhance the efficiency of your installation:
- Torque Wrench: This tool ensures that bolts are tightened to the manufacturer’s specifications, preventing damage to components.
- Multimeter: A multimeter is essential for checking electrical connections and ensuring proper voltage levels during the installation.
- Wire Strippers: These will help in preparing electrical wires for connections, ensuring a secure and reliable setup.
Safety Equipment
Safety should always be a priority during any motor installation. Make sure to have the following safety gear:
- Safety Glasses: Protect your eyes from debris and any potential hazards.
- Gloves: Use work gloves to protect your hands while handling tools and components.
- Steel-Toed Boots: These will provide foot protection against heavy objects that may accidentally fall during the installation process.
Additional Accessories
Consider having these additional accessories on hand to streamline your installation:
- Zip Ties: Useful for organizing and securing wires neatly to avoid tangling.
- Electrical Tape: Essential for insulating and protecting electrical connections.
- Shop Vacuum: Keeping your workspace clean will help prevent accidents and maintain a clear area for your project.
Equipping yourself with these essential tools will not only facilitate the golf cart motor installation process but also ensure a successful upgrade. By being well-prepared, you can tackle the installation with confidence and achieve optimal performance from your golf cart.
Step-by-Step Guide to Removing the Old Golf Cart Motor
Removing the old motor from your golf cart is a crucial step in upgrading to a more efficient or powerful unit. This guide will walk you through the process, ensuring you have the knowledge needed to safely and effectively remove the old golf cart motor.
Tools and Materials Required
Before starting, gather the following tools and materials:
- Socket set (including metric sizes)
- Wrenches (both standard and metric)
- Screwdrivers (flathead and Phillips)
- Wire cutters or strippers
- Multimeter (for electrical testing)
- Safety goggles and gloves
- Replacement motor (if applicable)
Step 1: Safety First
Before you begin, ensure the golf cart is turned off and disconnected from any power source. If your cart is electric, remove the battery terminals, starting with the negative terminal. This will prevent any accidental electrical discharge during the removal process.
Step 2: Accessing the Motor
To access the motor, you will typically need to:
1. Remove the seat: Unscrew the bolts or screws holding the seat in place. This step may vary depending on the golf cart model.
2. Remove the engine cover: Depending on your cart, you may need to detach the engine cover or panel to expose the motor.
Step 3: Disconnecting Electrical Connections
Carefully disconnect all electrical connections from the motor. This typically includes:
- Power wires: Usually marked with colors; take note of where each wire connects for reinstallation.
- Control wires: If applicable, these may lead to the controller or throttle.
Use the multimeter to ensure there is no residual voltage before proceeding.
Step 4: Detaching the Motor
Once all electrical connections are safely disconnected, it’s time to remove the motor itself:
1. Unscrew the mounting bolts: Use your socket set to remove any bolts securing the motor to the frame. Keep these bolts for reinstallation if your new motor requires them.
2. Gently lift the motor: Carefully pull the motor away from the frame, ensuring no additional connections are overlooked.
Step 5: Inspect and Clean
After the old motor is removed, take a moment to inspect the area for any debris or damage. Clean the mounting surface and ensure that all old wiring and connections are clear, preparing the space for the new motor.
Step 6: Preparing for Installation
Now that the old motor is out, you can proceed with the installation of your new motor, ensuring you follow the Essential Golf Cart Motor Installation Steps for a Successful Upgrade.
This step-by-step approach simplifies the process, making it manageable and efficient, allowing you to enhance your golf cart's performance. Remember to double-check all connections and ensure everything is secure before testing your golf cart after the new motor installation.
How to Properly Install the New Golf Cart Motor
Installing a new golf cart motor can significantly enhance your vehicle's performance and extend its lifespan. Following the correct procedure ensures a smooth installation and optimal functionality. Here’s a comprehensive guide on how to execute this upgrade effectively.
Gather Necessary Tools and Materials
Before starting the installation, ensure you have all the required tools and components:
- Socket set (including metric and standard sizes)
- Screwdriver set (both flathead and Phillips)
- Wrenches (adjustable and torque wrenches)
- New golf cart motor (e.g., Advanced DC Motor 8V, priced around $499)
- Replacement cables (if necessary)
- Battery terminals (ensure compatibility)
- Safety goggles and gloves
Preparation Steps
Proper preparation is key to a successful installation. Follow these steps to get ready:
1. Disconnect the Battery
Always start by disconnecting the negative terminal of the battery to prevent any electrical shorts during the installation process.
2. Remove the Old Motor
Carefully take out the old motor by unscrewing the mounting bolts and disconnecting the wiring harness. Make a note of the wiring configuration for reference when installing the new motor.
Installing the New Golf Cart Motor
Now that you have removed the old motor, it’s time to install the new one. Follow these steps for a seamless transition:
1. Position the New Motor
Align the new golf cart motor in the same position as the old one. Ensure it fits snugly into the motor mount.
2. Secure the Motor
Use the original bolts to secure the new motor in place. Tighten them according to the manufacturer's torque specifications to avoid any damage.
3. Connect Wiring
Refer to the notes you made earlier and connect the wiring harness to the new motor. Double-check all connections to ensure they are secure and properly aligned.
4. Reconnect the Battery
After confirming that everything is connected correctly, reconnect the battery terminals, starting with the positive terminal followed by the negative.
Testing the Installation
Once the installation is complete, it’s crucial to test the new motor to ensure everything functions as expected:
- Turn on the golf cart and listen for any unusual noises.
- Test the throttle response to ensure smooth acceleration.
- Monitor for any warning lights or indicators on the dashboard.
By adhering to these steps for the proper installation of your new golf cart motor, you can ensure enhanced performance and longevity. Remember that regular maintenance and periodic checks are essential for keeping your golf cart in top shape.
Common Mistakes to Avoid During Golf Cart Motor Installation
When upgrading your golf cart motor, avoiding common pitfalls can significantly enhance the performance and longevity of your vehicle. Here are some crucial mistakes to steer clear of during the installation process.
Neglecting to Read the Manufacturer's Instructions
It's essential to thoroughly review the manufacturer's guidelines before starting the installation. Each motor may have specific requirements, and failing to adhere to these instructions can lead to improper installation and potential damage.
Inadequate Preparation of Tools and Workspace
Before diving into the installation, ensure that you have all necessary tools and a clean, organized workspace. A disorganized area can lead to misplaced parts and tools, resulting in unnecessary delays. Important tools may include:
- Wrenches - for securing bolts
- Screwdrivers - for connecting wires and components
- Multimeter - to check electrical connections
Ignoring Electrical Connections
Electrical connections are critical in a golf cart motor installation. Be vigilant about ensuring that all wires are properly connected and insulated. A loose or incorrectly connected wire can lead to malfunctions or even pose safety hazards.
Checking Connections
After installation, double-check the following connections:
- Battery terminals
- Motor wires
- Controller connections
Overlooking Compatibility Issues
Not all motors are compatible with every golf cart model. Before purchasing a new motor, verify that it matches your cart's specifications. Installing an incompatible motor can lead to performance issues and void warranties.
Rushing the Installation Process
Take your time during the installation. Rushing can lead to oversights and mistakes, such as incorrectly torquing bolts or misaligning components. Following the essential golf cart motor installation steps for a successful upgrade at a steady pace ensures a thorough and effective installation.
Failure to Test the Motor Post-Installation
Once the installation is complete, it's crucial to test the motor under various conditions. A proper test can help identify any immediate issues that need addressing. Ensure to check:
- Acceleration response
- Smoothness of operation
- Any unusual sounds or vibrations
By avoiding these common mistakes, you can ensure a smooth and effective golf cart motor installation, ultimately leading to a better-performing vehicle.
Post-Installation Tips for Maintaining Your Golf Cart Motor
Maintaining your golf cart motor after installation is crucial for ensuring optimal performance and longevity. Here are some practical tips to help you keep your motor in excellent condition.
Regular Inspection
Conduct routine checks on your golf cart motor to catch potential issues early. Look for signs of wear, corrosion, or loose connections. Regular inspections can prevent minor problems from escalating into major repairs.
- Check wiring: Ensure all electrical connections are tight and free from corrosion.
- Inspect the motor housing: Look for cracks or damage that could affect performance.
- Monitor for leaks: Check for any signs of oil or fluid leaks around the motor area.
Keep It Clean
A clean motor operates more efficiently. Dirt and debris can lead to overheating and other issues.
- Wash regularly: Use a gentle soap and water solution to clean the motor exterior.
- Avoid pressure washing: High-pressure water can force moisture into electrical components.
- Dry thoroughly: After cleaning, ensure that all components are dry before using the cart.
Monitor Battery Health
The motor's performance is closely tied to the health of the batteries. Regularly check the batteries to ensure they are in good condition.
- Check water levels: For lead-acid batteries, ensure that the electrolyte levels are adequate.
- Inspect terminals: Clean any corrosion from battery terminals and ensure they are securely connected.
- Test voltage: Use a multimeter to check the voltage and ensure it meets the manufacturer's specifications.
Maintain Proper Lubrication
Proper lubrication is essential for reducing friction and wear on moving parts within the motor.
- Use the right lubricant: Consult your golf cart's manual for recommended lubricants.
- Lubricate moving parts: Regularly apply lubricant to bearings and other moving components.
- Avoid over-lubrication: Too much lubricant can attract dirt and grime, which can hinder performance.

Follow Manufacturer Recommendations
Every golf cart motor comes with specific guidelines for maintenance. Adhering to these recommendations can extend the lifespan of your motor.
- Refer to the manual: Review the maintenance section of your golf cart’s manual for specific instructions.
- Schedule professional servicing: Consider having a professional technician perform routine maintenance checks.
- Stay informed: Keep abreast of any recalls or service bulletins related to your motor model.
By following these post-installation maintenance tips, you can ensure that your golf cart motor remains efficient and reliable, enhancing your overall golfing experience.
We truly value your insights and experiences, and we invite you to share your thoughts or questions about Golf Cart Motor Installation Steps in the comments below. Your perspectives not only enrich our community but also help others who may be navigating similar projects. Whether you have tips to share or queries to explore, we’re eager to hear from you and engage in a meaningful discussion!
Leave a Reply